Introduction
Website security is no longer a luxury for businesses; it’s an essential foundation. Enterprises today rely heavily on their websites to conduct business, communicate with customers, and store valuable information. A secure website is critical for protecting this data and maintaining trust with your audience.
For enterprises, the consequences of a website breach can be severe. Hackers can steal sensitive customer data, like credit card numbers or personal information, leading to financial losses and legal repercussions.
The most damaging impact may be on your brand reputation. A security breach can erode customer trust and make it difficult to regain their confidence.
Taking website security seriously is key to safeguarding your enterprise. By implementing the right tools and strategies, you can prevent these risks and build a strong foundation for success.
This guide will explore how the Wordfence plugin can help you secure your enterprise website and ensure its ongoing protection.
This is a two-part blog series. In Part 1, we discuss the following sections of the Wordfence plugin
- Wordfence Dashboard
- Wordfence Firewall
Understanding the Security Threats Faced by Your WordPress Website
While WordPress offers a powerful platform for building websites, it’s important to understand the potential security risks involved. Here’s a breakdown of some common threats faced by WordPress sites:
- Hacking Attempts: Malicious actors may try to gain unauthorized access to your website through various methods. This could involve brute-force attacks where they guess your password repeatedly, or exploiting vulnerabilities in outdated plugins or themes.
- Malware Injections: Hackers might inject malicious code into your website. This code could steal sensitive data from your visitors, like credit card information or login credentials. It can also redirect users to fraudulent websites or disrupt your website’s functionality.
- Security Vulnerabilities: Outdated WordPress core software, plugins, and themes can contain vulnerabilities that hackers can exploit. These vulnerabilities can act as backdoors for unauthorized access or allow malicious code execution.
Now, let’s talk about the potential consequences of a security breach on your enterprise website:
- Data Breaches: A security breach can expose sensitive customer data like names, addresses, and credit card information. This can lead to financial losses for your company and legal trouble from regulatory bodies.
- Website Downtime: Malware or a denial-of-service attack can take down your website, preventing customers from accessing your products, services, or information. This can lead to lost revenue and damage your brand reputation.
- Loss of Trust: A security breach can erode customer trust in your brand. If customers believe their data is not secure on your website, they may be hesitant to do business with you. Regaining their trust can be a long and challenging process.
By understanding these security threats and their potential consequences, you can appreciate the importance of taking proactive measures to safeguard your enterprise website. The good news is that plugins like Wordfence can help!
Step-by-Step Process of Securing an Enterprise Website with Wordfence
Step 1: Install Wordfence
- Go to the dashboard and click on Plugins to add a new plugin.
- Search for the Wordfence plugin.
- Click on Install and Activate.
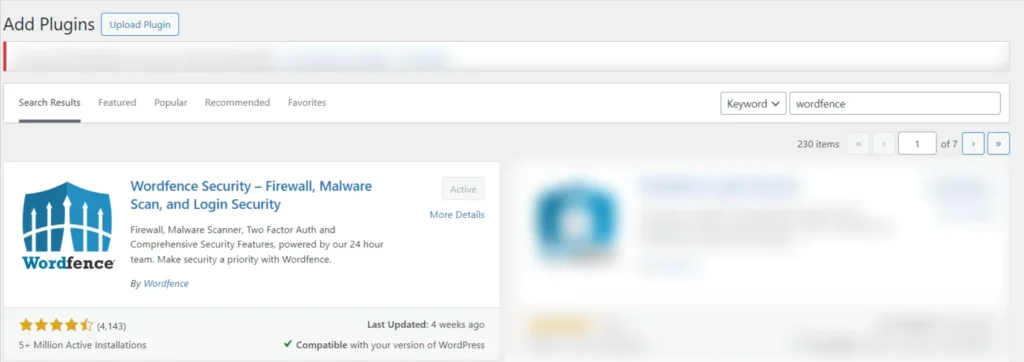
Screenshot 1: Install and Activate the Wordfence Plugin
Step 2: Getting the License
- On installing the plugin, you’ll be prompted to register and get the license to use the plugin. You’ll be redirected to the official website of Wordfence to register.
- Enter your email ID and you get your license. There’s no extra cost for that.
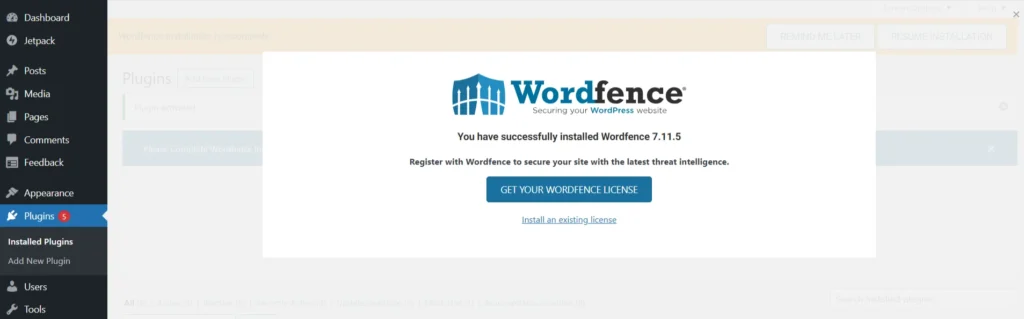
Screenshot 2: Get WordFence license
Step 3: Activating the Wordfence License
- Enter the email ID and the license that you got on your mail.
- Click on Install license.
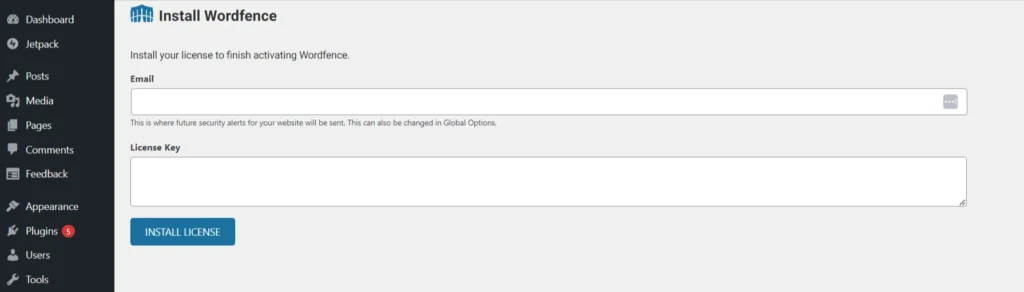
Screenshot 3: Install Licence
Wordfence Dashboard
Step 4: Understanding Wordfence Dashboard
- The Wordfence dashboard indicates the status of your installation.
- The Firewall and Scan indicate how much your site is protected in percentage. The features and settings that you have activated determine the degree of protection.
- When you first install Wordfence, you’ll see below the Firewall status circle, “WAF Currently in Learning Mode”. This status will automatically change after 7 days. This allows the firewall to get adjusted to your website.
- In learning mode, the firewall is not fully active and does not block any attacks.
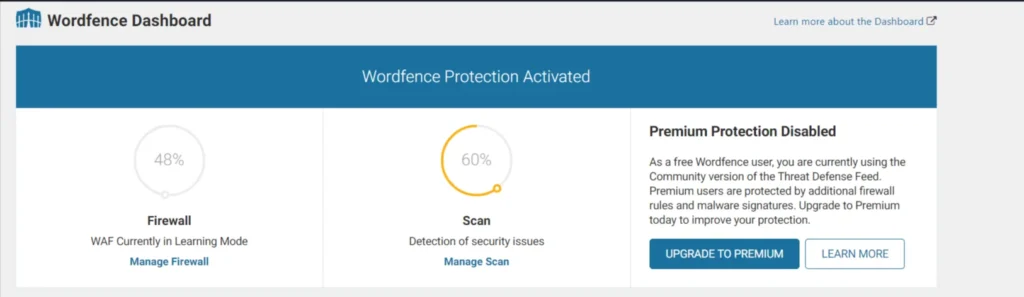
Screenshot 4: Wordfence Dashboard
- On a computer, move your mouse cursor over a status circle. On a mobile device, simply tap it. Either way, a tooltip will appear, explaining what steps you need to take for full protection.
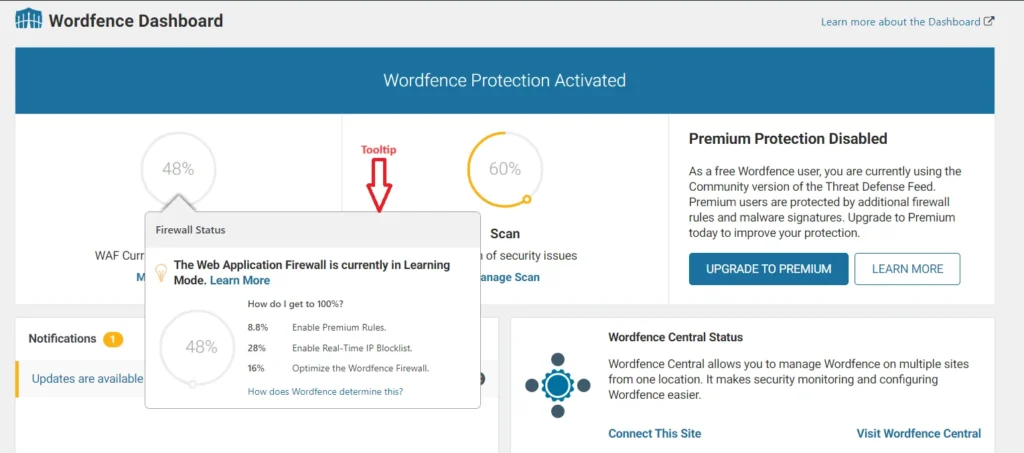
Screenshot 5: Firewall Status Tooltip
- The Notification section indicates which actions are to be taken.
- You’ll get notified about required updates, security alerts, product updates, promotions, blog highlights, etc. Please note that some of these notifications are only available in the premium version.
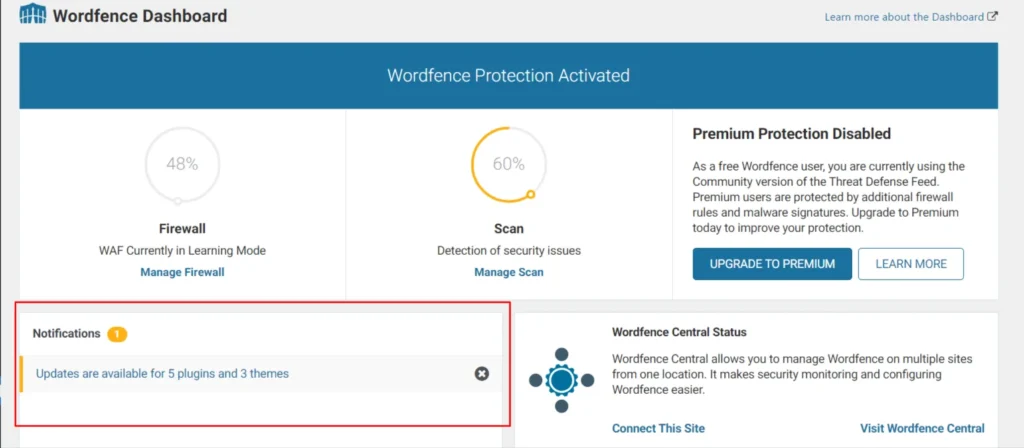
Screenshot 6: Notifications
- The Wordfence Central Status section shows if your site connects to Wordfence Central. This tool lets you manage security for multiple WordPress sites in one place. A free account gets you started, while a Premium license unlocks additional features (login required).
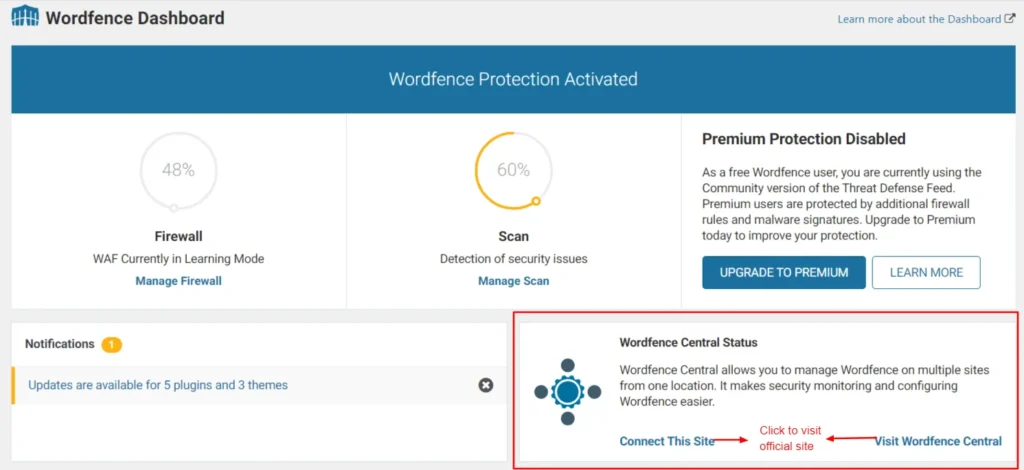
Screenshot 7: Wordfence Central Status
- In addition to the main menu, you’ll find sections for Tools, Help, and Global Settings. Global Settings lets you configure Wordfence overall, including how it sends alerts (email address), what triggers alerts, and what kind of notifications appear on the Dashboard.
- You can also find the Tools section in the menu bar of Wordfence, as indicated in the following screenshot.

Screenshot 8: Tools, Help, and Global Options of Wordfence Dashboard
- The Firewall Summary section details the recent attacks blocked by your website’s security measures, categorized by the type of attack. This is not visible in Learning Mode.
- The Total Attacks Blocked graph visualizes the overall attack volume targeting your site, and compares it to attacks detected across the entire Wordfence security network.
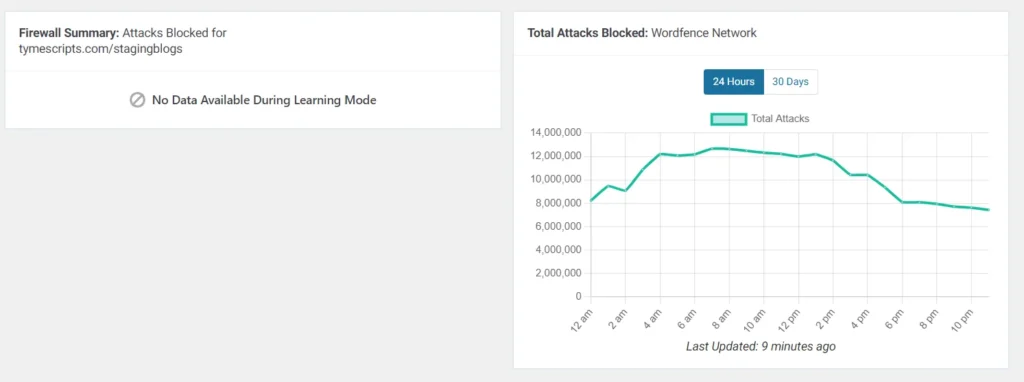
Screenshot 9: Firewall Summary and Total Attacks Blocked.
Wordfence Firewall
Step 5: Firewall Configurations
Wordfence WAF shields your WordPress site from both general web attacks and those targeting WordPress itself. It acts as an early defense system, filtering threats before vulnerable code from plugins or themes can be exploited.
- Once you understand how to read the dashboard, click on “Firewall” to configure it.
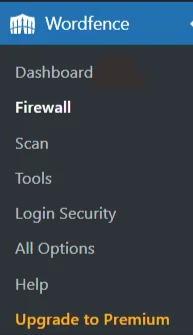
Screenshot 10: Click on “Firewall”

Screenshot 11: Firewall Section of Wordfence
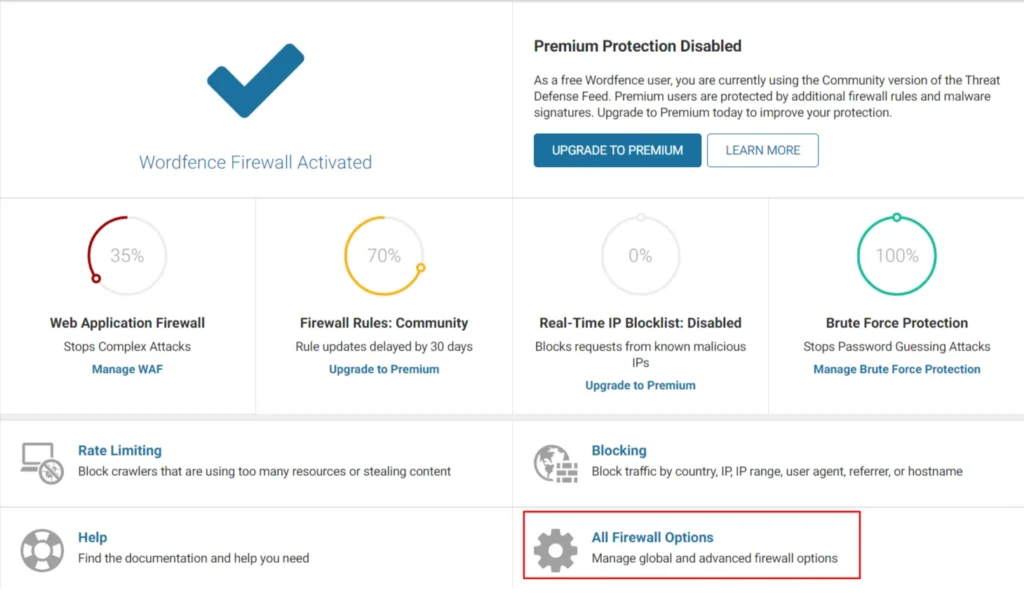
- When you go to the Firewall section, you’ll see the status of your protection.
- The colored circles show how well your firewall is protecting you right now. Gray circles mean the firewall is either in learning mode or turned off. If you click on a circle, a tooltip will pop up explaining what you need to do for the best possible protection (100% rating).
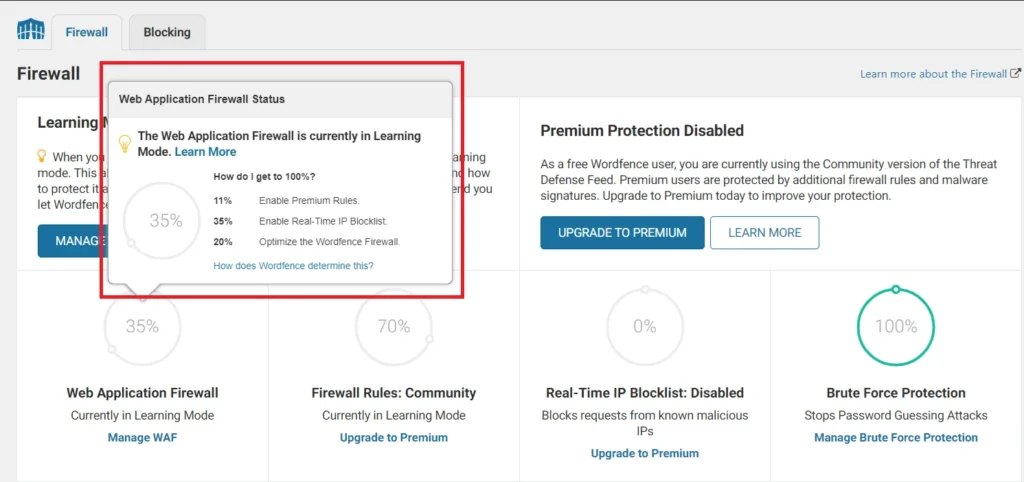
Screenshot 12: Firewall Status Circle and Tooltip
Step 6: Firewall Status Circle Check
- For all your firewall circles to be completely filled (at 100%), you need to make sure the following things are done:
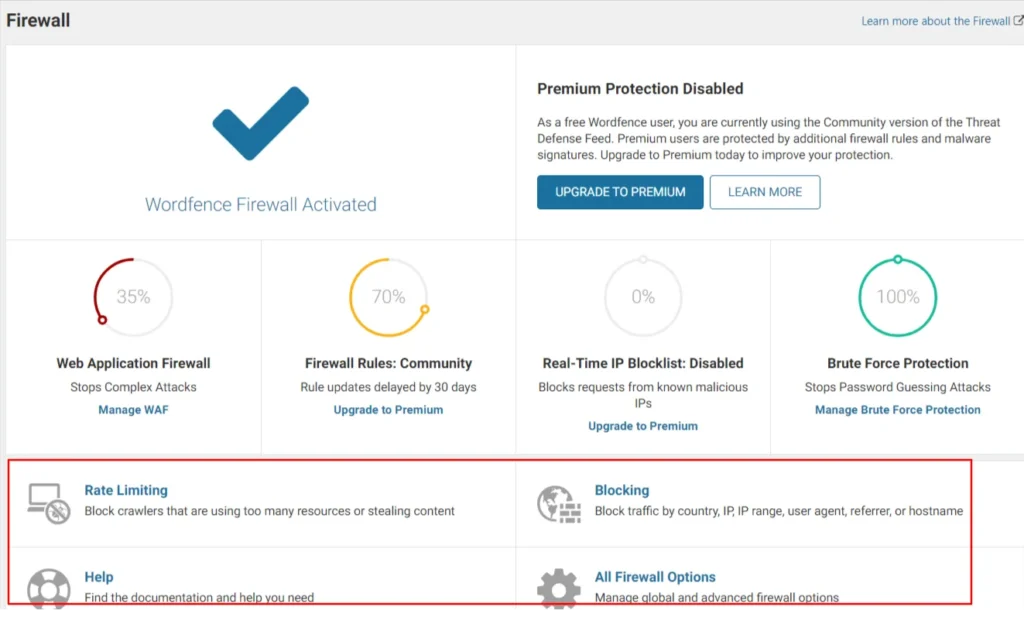
Screenshot 13: Firewall Settings to get 100% Status Circle Check
- Rate Limiting: By default, this feature is turned on. It’s located on the “Firewall Options” page under “Rate Limiting”. The rate limiting settings include configurations about how we should treat Google’s crawlers, if anyone’s requests exceed or if a crawler’s page views exceed, and so on.
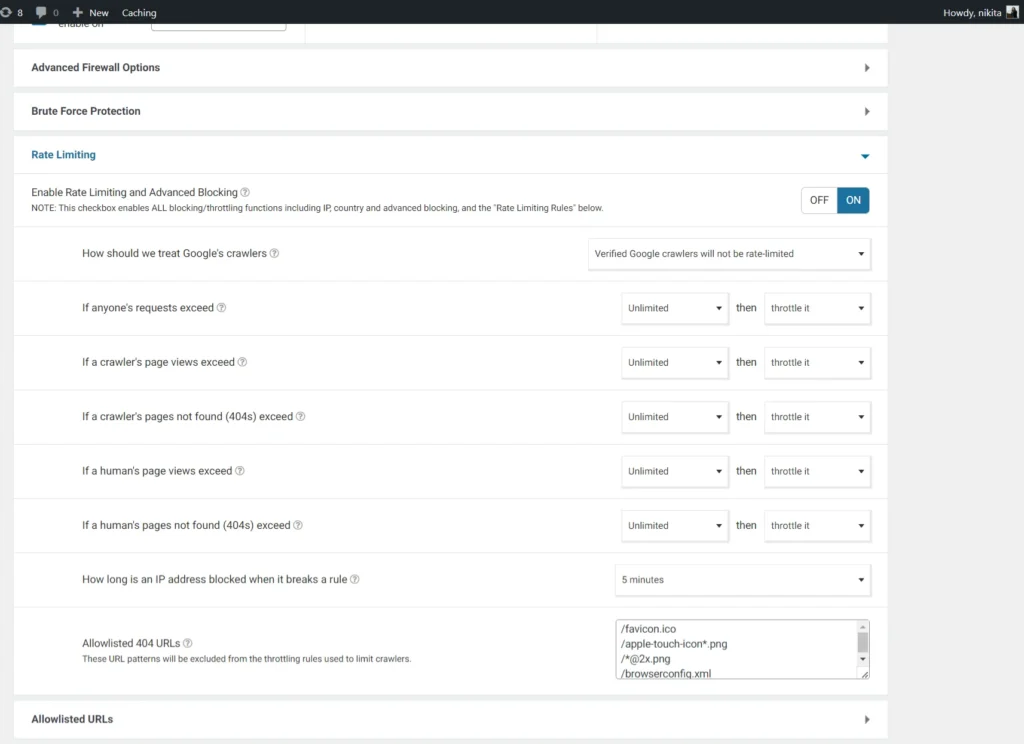
Screenshot 14: Rate Limiting Settings
- Blocking: This helps to configure what you want to block including blocking according to geolocations (country) (premium), IP address, or Custom Pattern in which you can block by IP address range, hostname, user agent etc.
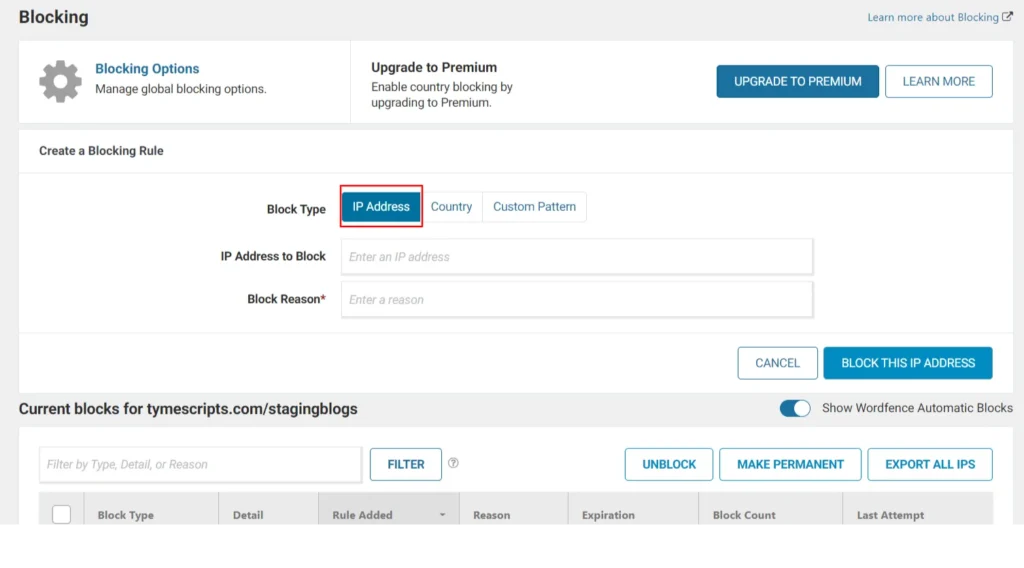
Screenshot 15: Blocking by IP Address
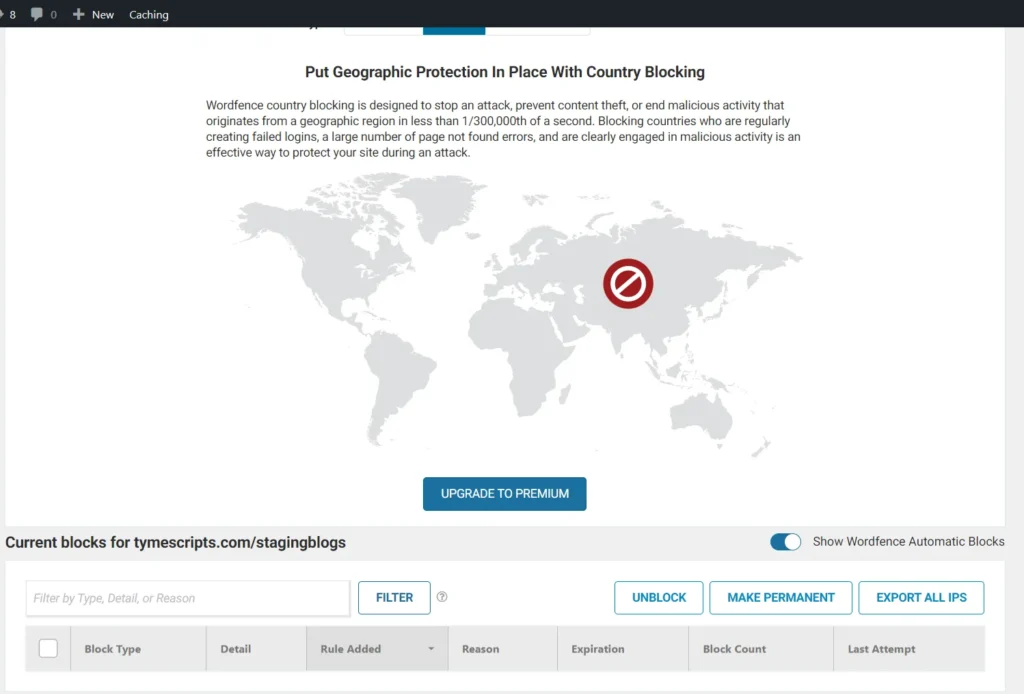
Screenshot 16: Blocking by Country
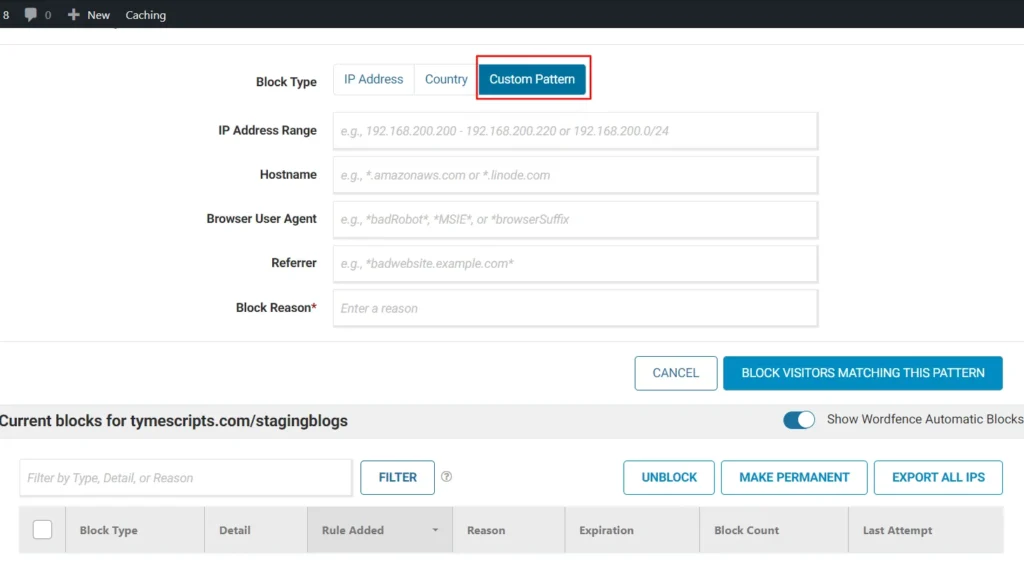
Screenshot 17: Blocking by Custom Pattern
- Help: You can get the documentation and help from here.

Screenshot 18: Firewall Help
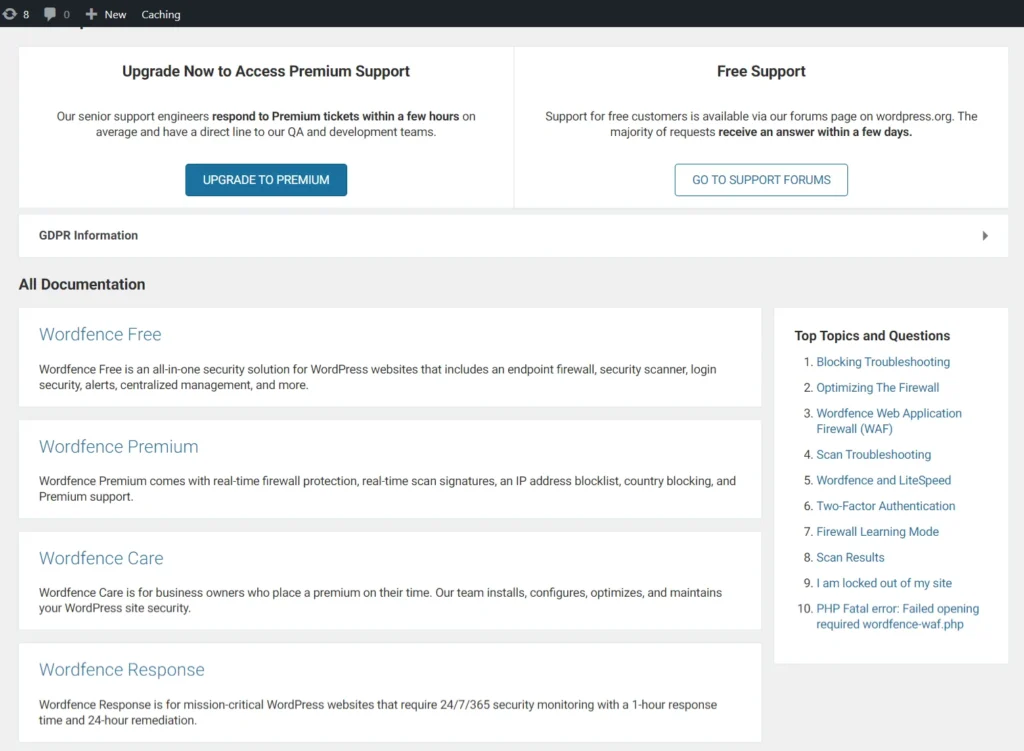
Screenshot 19: Help Section
- All Firewall Options: Go to All Firewall Options and select Advanced Firewall Options.
- In this section, you can enable advanced firewall securities such as:
Allowlisted IP addresses that bypass all rules: This feature lets you create an exception for a specific IP address, allowing it full access to your website regardless of Wordfence security rules. This is useful if you have a constant internet connection (like in an office) with a static IP address.
Screenshot 20: All Firewall Options
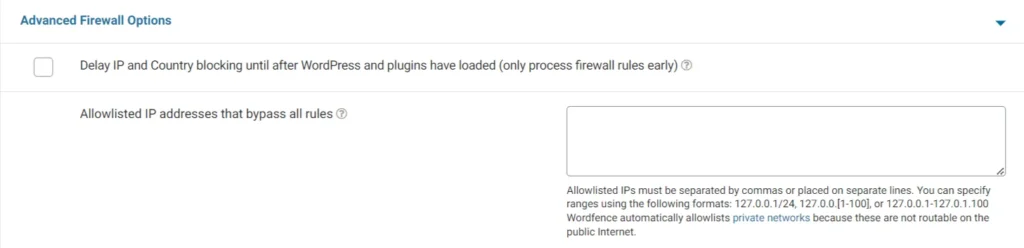
Screenshot 21: Advanced Firewall Options
- Allowlisted Services: Wordfence prevents accidental blockage of certain external services, like Facebook. This can happen with strict Rate Limiting rules, where Facebook’s crawler might get blocked if it requests pages too fast (like when someone shares multiple links from your site). By default, some services are pre-approved (allowlisted). You can manually remove any service from this list using the “Allowlisted Services” option. Once unchecked, a service will be treated like any other visitor.

Screenshot 22: Allowlisted Services
- Immediately block IPs that access these URLs: This feature lets you create a honeypot to catch malicious visitors. You can define a fake URL, like “/example-one”. Anyone attempting to access this non-existent address will be automatically blocked. Remember to use relative URLs starting with a forward slash, and be mindful that these URLs are case-sensitive.

Screenshot 23: Block IPs that Access mentioned URLs
- Ignored IP addresses for Wordfence Web Application Firewall alerting: Do you run regular scans, uptime checks, or other automated services on your site? If so, and you don’t want alerts for those activities triggering an “increased attack rate” notification, you can add their IP addresses here. But remember, only include services you completely trust, as you won’t be notified if that IP actually attacks your site.

Screenshot 24: Ignored IP Addresses
- Rules: Wordfence’s firewall packs a double punch. First, it has a set of specific rules that recognize common attacks hackers love to use. These rules are super efficient at spotting matches because they’re so precise. Second, the firewall has another layer of defense with broader rules that use patterns to sniff out suspicious activity. This helps block even never-before-seen attacks (known as “0-days”) that fall into familiar categories.
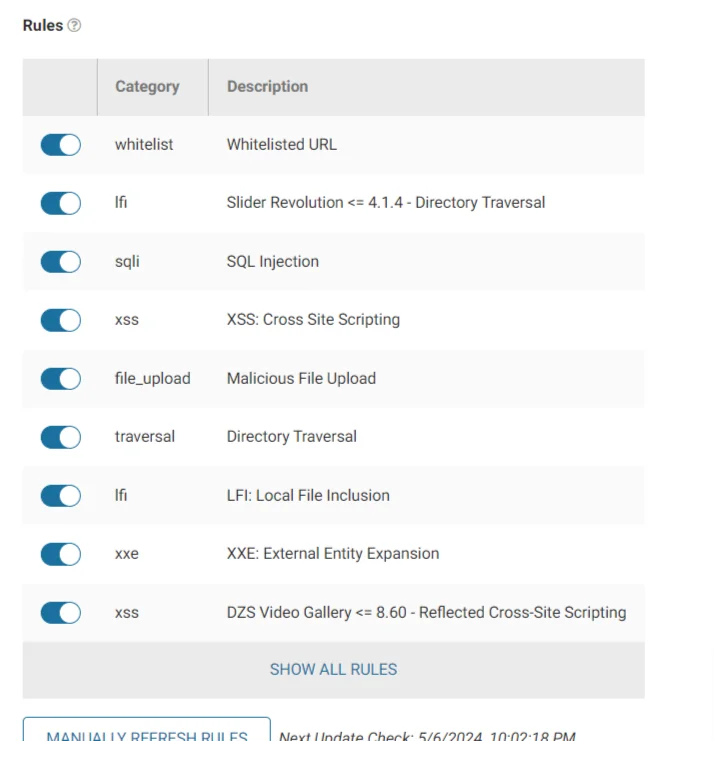
Screenshot 25: Rules
- Brute Force Protection: This acts as a master control for enabling or disabling all Brute Force Protection features.
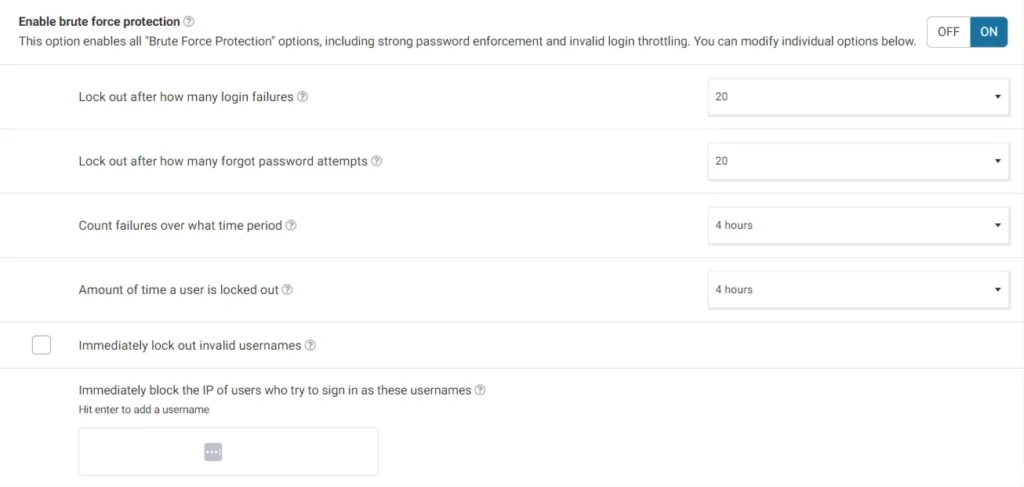
Screenshot 26: Brute Force Protection
- Lock out after how many login failures: Blocks repeated login attempts (protects against brute force attacks). Set to 20 to allow for forgotten passwords, but lockout kicks in after 20 attempts.
- Lock out after how many forgot password attempts: Limits on the “Forgot password?” form stop spam and brute-force attacks. Set it to 5 for most sites.
- Count failures over what time period: This setting defines a window to track failed logins. It thwarts brute-force attacks by locking out users after too many failed attempts within that period. You can adjust this window for your needs.
- Amount of time a user is locked out: This sets the lockout duration for failed login attempts (to prevent brute force attacks). Strong passwords make it very difficult to crack them, even after many tries.
- Immediately lock out invalid usernames: Enabling immediate lockouts for invalid usernames can be inconvenient for small sites (1-2 admins/editors) due to potential typos. It’s best for sites with few users. If a legitimate user gets locked out, unblock their IP via Wordfence “Firewall” > “Blocking”.
- Immediately block the IP of users who try to sign in as these usernames: This setting blocks login attempts with usernames you specify (e.g., “admin” or your domain name). Avoid usernames similar to real accounts to prevent accidental blocks. Existing accounts with these usernames won’t be blocked.
Screenshot 27: Brute Force Additional Options
- Prevent the use of passwords leaked in data breaches: Stops logins with leaked passwords (used in hacks) for admins by default. Optionally, apply it to all who can publish posts (including admins).
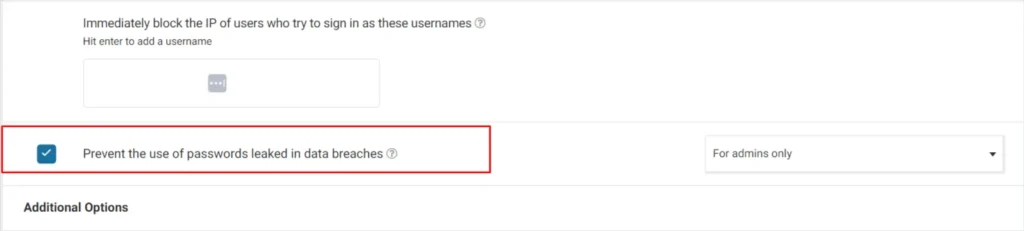
Screenshot 28: Check to Prevent Use of Passwords Leaked
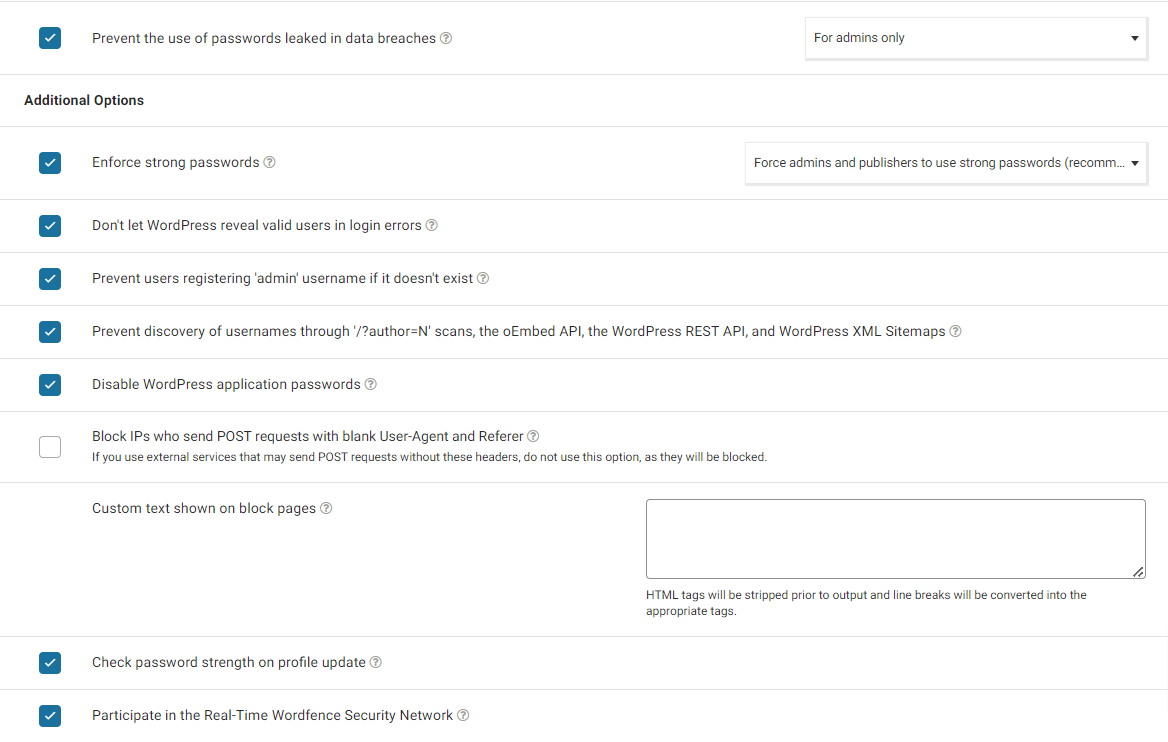
- Additional Options:
- Enforce strong passwords
- Don’t let WordPress reveal valid users in login errors
- Prevent users from registering ‘admin’ username if it doesn’t exist
- Prevent discovery of usernames through ‘/?author=N’ scans, the oEmbed API, the WordPress REST API, and WordPress XML Sitemaps
- Disable WordPress application passwords
- Block IPs who send POST requests with blank User-Agent and Referer
- Custom text shown on block pages: Wordfence lets you add a custom message for blocked users (e.g., how to contact the site owner). Keep it plain text, and line breaks work like the WordPress editor.
- Check password strength on profile update
- Participate in the Real-Time Wordfence Security Network
- The dashboard of Wordfence Firewall also displays IPs blocked, Top Countries by Number of Attacks, firewall summary, a graph about total blocked attacks, and login attempts (both failed and successful).
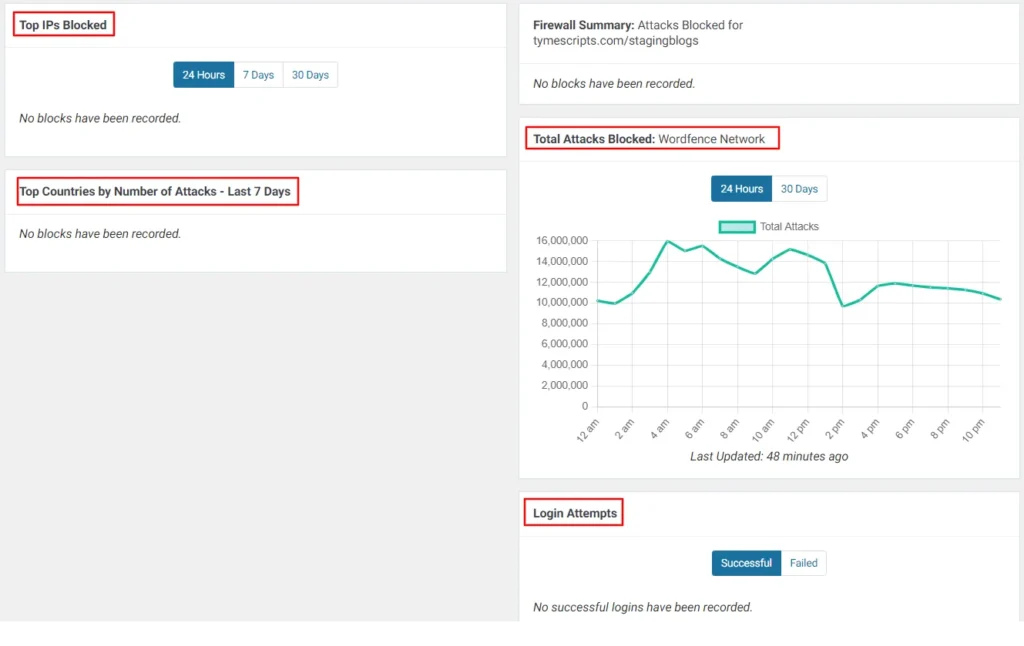
Screenshot 29: Firewall Dashboard
Conclusion
In this post (Part 1 of 2 of the series), we installed and configured the WordFence plugin. Then we understood the Wordfence dashboard, which shows the status of the installation, with Firewall and Scan indicating the site protection percentage.
Next, we configured the firewall WAF, which protects the WordPress site from web attacks. We also looked at the features of rate limiting, blocking, and advanced firewall options.
In the next part of this series, we will explore in more depth the various settings and features of WordFence.
Build
Website
Themes