Introduction
It is now essential for enterprise-level organizations to have a multilingual web presence in today’s interconnected business ecosystem. This step goes beyond just accommodating; it shows that we are actively trying to reach more diverse audiences and grow your market.
Think about this situation: A website run by a multinational firm only supports one language. Because their language preferences differ from the site’s preferred language, many potential customers are unintentionally left out of this setup.
There are several important reasons why multilingual websites are important:
- Broadened Audience Reach: Embracing linguistic variety allows organizations to engage with a broader spectrum of global consumers, broadening their audience reach. Companies may promote inclusion and accessibility by making their platforms multilingual.
- Fostering Trust and Relatability: Users feel more comfortable and at ease when they can consume the content in their local language, which in turn increases trust and relatability. This language resonance greatly enhances credibility and long-term relationships with customers.
- Strategic Competitive Advantage: In today’s highly competitive industry, having a website that is available in multiple languages gives you a clear advantage. It enhances a company’s brand appeal and relevance by portraying it as culturally sensitive and aware of global market trends.
- Elevated SEO Performance: Websites that are available in more than one language improve SEO performance by increasing their visibility in more geographic areas. Search engine rankings, the amount of organic traffic, and overall online presence can all be improved with locally optimized content.
Choosing the Right Translation Plugin
Selecting the perfect multilingual plugin for your enterprise website is crucial. Imagine it as the bridge that connects your website content to a global audience, and you want a sturdy, reliable bridge! Here’s a breakdown of key factors to consider when choosing a plugin that can handle your business needs:
1. Scalability: Can it Scale?
Enterprise websites tend to deal with a lot of content and traffic. The last thing you want is a plugin that buckles under pressure. Look for a plugin that boasts scalability, meaning it can handle your website’s growth as you add more languages and content.
2. Feature Feast: Does it Have the Right Tools?
Multilingual plugins come with a variety of features, and for an enterprise website, you’ll likely need a well-equipped toolbox. Here are some must-have features to consider:
- Number of Languages Supported: Does the plugin offer enough languages to reach your target audience? Enterprise needs might be broader, so a plugin supporting a vast array of languages is ideal.
- Translation Method: Choose a plugin that offers flexibility in translation methods. Automatic translation can be a good starting point, but there must be an option for self-editing for a more polished final product.
- Content Management: Managing translated content across multiple languages can get tricky. Look for a plugin with a user-friendly interface that allows you to easily edit, review, and approve translations.
3. SEO Savvy: Can it Help You Get Found?
Search Engine Optimization (SEO) is crucial for any website, and a multilingual website is no exception. Ensure the plugin you choose is SEO-compatible. This means it should allow you to optimize your translated content for search engines in each language. The goal is to make sure your website shows up in search results, no matter what language someone uses.
4. Multisite vs. Subfolder Structure URLs
This might seem like a technical detail, but it can impact your website’s structure and SEO. Here’s a simplified breakdown:
- Multisite: In essence, you create separate websites for each language version of your website. This offers more control and flexibility but can be more complex to manage.
- Subfolder Structure: Here, you add a language code to your existing website URL (e.g., [invalid URL removed] for French). This is a simpler setup but offers less flexibility in managing each language version as a separate entity.
Ultimately, the best choice depends on your specific needs and priorities. Keeping the above points in mind, we have selected the Weglot Plugin for translation for this blog.
Step-by-Step Guide on How to Create Multilingual Enterprise Website Using Weglot
Step 1: Getting the API Key.
- Head over to Weglot: https://weglot.com/ and sign up for a free trial.
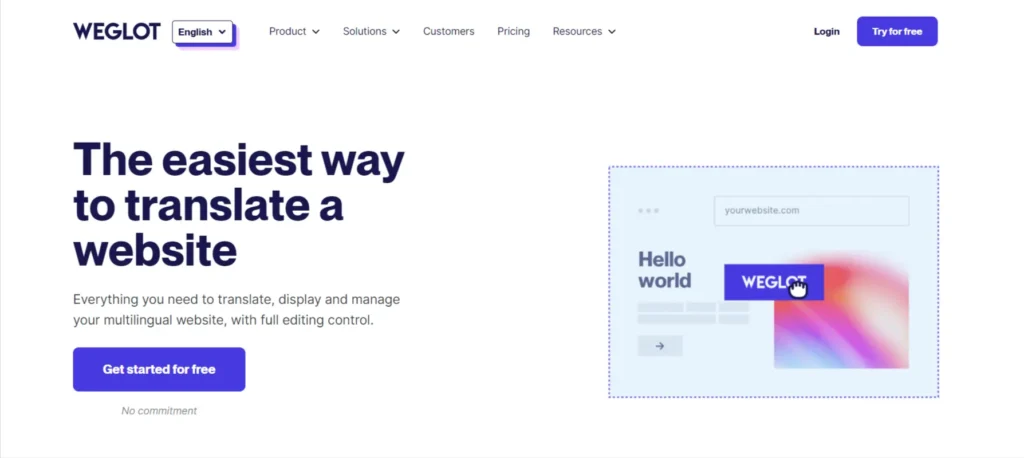
Screenshot 1: Register to get the “API Key”
- Once you register for the site, create a project by entering its name and selecting a technology.
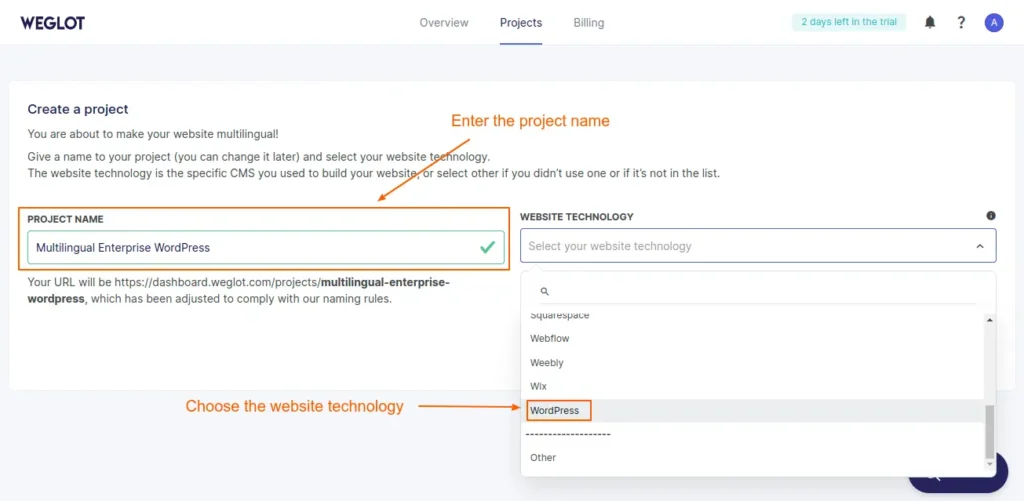
Screenshot 2: Create a Project and choose website technology as “WordPress.”
- Once that is done, copy the generated Weglot API key.
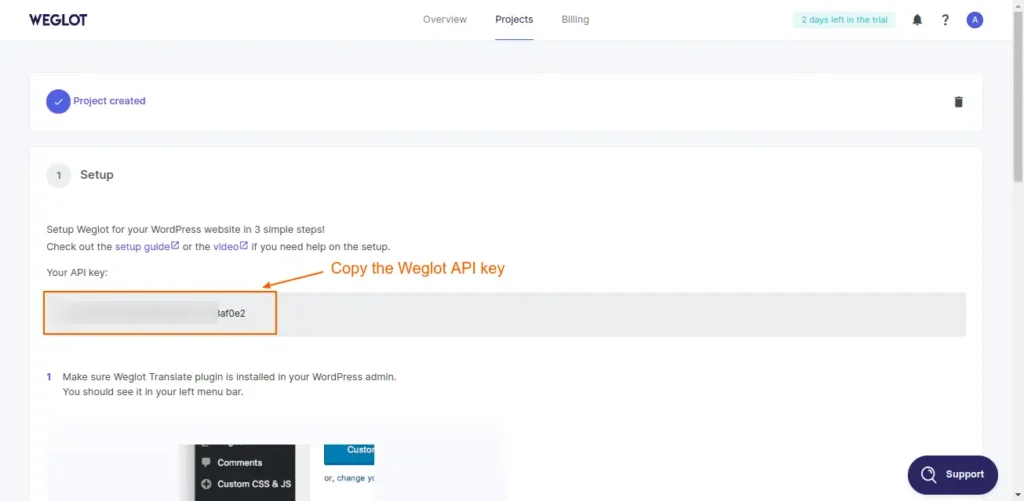
Screenshot 3: Copy the Weglot API key
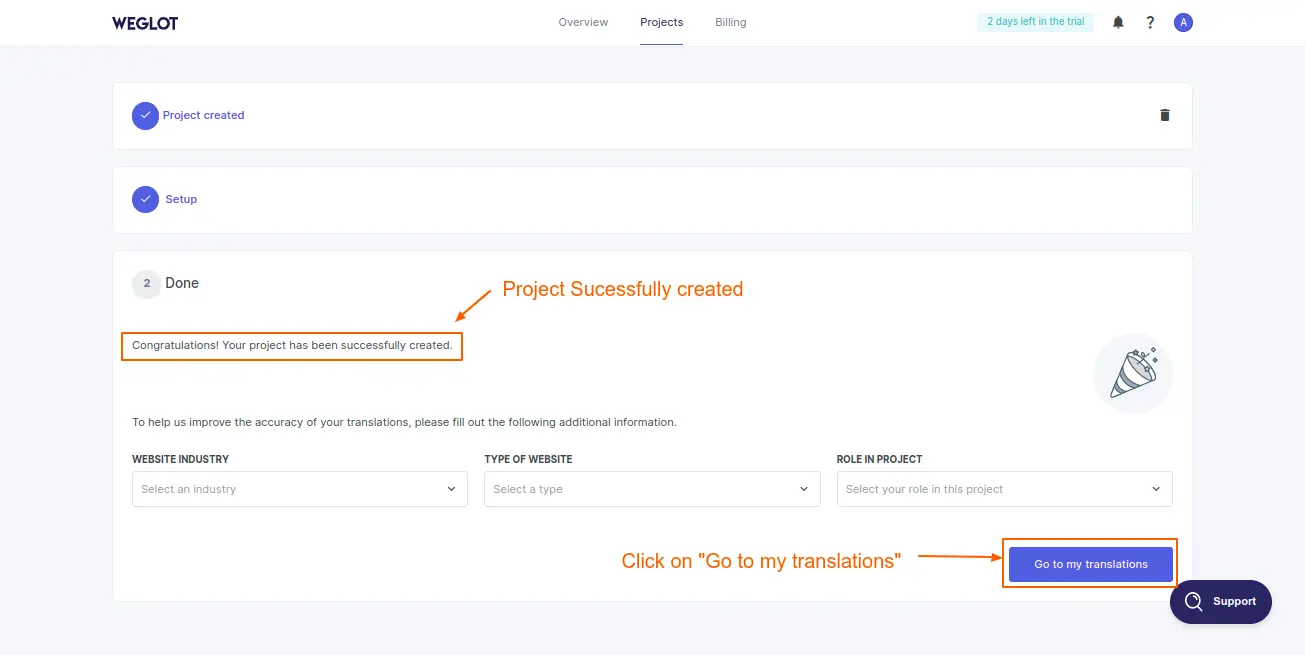
Screenshot 4: Project successfully created
Step 2: Install and Activate WeGlot Plugin
- Go to Plugins on your website’s dashboard.
- Go to Add New Plugin.
- Search for Weglot Plugin.
- Install and Activate the plugin.

Screenshot 5: Install and Activate the plugin
Step 3: Weglot Plugin Settings
- After you activate the plugin, go to the Weglot plugin from your dashboard.
- Enter the API key that you received when you registered at the WeGlot website in Step 1.
- Configure the required settings, like choosing the original language and choosing the destination language. For this blog, we have added Hindi as the destination language.
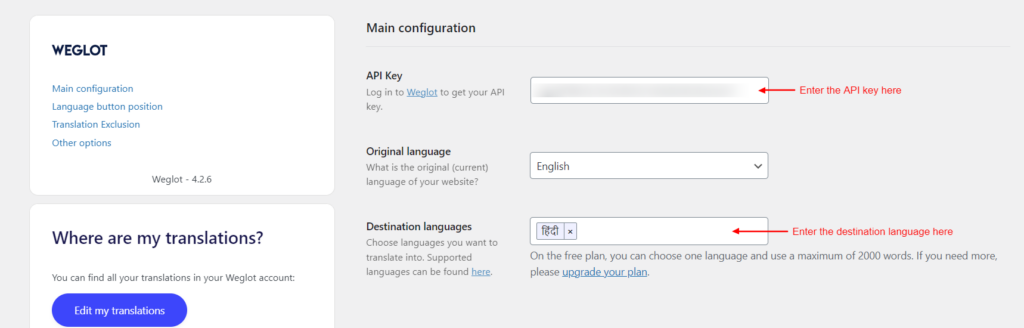
Screenshot 6: Main Configuration Settings
Step 4: Language button design
- The language button design settings allow you to customize how your language switch button will look on the website.
- The settings include whether to display the language button as a dropdown or side by side, whether to display a flag in the language button, how the flag would look (rectangle, circular, or square), or whether you want a full language name or only the language code.
- You can also customize the language button settings by overriding the CSS code.
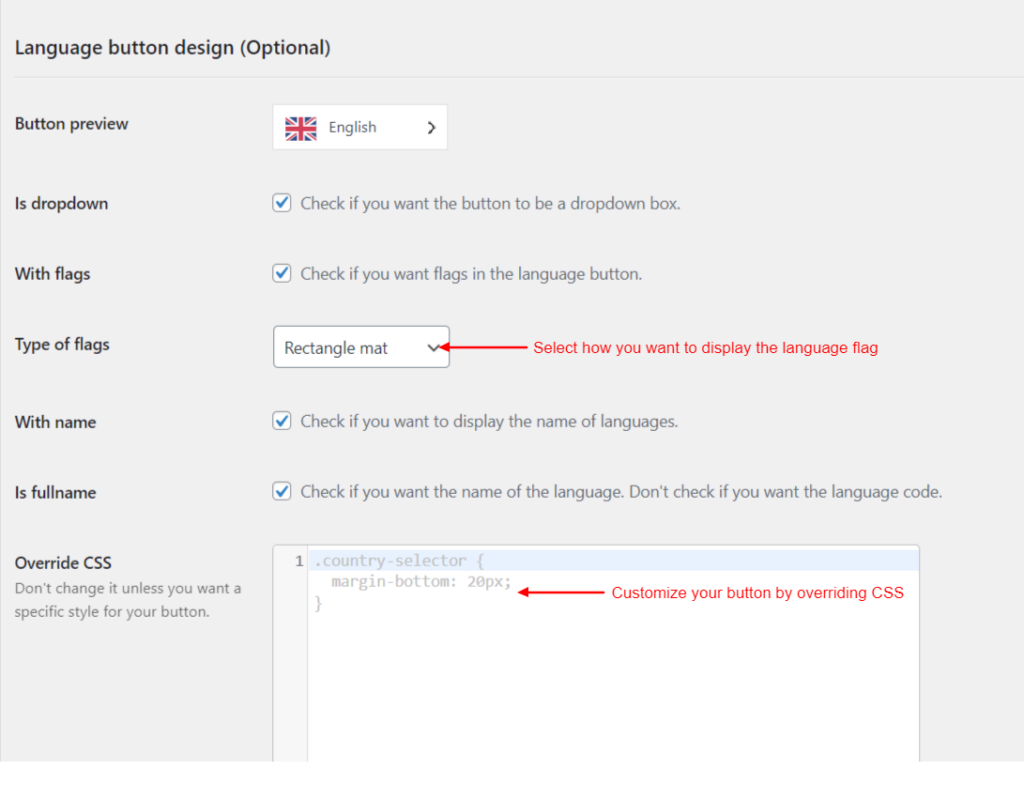
Screenshot 7: Language Button Settings
Step 5: Language Button Position
- These settings define where the language button will be positioned, which would help the user locate it easily.
- Choose from various options to place the language button in the menu, as a widget, with a shortcode, in the source code, or even in a custom position.
- To select these positions, go to Appearance > Menus or Appearance > Widgets.
- To select a custom position, you can go to the Switch editor.
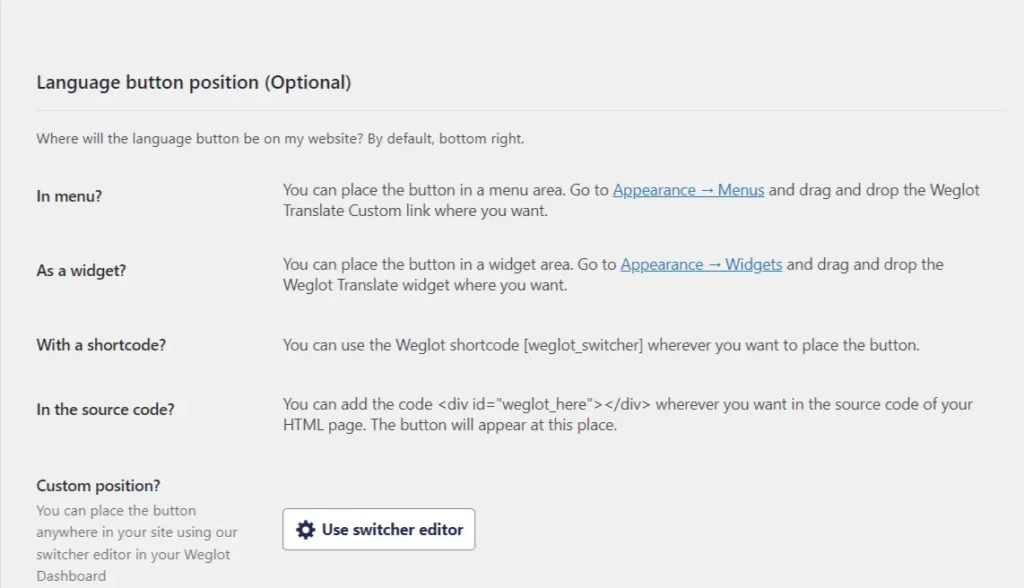
Screenshot 8: Language Button Position
Step 6: Translation Exclusion
- These settings allow you to specifically exclude any URL or blocks that you do not wish to translate on your website.
- Note that these settings are optional and not mandatory.
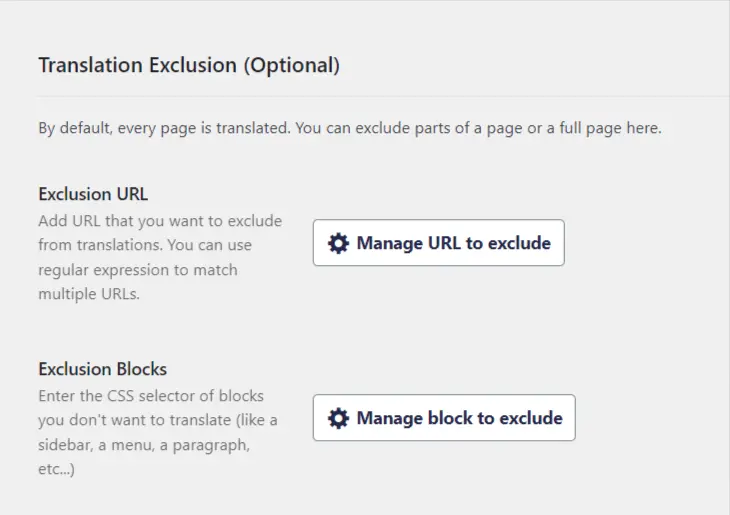
Screenshot 9: Translation Exclusion Settings
Step 7: Other Settings
- These settings include auto redirection for users, auto email translation, Translate AMP pages, and allowing users to search in their languages.
- Note that these settings are optional and not mandatory.
- Click on Save Changes.
- Your website is ready to be translated.
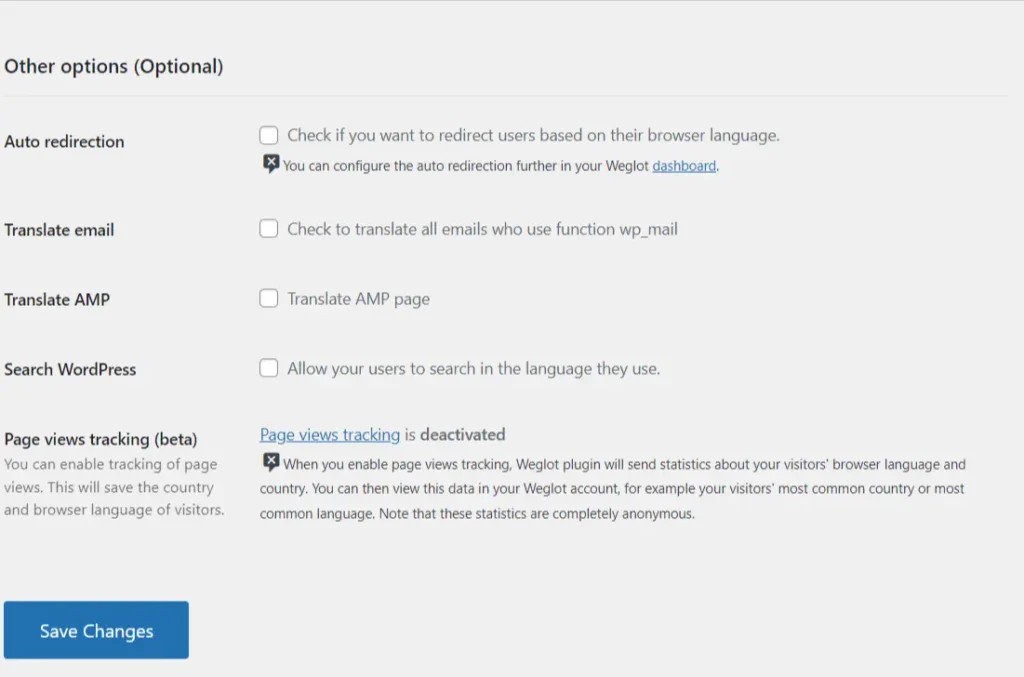
Screenshot 10: Other Options
- Once you have configured the settings, head over to the front end of the website to see the automated language translation in action.
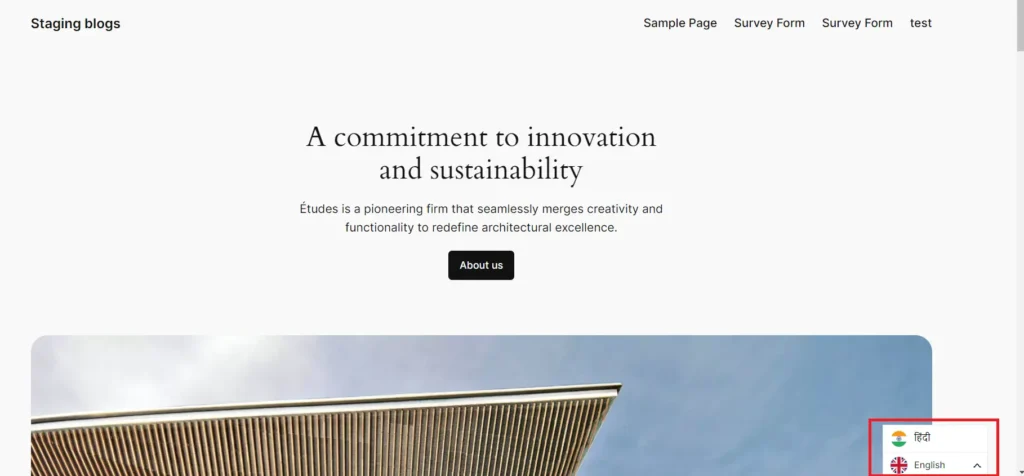
Screenshot 11: Output of Language Selection
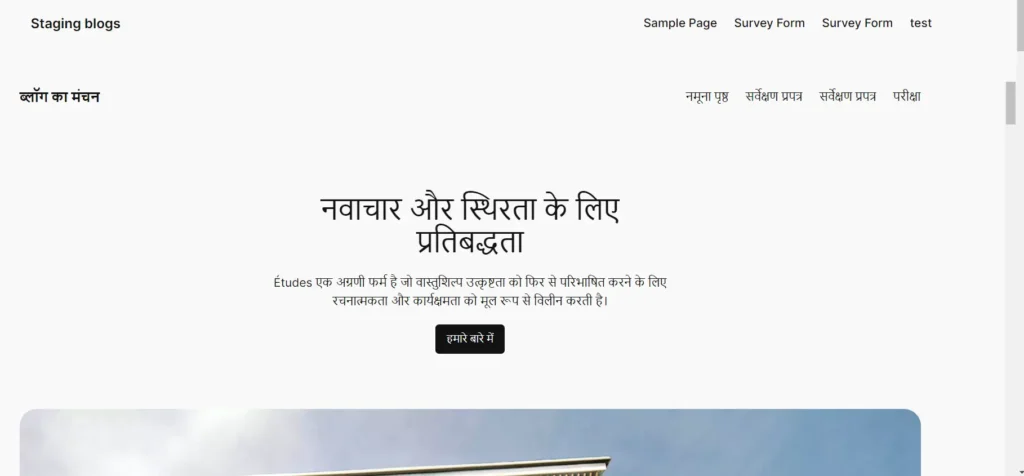
Screenshot 12: Output of Translated Website in Hindi
Step 8: Editing Translations
- Once the plugin is configured, click the language switcher on the front end of the website. The Weglot plugin then automatically translates all the text on the website into the destination language selected.
- Sometimes it’s required to edit those translations manually. To do that, click on “Edit my translations” button, it will take you to the Weglot dashboard, as shown in the below screenshot (number).
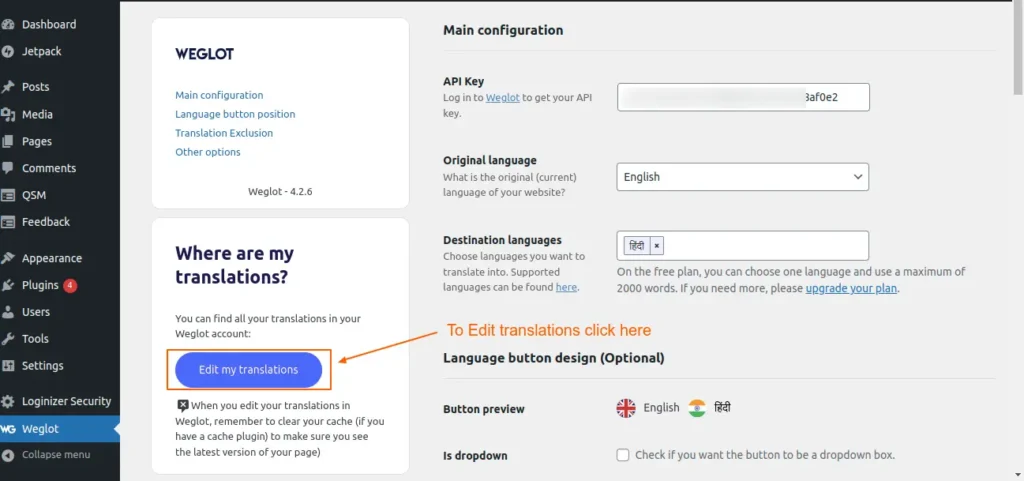
Screenshot 13: Edit translations
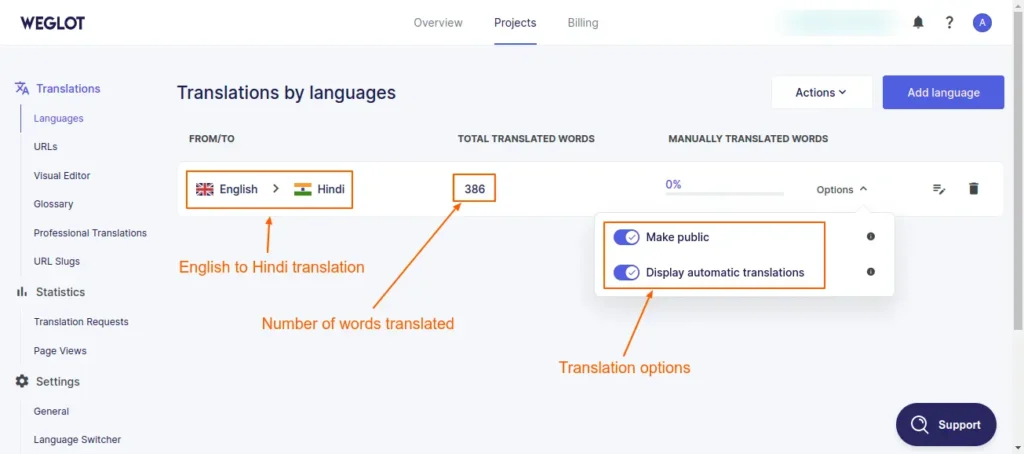
Screenshot 14: Translation by languages (English to Hindi)
- On the Weglot dashboard’s “Translations by languages” screen, we can see the “Total translated words” and “Manually translated words” columns.
- Also, there are two options available, as seen in the above screenshot number. First, we can make the translations public or private. This is helpful if you want the language translations to be private so that only you and your team can view them (by appending “?weglot-private=1” at the end of the URL). This means it won’t be visible to search engines or visitors.
- The second option is “Display automatic translations.” If you prefer to show only manual translations on your website rather than automatic translations, switch on this option.
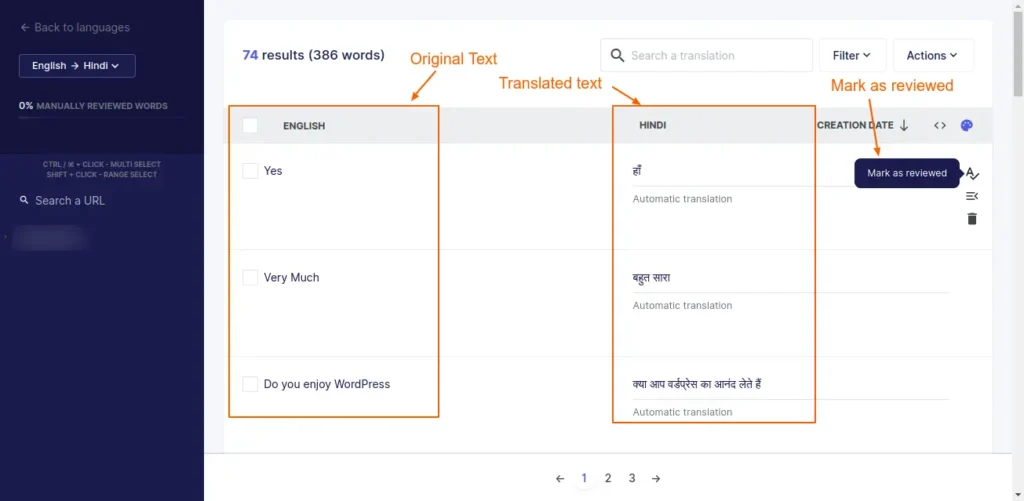
Screenshot 15: Manually edit the translation and mark it as reviewed
Note: All the translations (automated and manual) are stored on the Weglot platform. Only the Weglot plugin settings are stored in the WordPress database.
Conclusion
Making a website that supports multiple languages doesn’t have to be complicated when you have Weglot by your side. With this intuitive plugin, you can expand your reach to new markets and engage with people all over the world—without ever having to touch a line of code.
If you want to build a multilingual enterprise WordPress website, connect with us.
Build
Website
Themes