Capturing the attention of your target demographic while simultaneously collecting useful data is a must in the modern digital era. Any content producer or business owner’s toolbox should include surveys since they provide a direct route to understanding your audience’s preferences, wants, and opinions.
You can engage your audience on a deeper level and empower them to make well-informed decisions by adding surveys to your WordPress site. Using the powerful capabilities of the Quiz and Survey Master plugin, this tutorial will show you how to implement surveys in WordPress.
Note: The Quiz and Survey Master plugin as the name suggests, can be configured for conducting quizzes and surveys. This article discusses the configuration of surveys only.
Step 1: Install and Activate the Plugin
- Log in to your WordPress dashboard.
- Navigate to Plugins > Add New.
- In the search bar, type “Quiz and Survey Master”.
- Once you find the plugin, click on Install Now.
- After installation, click Activate to enable the plugin on your WordPress site.
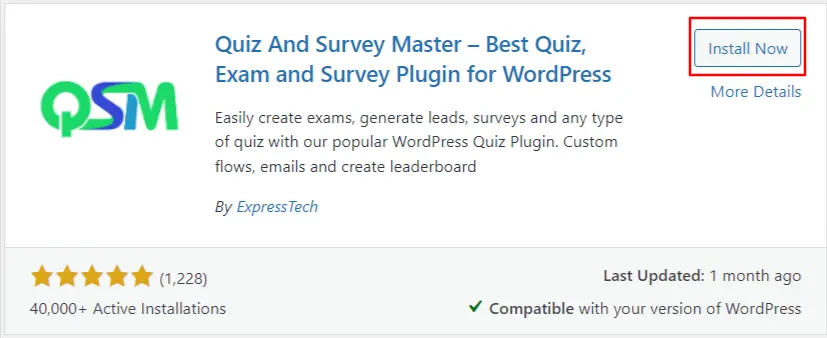
Screenshot 1: Install the Quiz and Survey Master Plugin
Step 2: Create a New Survey
- Go to QSM > Quizzes/Surveys in your WordPress dashboard.
- Click on the Create New Quiz/Survey button.
- Enter a name for your survey in the Quiz Name/Survey Name field.
- Optionally, you can add a description of your survey.
- Click Create Quiz/Survey to proceed.
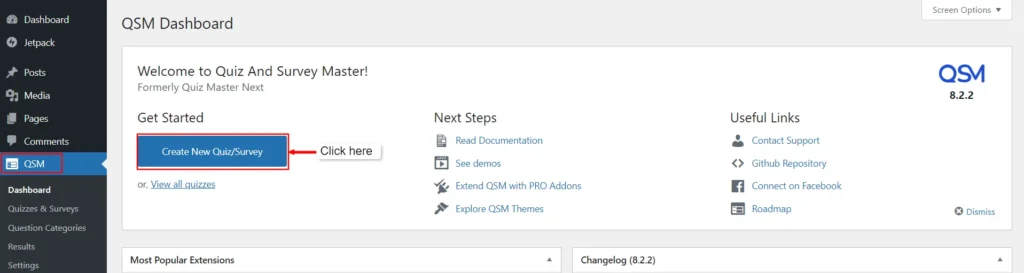
Screenshot 2: Click on ‘Create New Quiz/ Survey’
- Select the theme for which you want to create your quiz/ survey. There are also paid themes available to choose from.
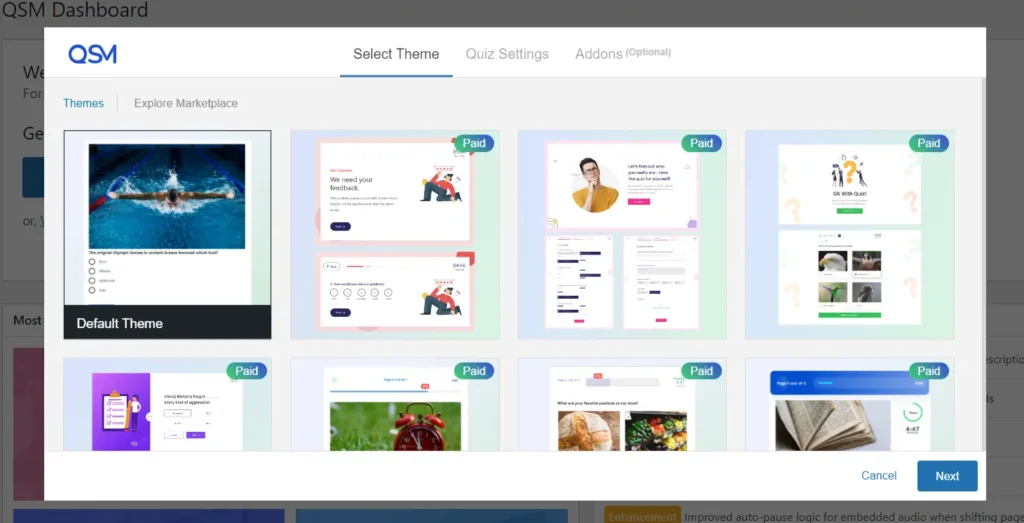
Screenshot 3: Select Theme
- After selecting your theme, you must enter Quiz Settings’ details.
- Select the form type Survey to create a survey. This is an important step for creating and configuring surveys
- Further options, such as enabling a contact form, setting a Time Limit, requiring user login, enabling a comment box, and others, are set to “No” by default. You can choose “Yes” or options that fit your requirements.
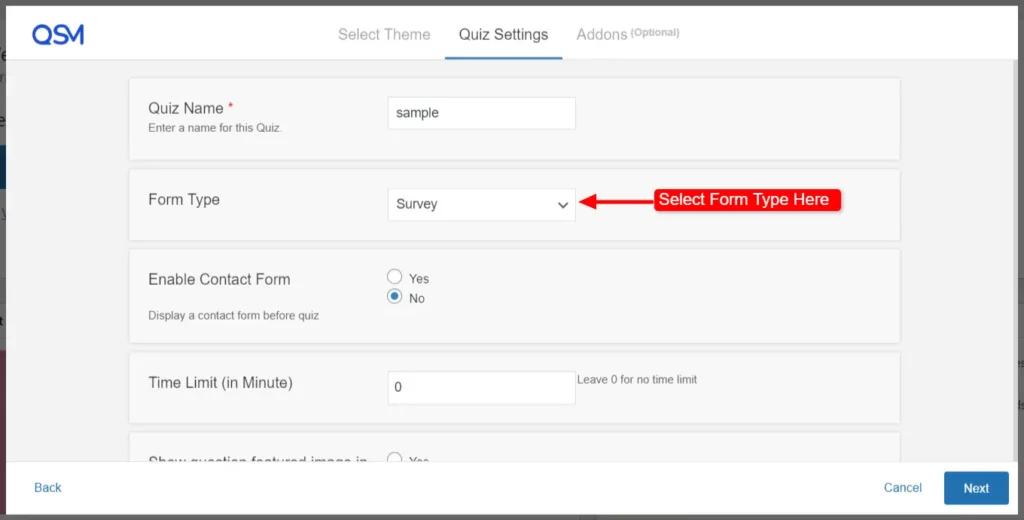
Screenshot 4: Enter the Quiz Settings Details
- You can choose other add-ons such as Quiz Navigator, Quiz Protector, Advanced Question Types, and many more. These add-ons come with an additional price, which can be viewed by clicking on View Details.
- Click on Create Quiz to proceed further.
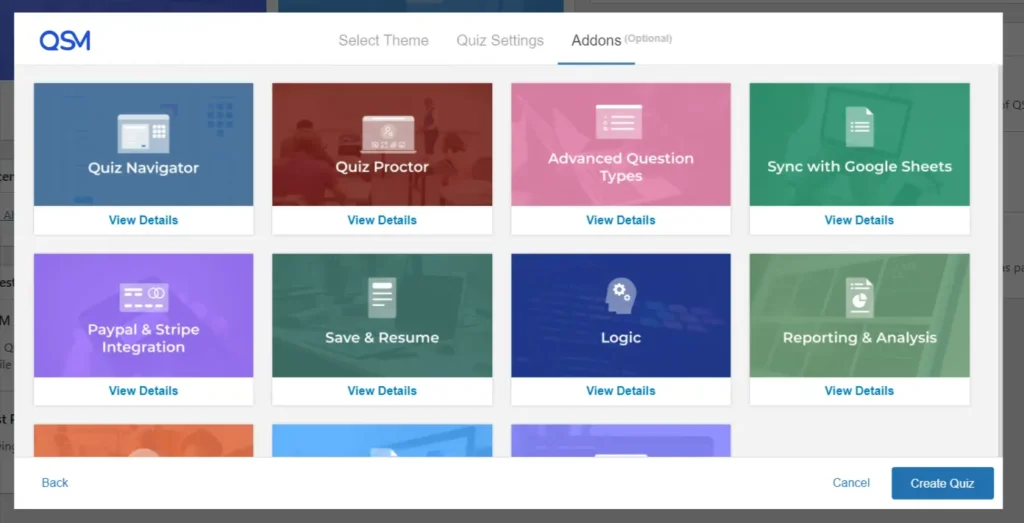
Screenshot 5: Choose add-ons (optional)
Step 3: Add Questions to Your Survey
- After creating your survey, you’ll be redirected to the Questions tab.
- Click on ‘Type Your Question Here’.
- Code tags in question descriptions can display HTML, CSS, and JS code snippets. Using code snippets prevents the system from executing the code and interfering with the website’s code.
- The WordPress Visual editor lets you add photos, audio, video, documents, spreadsheets, and more from your Media Library and customize the Question using formatting options. Click the Text tab on the editor to add your question in HTML.
- Choose the question type from the dropdown menu on the right side (e.g., Multiple Choice, True/False, Open Answer).
- Enter the question in the Question text area.
- Feed the answers to your questions. Answers depend entirely on the Question Type.
- Set additional parameters for the question, such as required answers or hints.
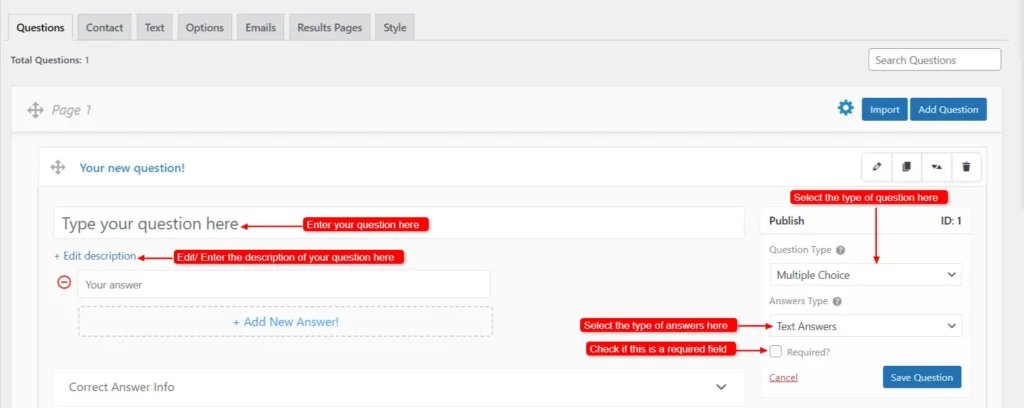
Screenshot 6: Questions Tab: Enter your Questions
- You can also feed information for correct answer info, the type of comment box you want, and add a Hint if you want. At the end of the quiz, the user can receive a thorough explanation of the correct answer through the correct answer info block. The results page shows the right answer.
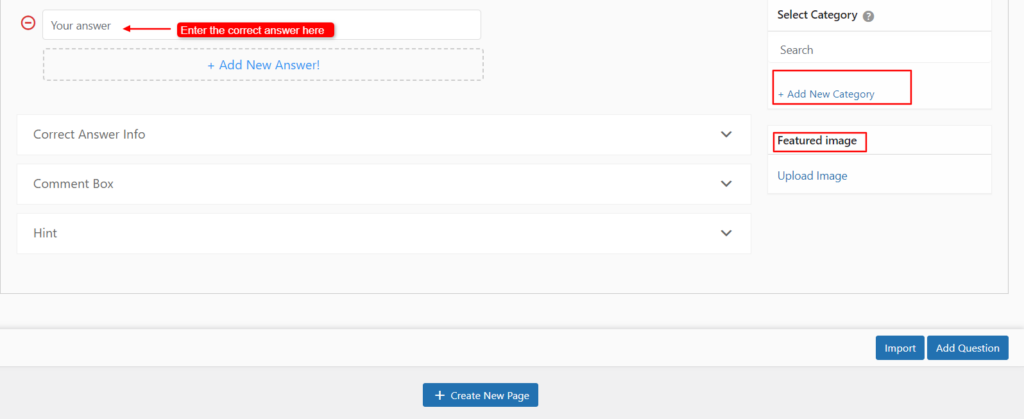
Screenshot 7: Select various fields
- Set the featured image if you require it.
- You can Add a new category for your questions too.
- Click Save Question to add it to your survey.
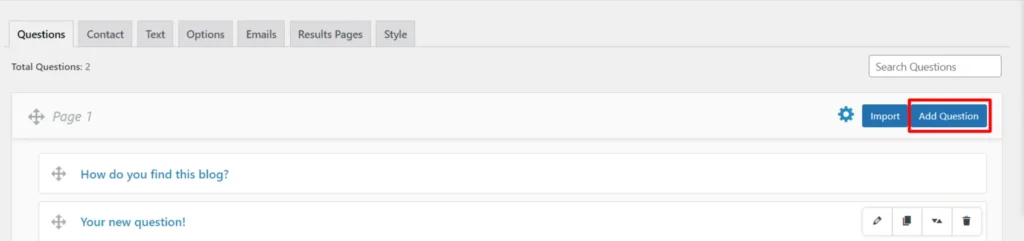
Screenshot 8: Click on Add New Question
- Click on Add Questions and repeat these steps to add more questions to your survey.
- Clicking the “Create New Page” option at the bottom of the question tab generates a new page for questions and responses. A quiz/survey with numerous question pages will show Next & Previous buttons to switch between pages.
Step 4: Gathering User Information
- After setting up the questions and answers, create a contact form to collect user contact information or other details before or after taking the quiz/survey.
- Go to the Contact tab.
- Enable the field and enter the Label Name.
- Choose the Form Options according to when you want to display the form.
- Click on Save Form.
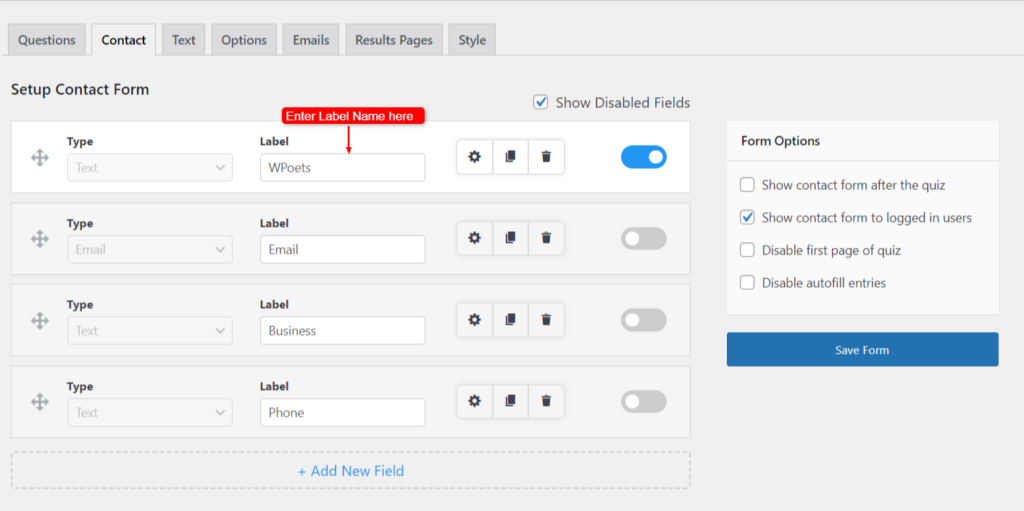
Screenshot 9: Gather User Information Through Contact Form
Step 5: Editing Text Sections
- Once we have some quiz questions, we can alter some of the text users will see and interact with.
- Go to Text tab.
- The text tab is divided into 3 subtabs:
- General: You can choose from several different messages in this drop-down menu.
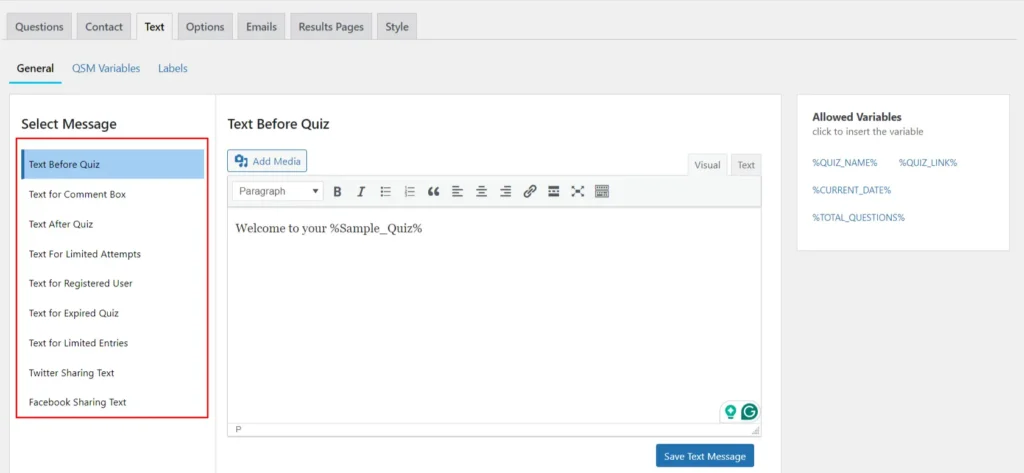
Screenshot 10: Text > General Tab
- QSM Variables: This includes factors that have already been set for the Results Page and Email Pages.
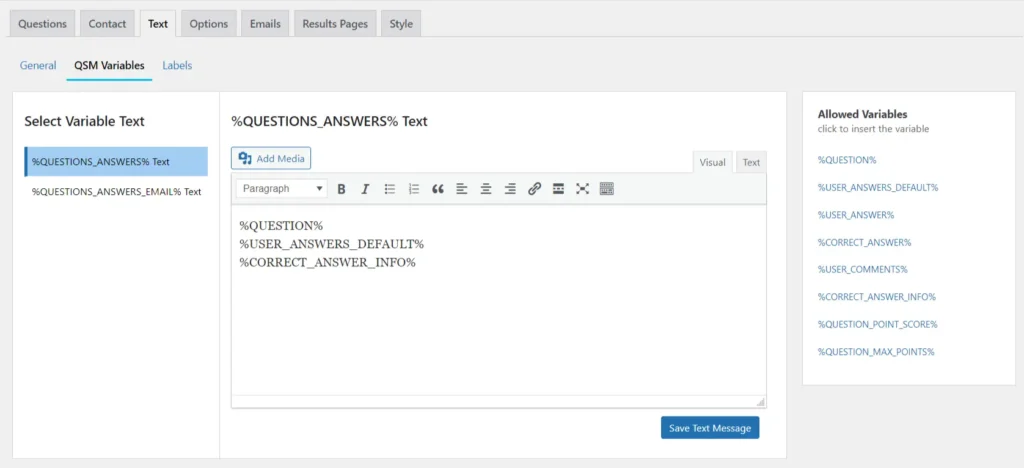
Screenshot 11: Text > QSM Variables Tab
- Labels: Some Label options let you change things like the “Validation Messages” and the “Default Text” shown on the Quiz Navigation Buttons.

Screenshot 12: Text > Labels Tab
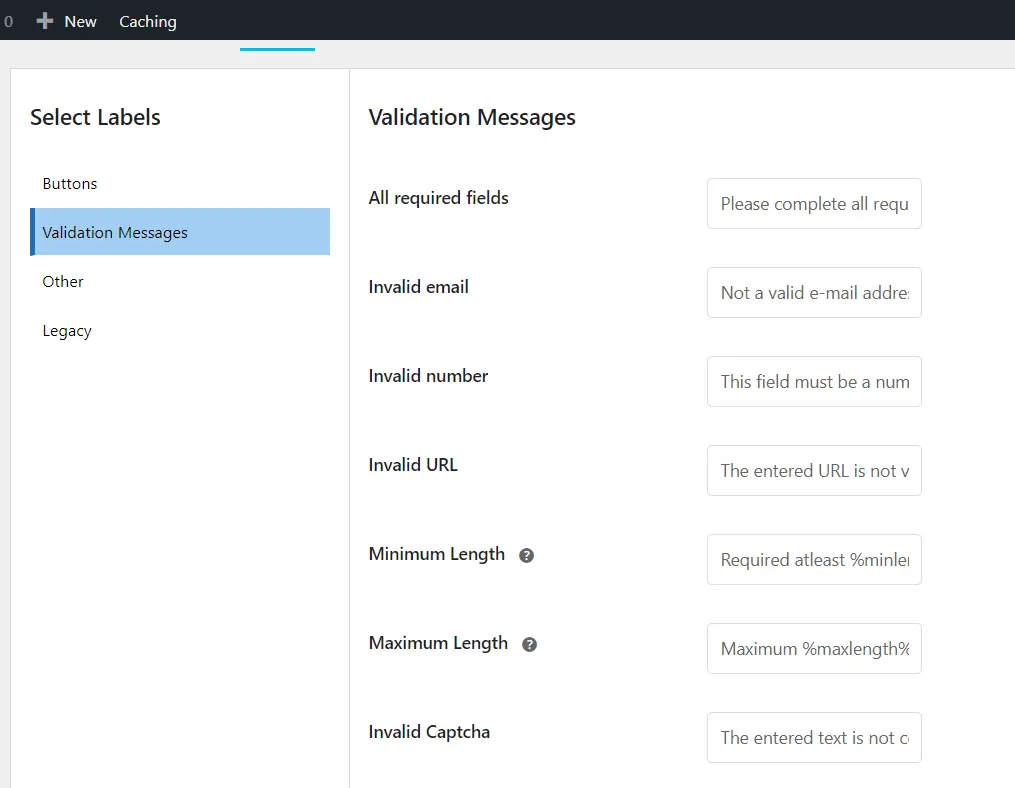
Screenshot 13: Text > Validation messages Tab
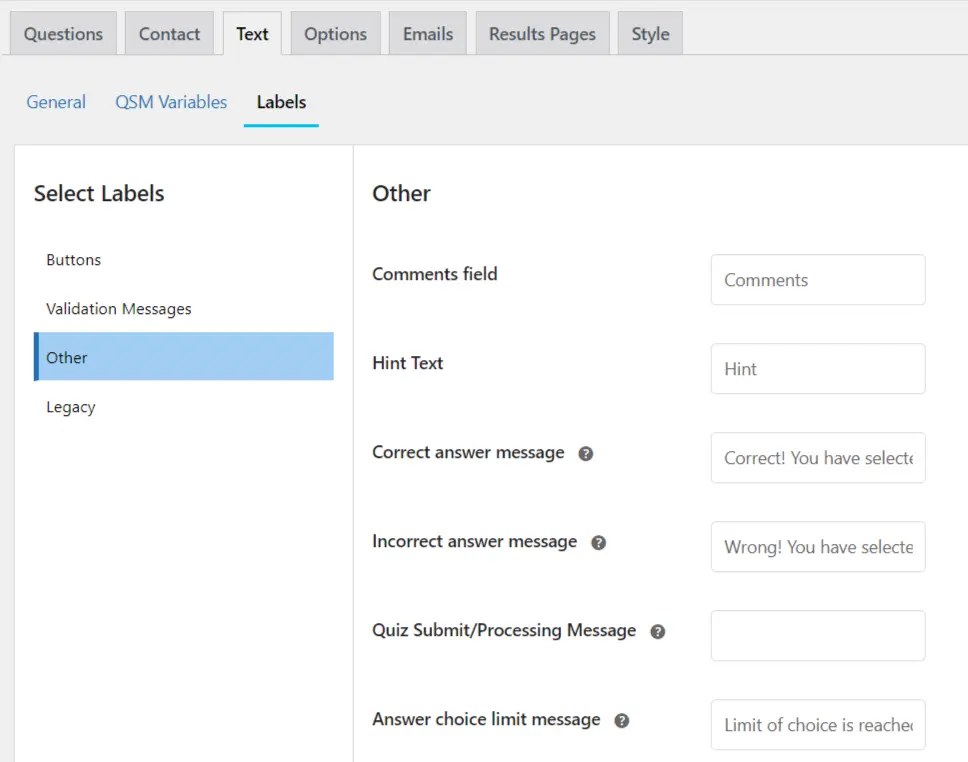
Screenshot 14: Text > Other Tab
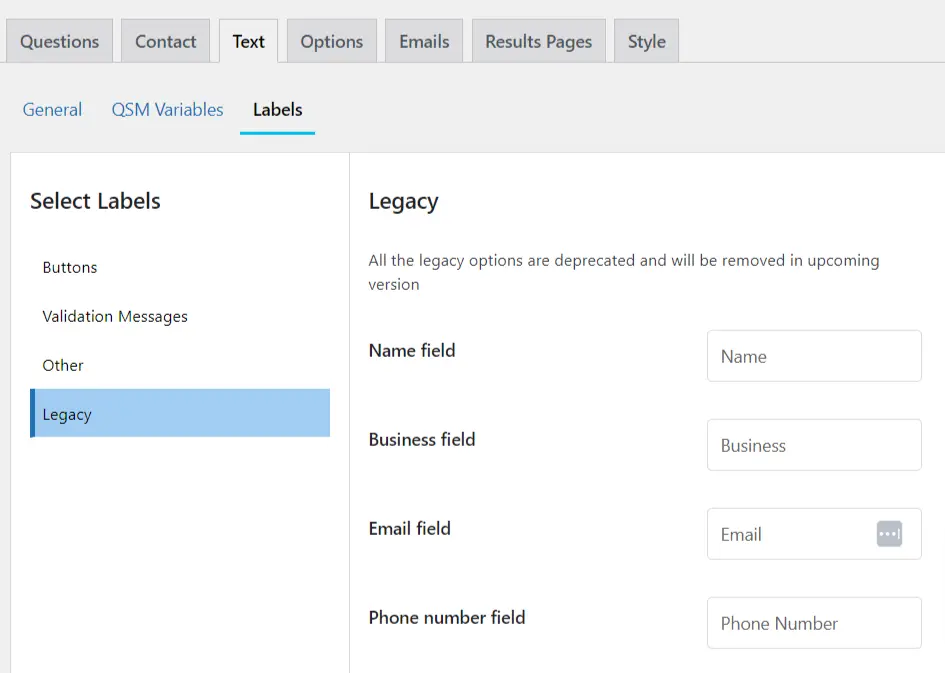
Screenshot 15: Text > Legacy Fields Tab
Step 6: Basic Settings in the Options Tab
- It’s time to change the choices now that we’ve added our questions and written some text.
- Go to the Options Tab.
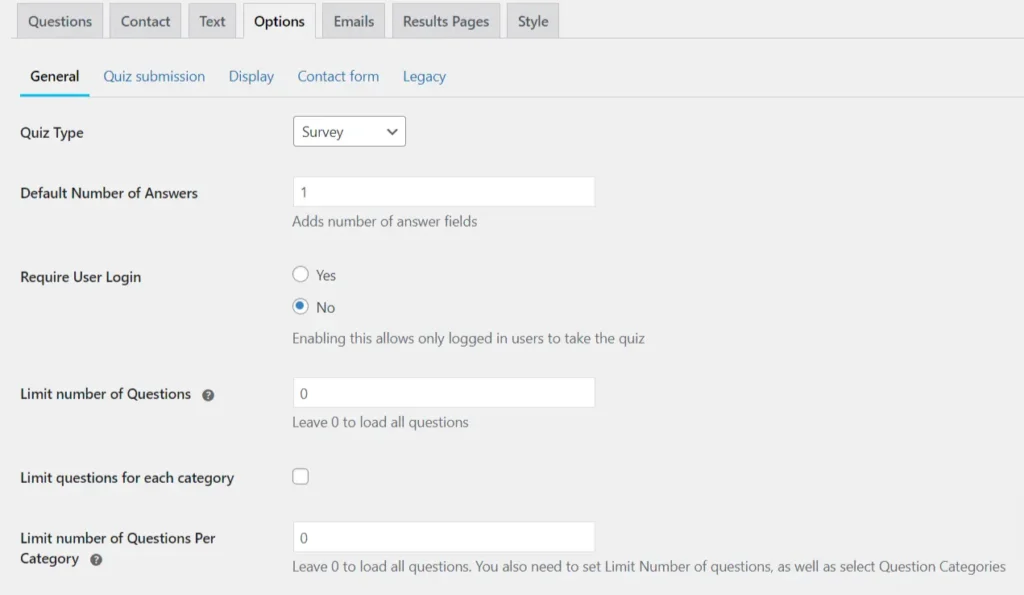
Screenshot 16: Options > General Settings Tab
- This tab involves various settings that fall under the categories as follows: General, Quiz Submission, Display, Contact Form, and Legacy.
- These are basic settings that allow you to select quiz type, set how to display results, set the position of the contact form, set what information to gather from users, etc.
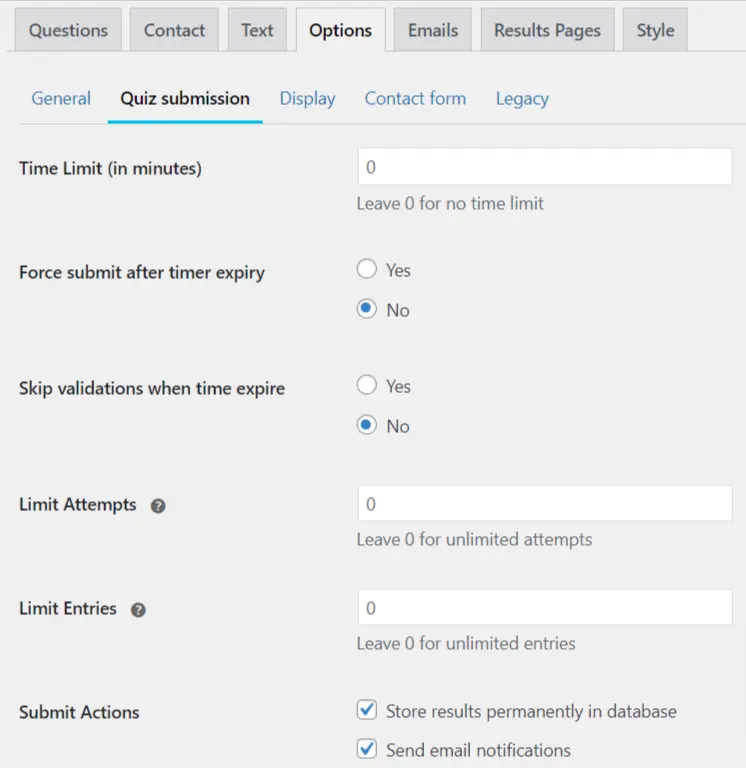
Screenshot 17: Options > Quiz Submission Settings
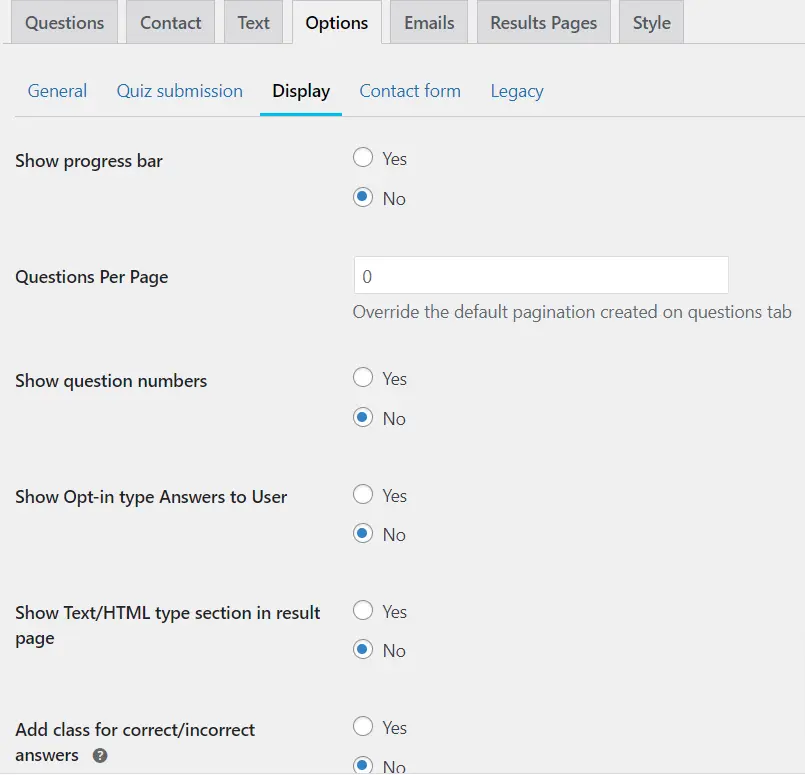
Screenshot 18: Options>Display Settings
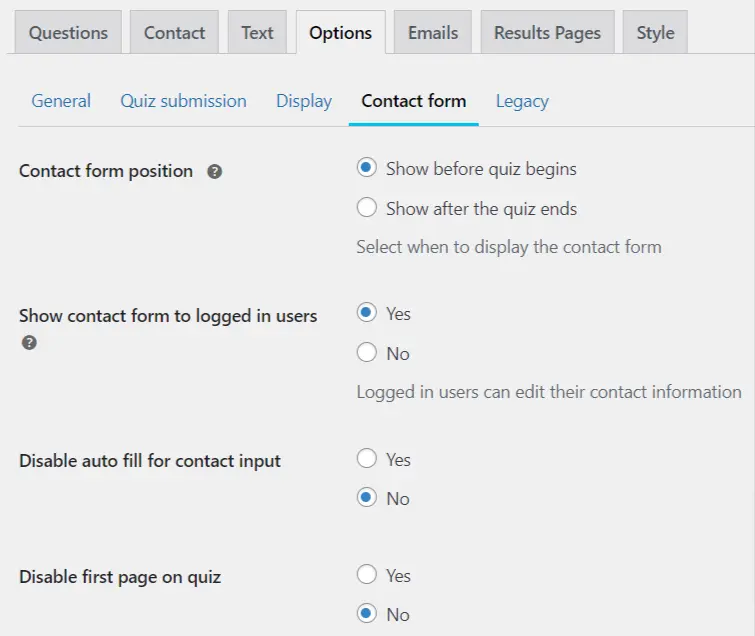
Screenshot 19: Options> Contact Form
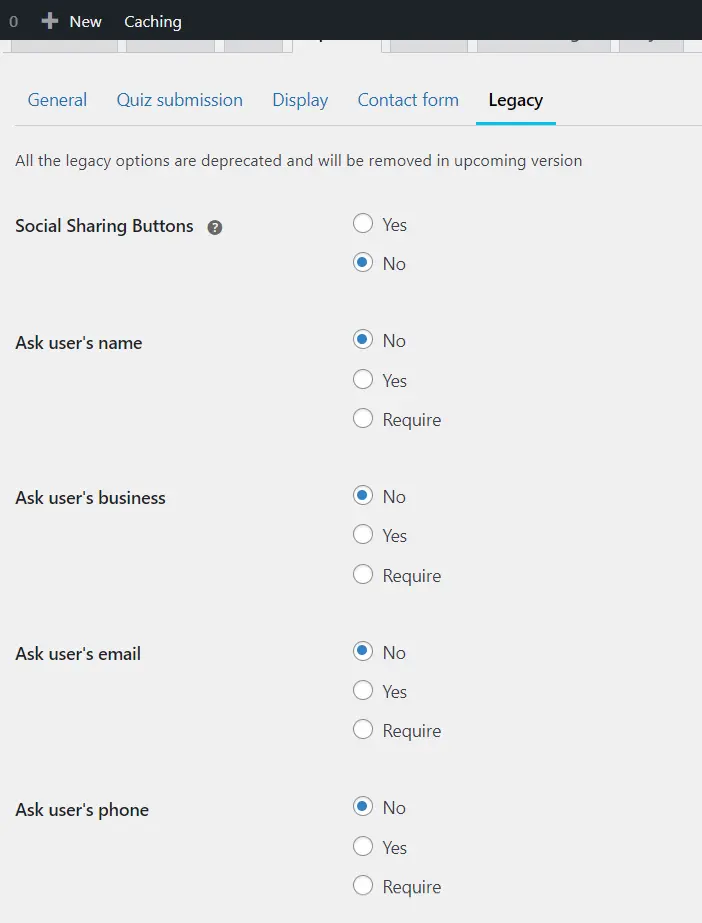
Screenshot 20: Options> Legacy Settings
Step 7: Setting up Emails
- After users submit the surveys, you may need to send them emails with their answers.
- Go to the Emails Tab.
- We can run a function with Template Variables.
- Click on Insert Template Variables at the bottom-right.
- Clicking the button opens a window with all the Template Variables you can use to send emails. These variables start a task when used.
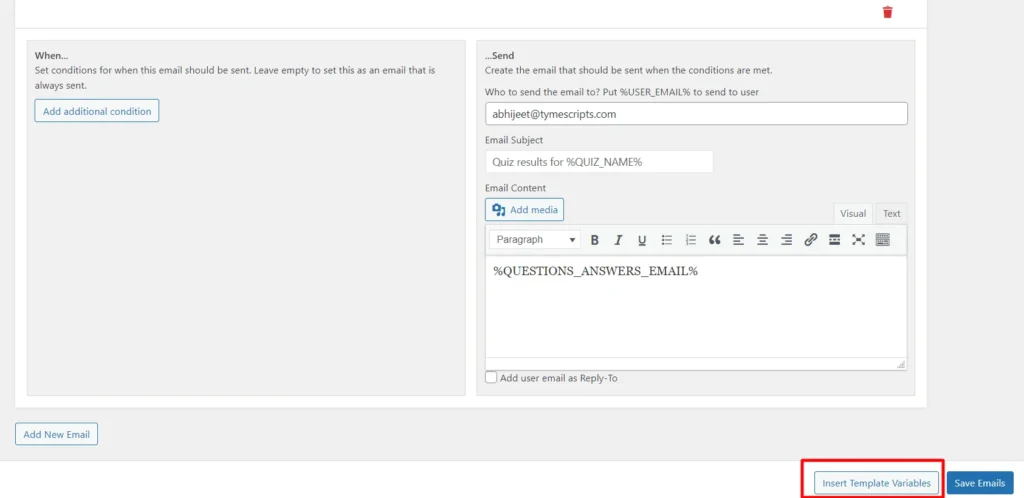
Screenshot 21: Click on Insert Template Variables
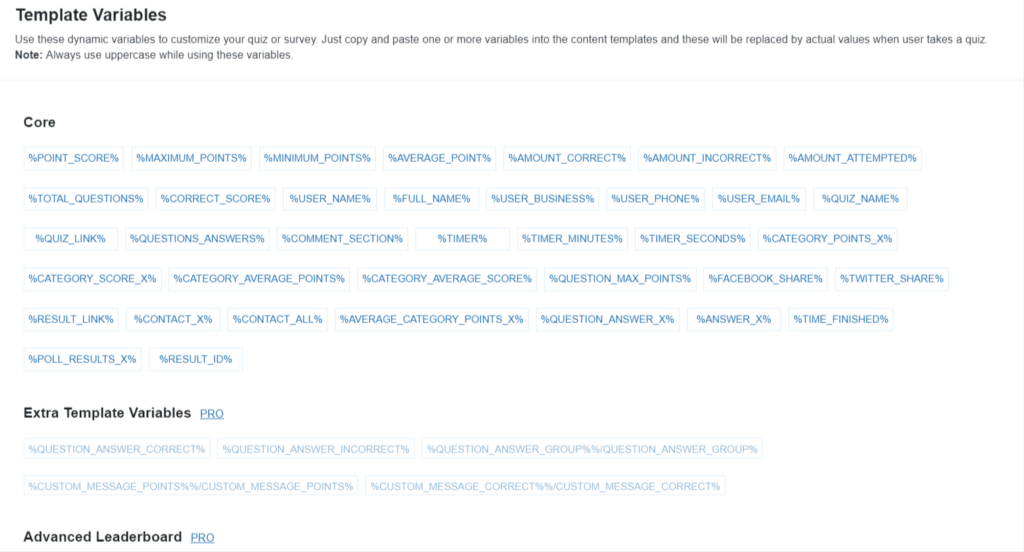
Screenshot 22: Email Template Variables
- Click on the Variable you need. It gets copied automatically, and you can paste it into the email text section. Customise and add variables to improve the email experience. %QUESTIONS_ANSWERS_EMAIL% is set by default.
- To add extra content, use template variables in the Email Body to include Amount Correct, User Name, Points Scored, Average Category Points, Correct Score, Category Points, Category Average Points, Quiz Name, and more.
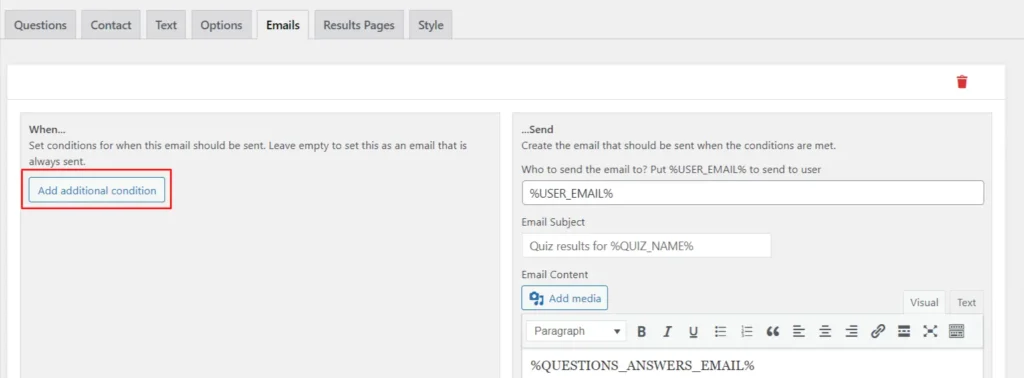
- Click on Add Additional Condition to add more conditions to your email.
Screenshot 23: Additional Condition for Email
Step 8: Result Page Settings
- This page is shown after the user submits the survey.
- This is quite similar to the Emails page we’ve seen earlier.
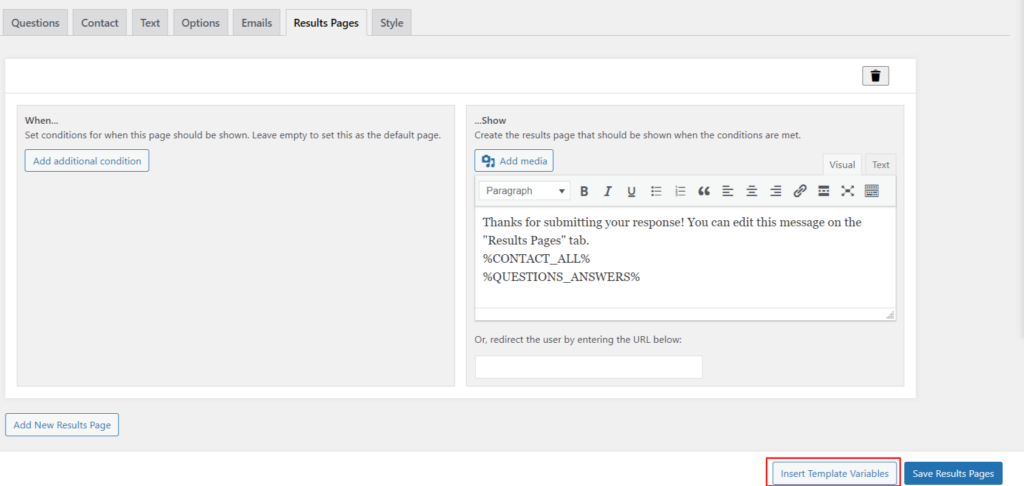
- Go to the Results tab.
- We can run a function with Template Variables.
- Opening the Results Tab, the Insert Template Variables button appears in the bottom-right corner.
- Once you click the button, a new window appears with all the Template Variables you may use to configure quiz results. These variables start a task when used.
Screenshot 24: Insert Template Variables for Results Page
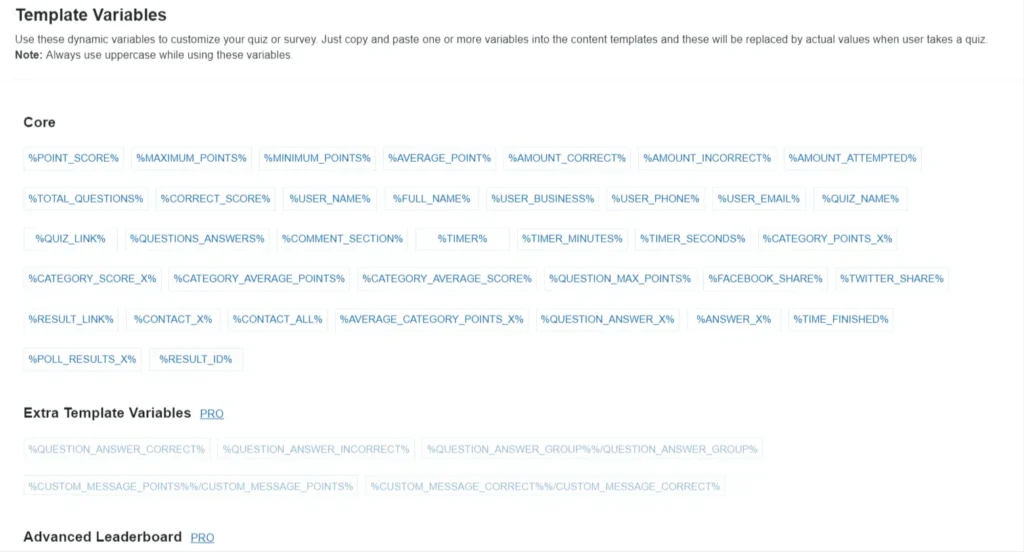
Screenshot 25: Template Variables in Results Page
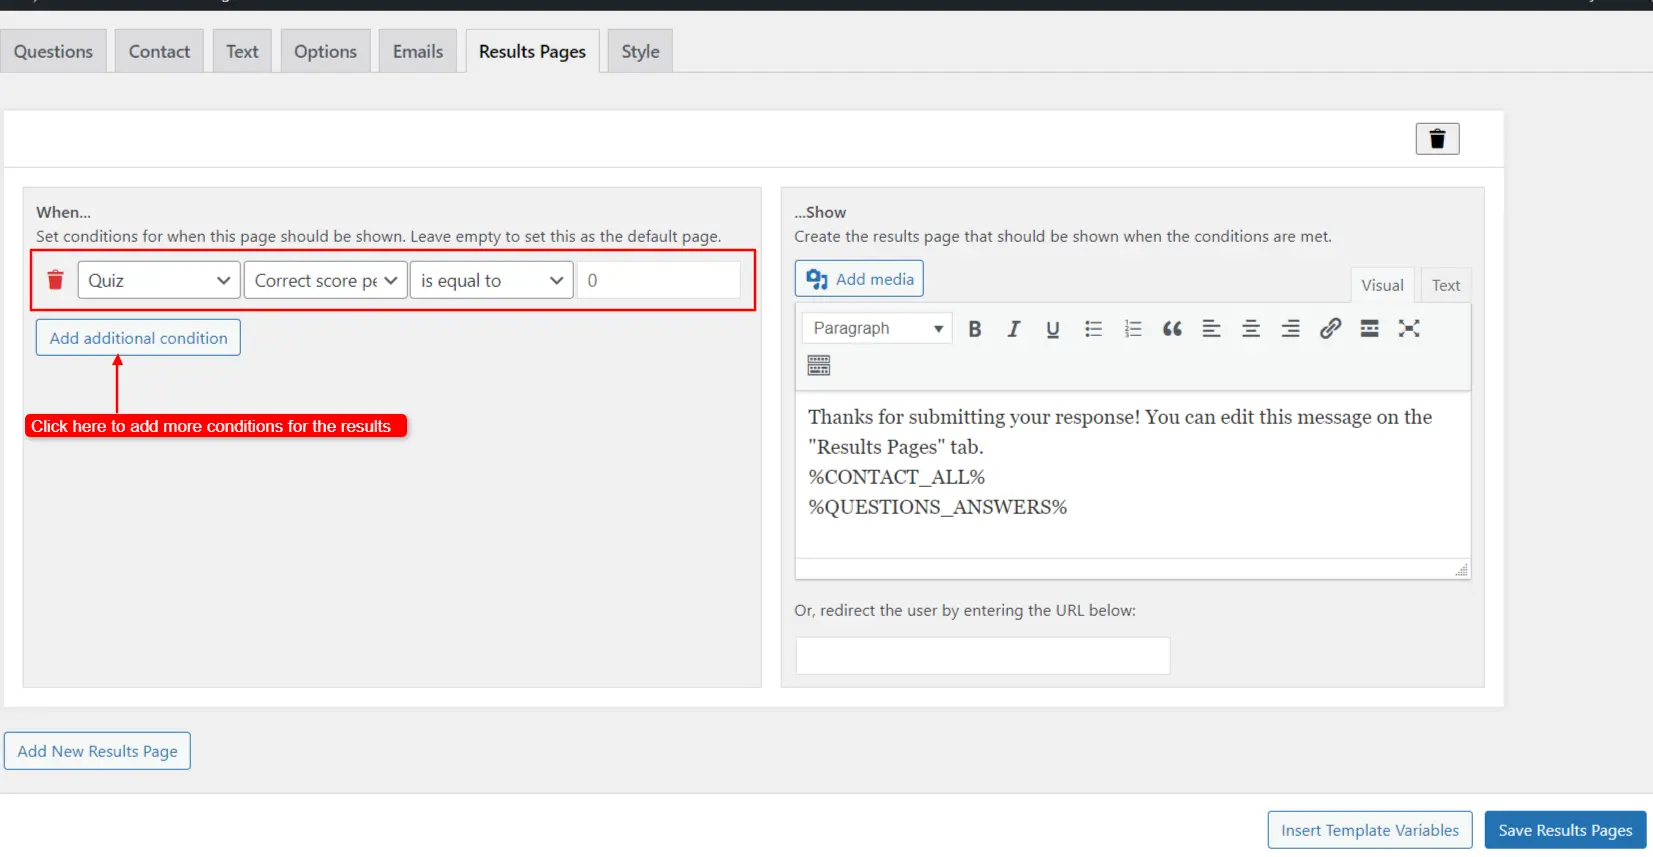
- Navigate to the Conditions section on the QSM Results Page.
- Click on the “Category Name” drop-down menu.
- Select the desired category from the options listed.
- Choose between “Total points earned” or “Correct score percentage” from the available options.
- Select a condition to apply to the output display.
- This allows you to showcase various outputs tailored to users whose results meet the specified category criteria.
Screenshot 26: Adding Additional Condition in the Results Page
Step 9: Styling Your Survey
- The Style tab is designed to help users customize the appearance of their quizzes and surveys.
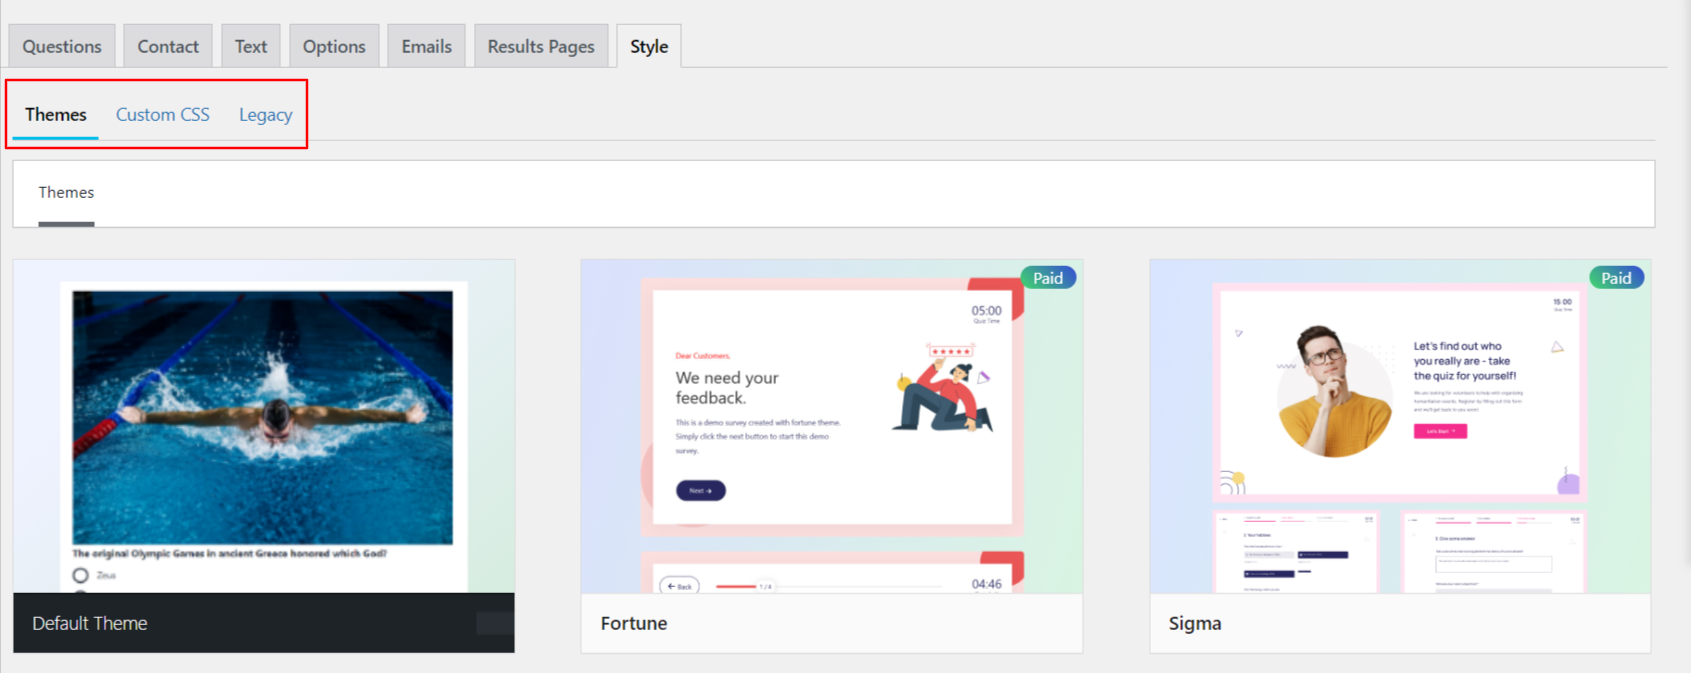
- Select the Theme you want for your survey from the Themes section.
- You can add Custom CSS to customize your survey.
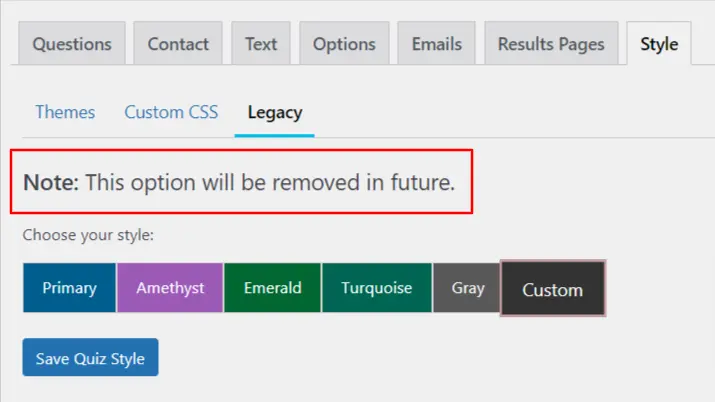
- The Legacy section will soon be removed from the plugin as specified in the screenshot below.
Screenshot 27: Styling Your Survey>Selecting Theme
Screenshot 28: Legacy Section to be Removed
Step 10: Adding Survey to your Website
There are three ways to add a survey to your website:
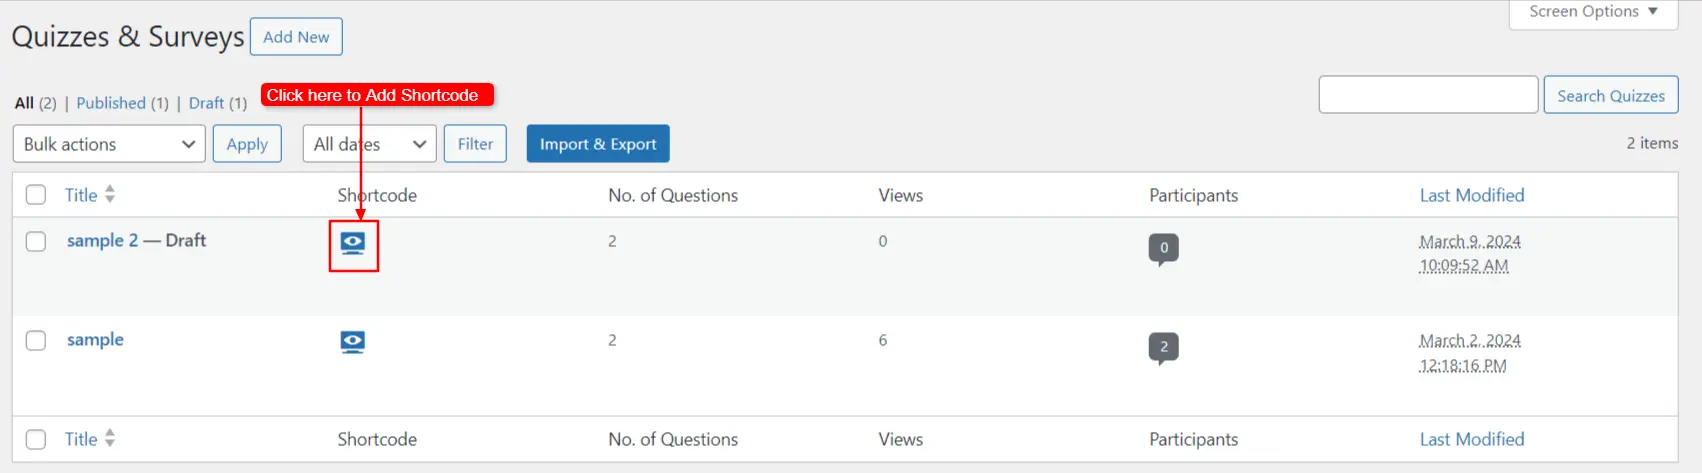
- By Pasting Shortcode on Page/Post
- Copy the shortcode from QSM > Quizzes/Surveys > Shortcode. Paste it into your page or post. The shortcode displays the survey or provides a link to it.
Screenshot 29: Click to Add Shortcode
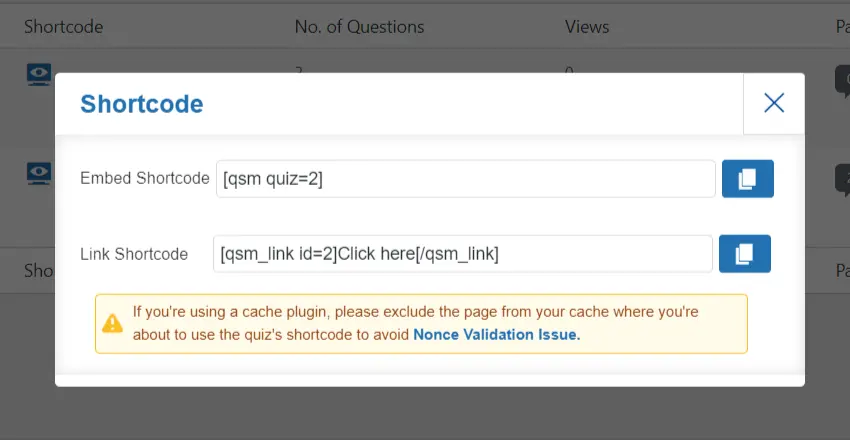
Screenshot 30: Embed the Shortcode
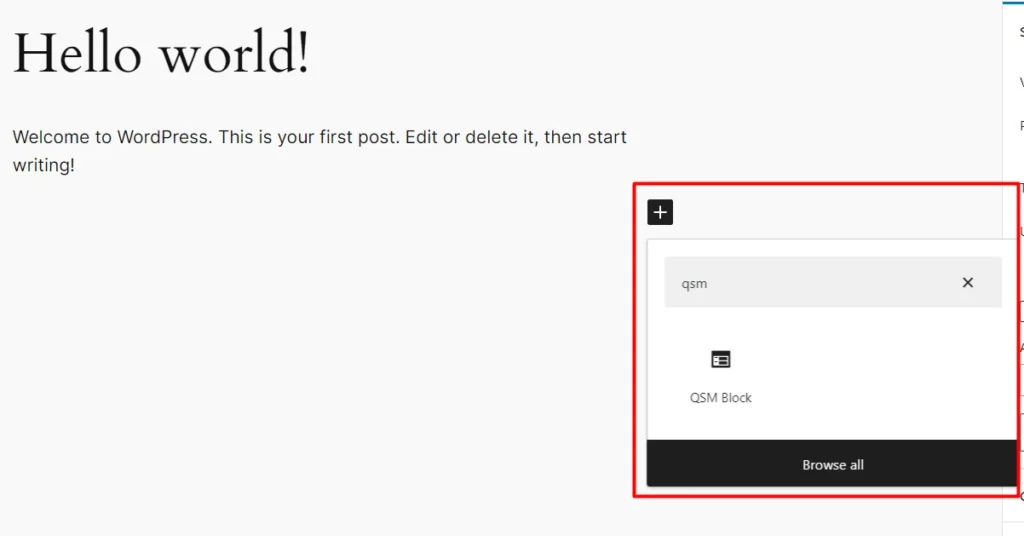
- By Using Gutenberg Block
- Insert the quiz or survey on a page or post with the Gutenberg editor by searching for the “QSM Block”. Select your Quiz/Survey ID from the dropdown in block settings and update.
Screenshot 31: Add Survey Through Gutenberg Block
- Now, you can select the survey to be added from block settings.
- Click on Update to add the survey to your website.
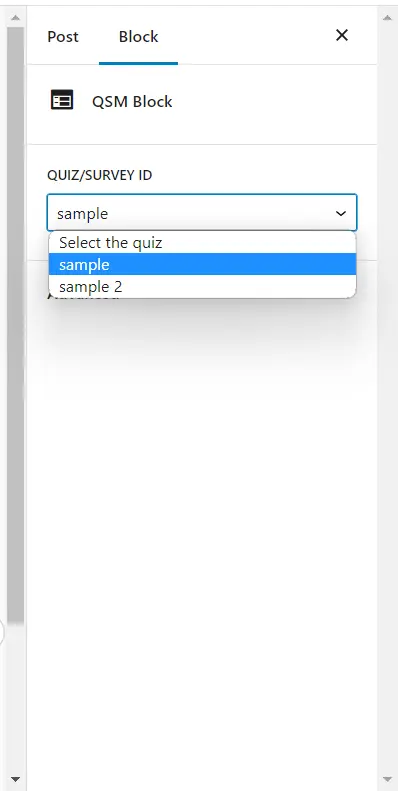
Screenshot 32: Selecting Survey from Block settings
- Click on View Post to view the survey embedded in your post.

Screenshot 33: Survey Embedded in Website
Conclusion
Crafting surveys in WordPress using the Quiz and Survey Master plugin is a streamlined process that empowers you to engage deeply with your audience and gather vital insights. This guide explored the steps necessary to design, customize, and deploy your surveys effectively. By leveraging this powerful tool, you can enhance your connection with your audience, make data-driven decisions, and ultimately drive your WordPress site’s success forward.
Build
Website
Themes