Introduction
Mega menus are powerful, innovative menus that make website navigation visually appealing and dynamic. Multi-column layouts, rich media, and the ability to organize large amounts of content distinguish Mega Menus from dropdown menus.
Mega Menus offers a more immersive and efficient navigation experience than mere links. Mega Menus are powerful, innovative navigation menus that make website navigation visually appealing and dynamic.
Enhanced navigation efficiency, visual hierarchy and organization, enhanced user experience, and aptly showcasing featured content are some of the key features of implementing a mega menu.
Let’s learn how to use the mega menu on your website. The Max Mega menu plugin is the most extensively used; we will learn about its usage in this blog post.
Installation and Usage of Max Mega Menu Plugin
First, install and activate the Max Mega Menu plugin. You can do it either by searching for the plugin in the “Add New Plugin” screen or by downloading it from the WordPress repository and uploading the zip file.
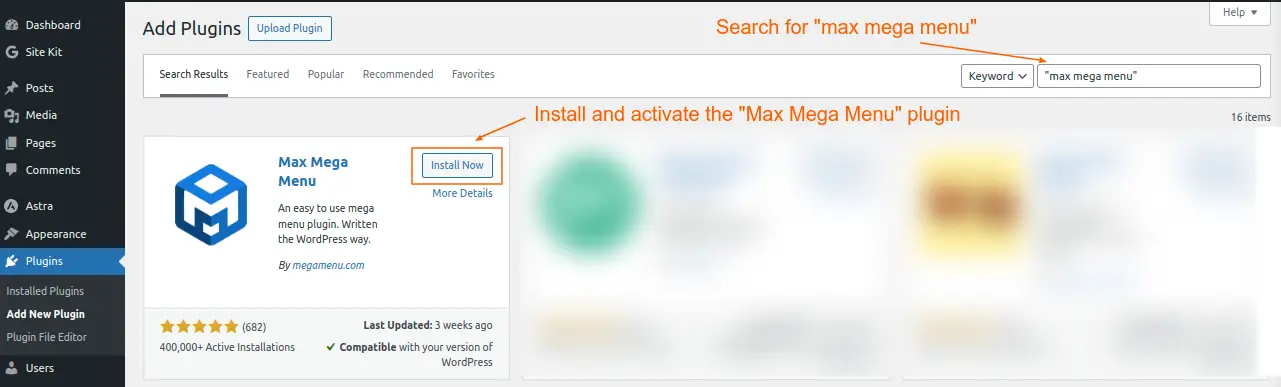
Screenshot 1: Install and activate the Max Mega Menu plugin.
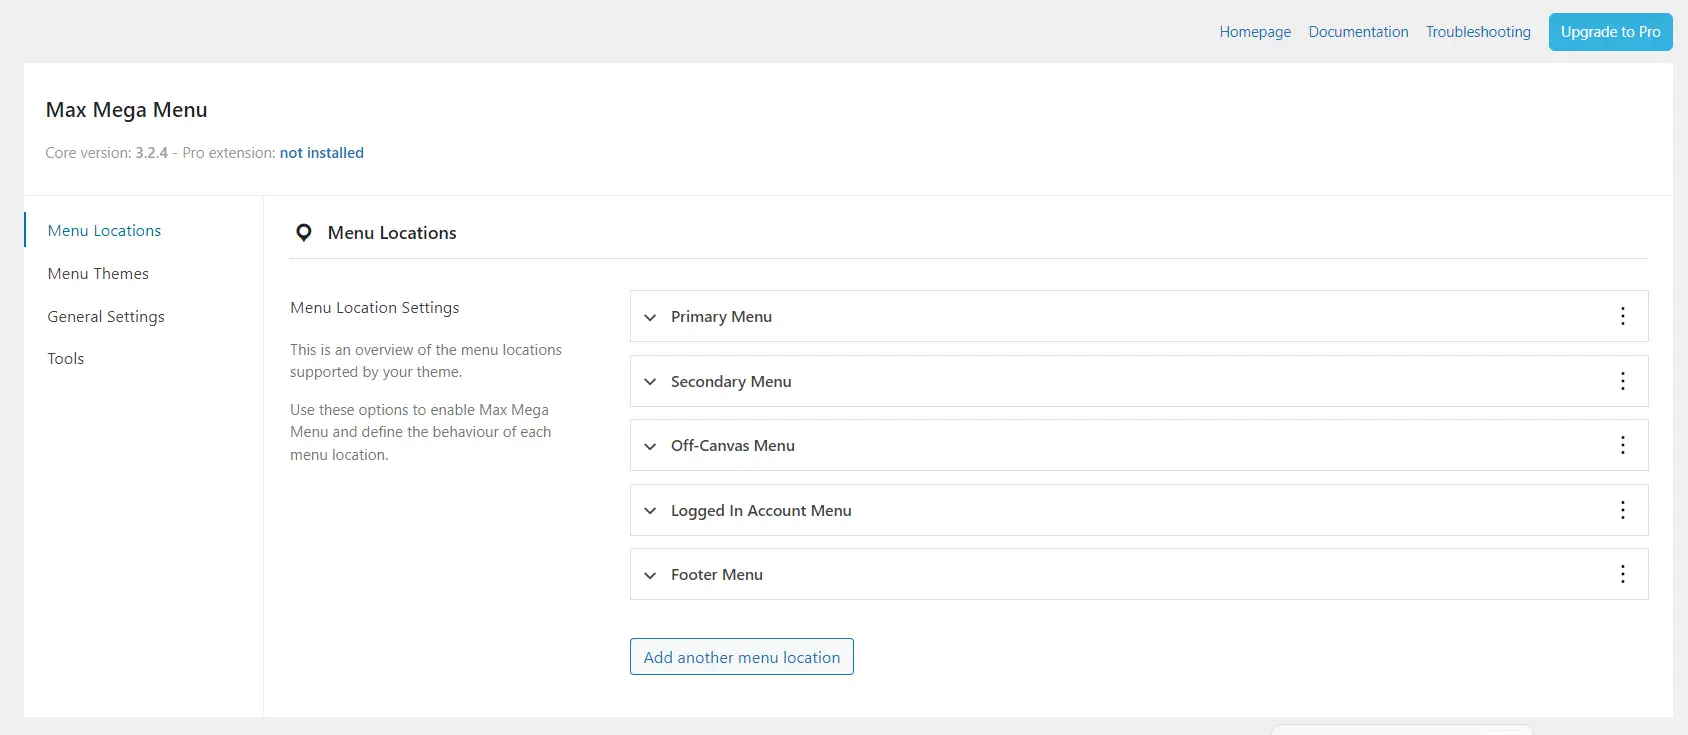
A. Menu Locations
Once activated, navigate to Mega Menu > Menu Locations to view all of the locations where a mega menu can be added.
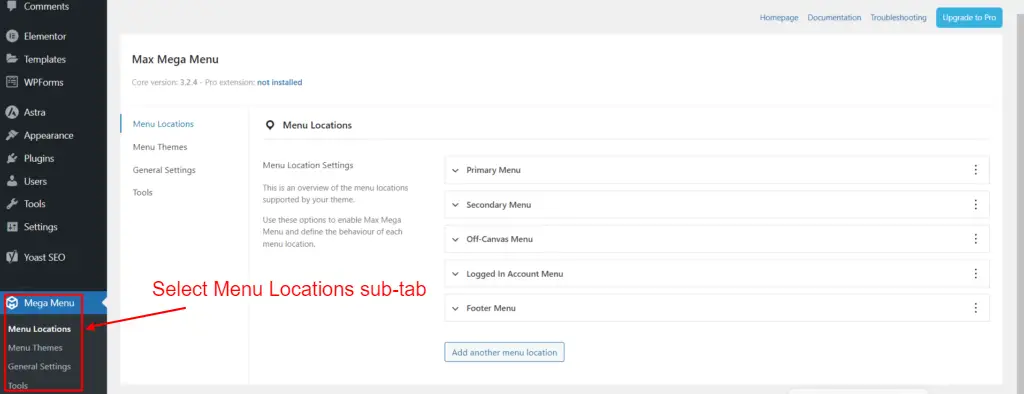
Screenshot 2: Max Mega Menu Menu Locations
1. General Settings (For menu Locations)
This is the first sub-tab under the “Menu Locations” tab. A list of all the menu locations supported by your theme is shown here.
Here, you can enable the locations for which you want to use the Mega Menu. To do this, click on the location to expand the accordion, then select the “Enabled” option as shown in the screenshot below to enable the Max Mega Menu for this menu location.
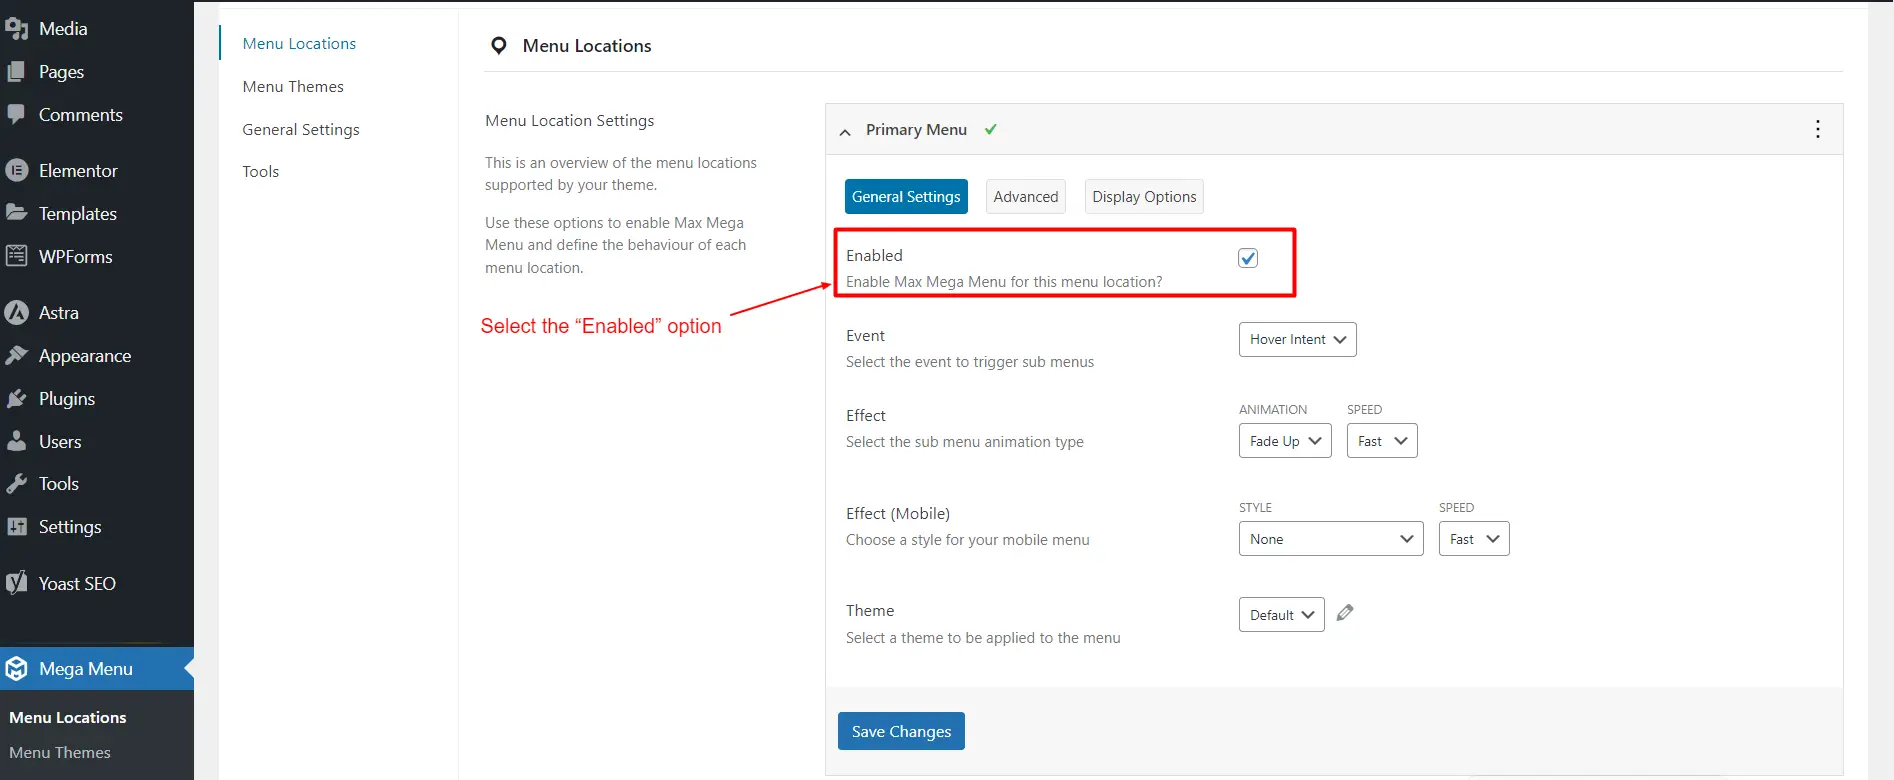
Screenshot 3: Enabling Primary Menu
Along with it, there are various options that you may choose to modify under the “General Settings” sub-tab.
For example, modifying the “Event” will cause the mega menu to appear.
The mega menu can only be triggered by the visitor hovering their mouse over it for a few seconds, as it is configured by default to be “Hover intent.” For the majority of WordPress websites, this is sufficient; however, you can also select “Hover” or “Click” by opening the “Effect” dropdown menu.
When you select the “Click” event trigger, the user will have to click to navigate the mega menu. This can be helpful if you’re concerned that guests could accidentally activate the menu, which can be annoying.
Meanwhile, when a visitor slides their cursor over “Hover,” your big menu will open. You could wish to use “Hover” on landing pages or the homepage of your website, as this can entice users to explore different sections of it.

Screenshot 4: Select Mega Menu Event
You can experiment with various animations in the Max Mega Menu, such as slide-up and fade. The speed of the animation is also adjustable. You may make a captivating mega menu that draws in visitors by playing with various animations.
Similarly, enable mega menus for different locations if required.
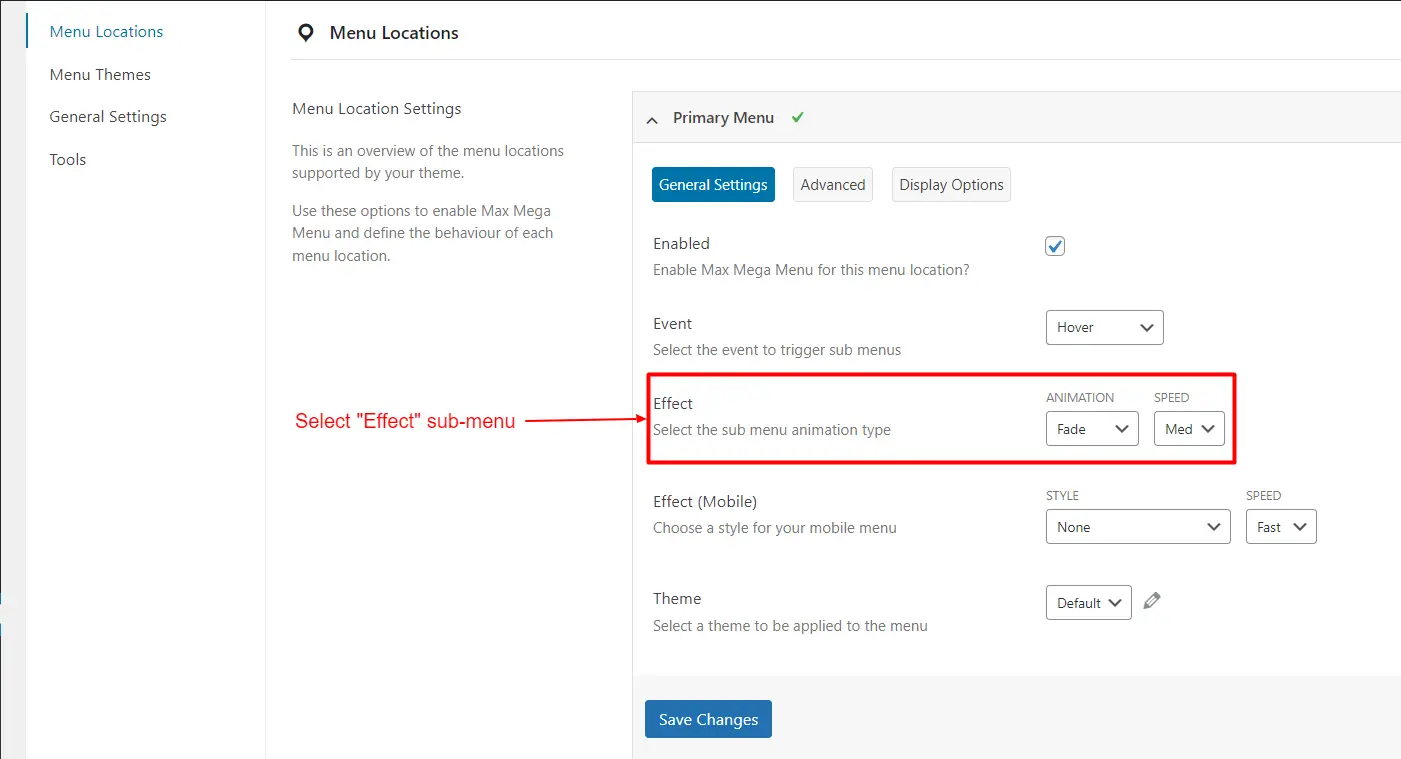
Screenshot 5: Selecting “Effect”, sub-menu animation type
2. Advanced Settings (For menu locations)
If, in the Event section, you have selected the ‘Click’ option, go to the ‘Advanced’ tab for more settings such as the behavior of the click event, sub-menu behavior in mobile click, and others.
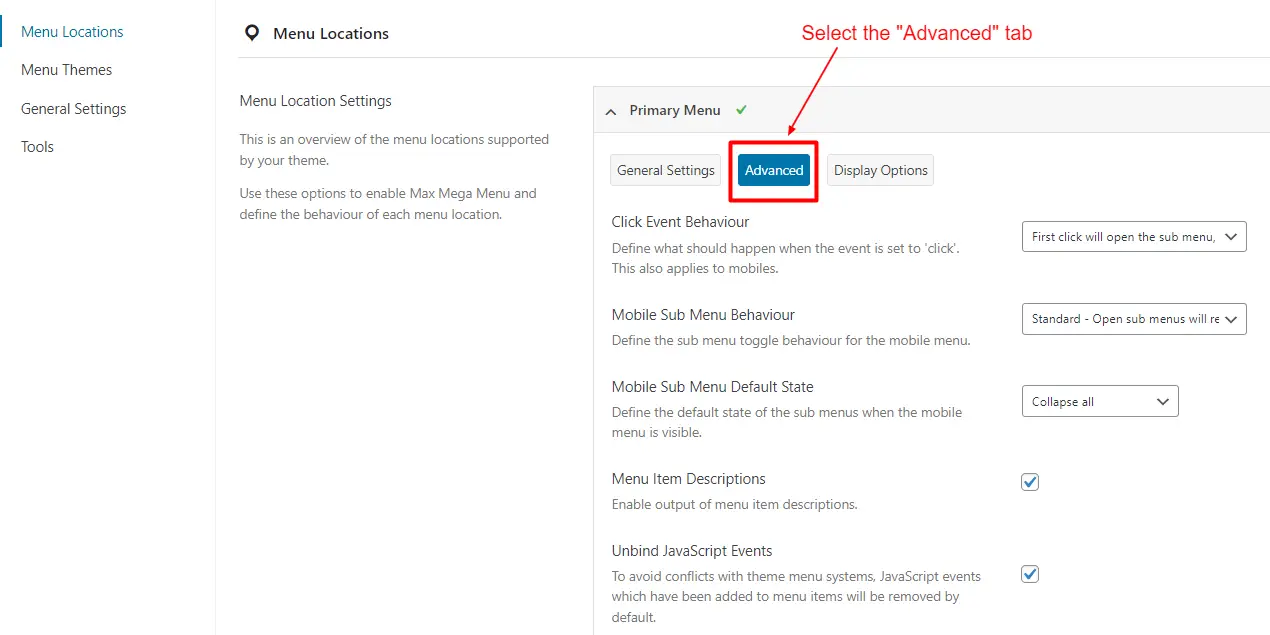
Screenshot 6: Advanced Settings for Click event
Once done, click on “Save Changes.”
Screenshot 7: Menu Locations Saved
3. Add another Menu Location
You can add other menu locations that are not listed by your theme by clicking on ‘Add another Menu location.
Just enter the “Location Name” that describes where the menu will be displayed on your site. Optionally, assign a menu to the newly created menu location. The menu assigned now during the creation of a new menu location can be later changed using the Appearance > Menus > Manage Location page.
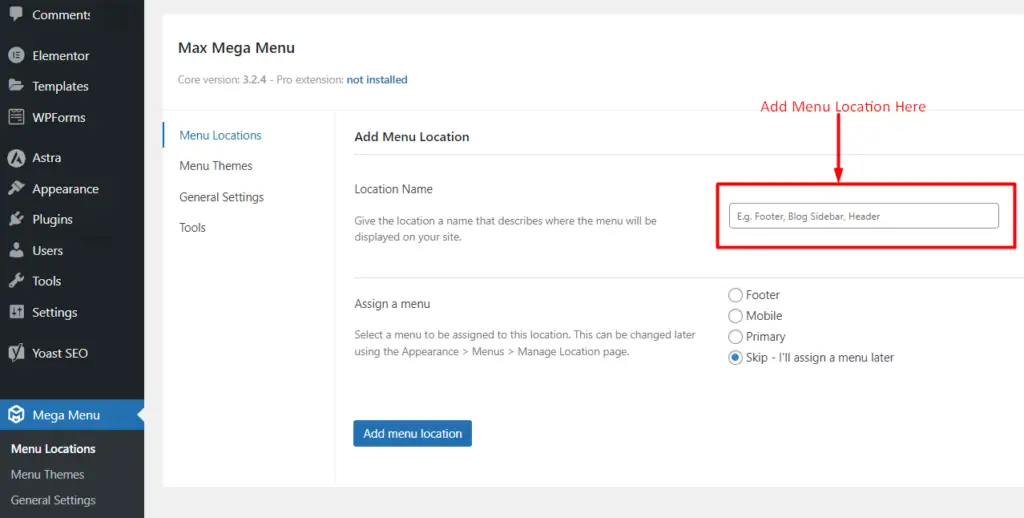
Screenshot 8: Add another Menu Location
B. Menu themes
Go to the “Menu Themes” sub-menu to customize your mega menu. When you select a theme to edit, it displays ‘Default (Primary Menu)’, thus showing the menu locations where the menu theme will appear.
1. General Settings (For menu theme)
In this section, you can customize various things, such as arrow styles, shadows, line heights, hover transitions, and others.
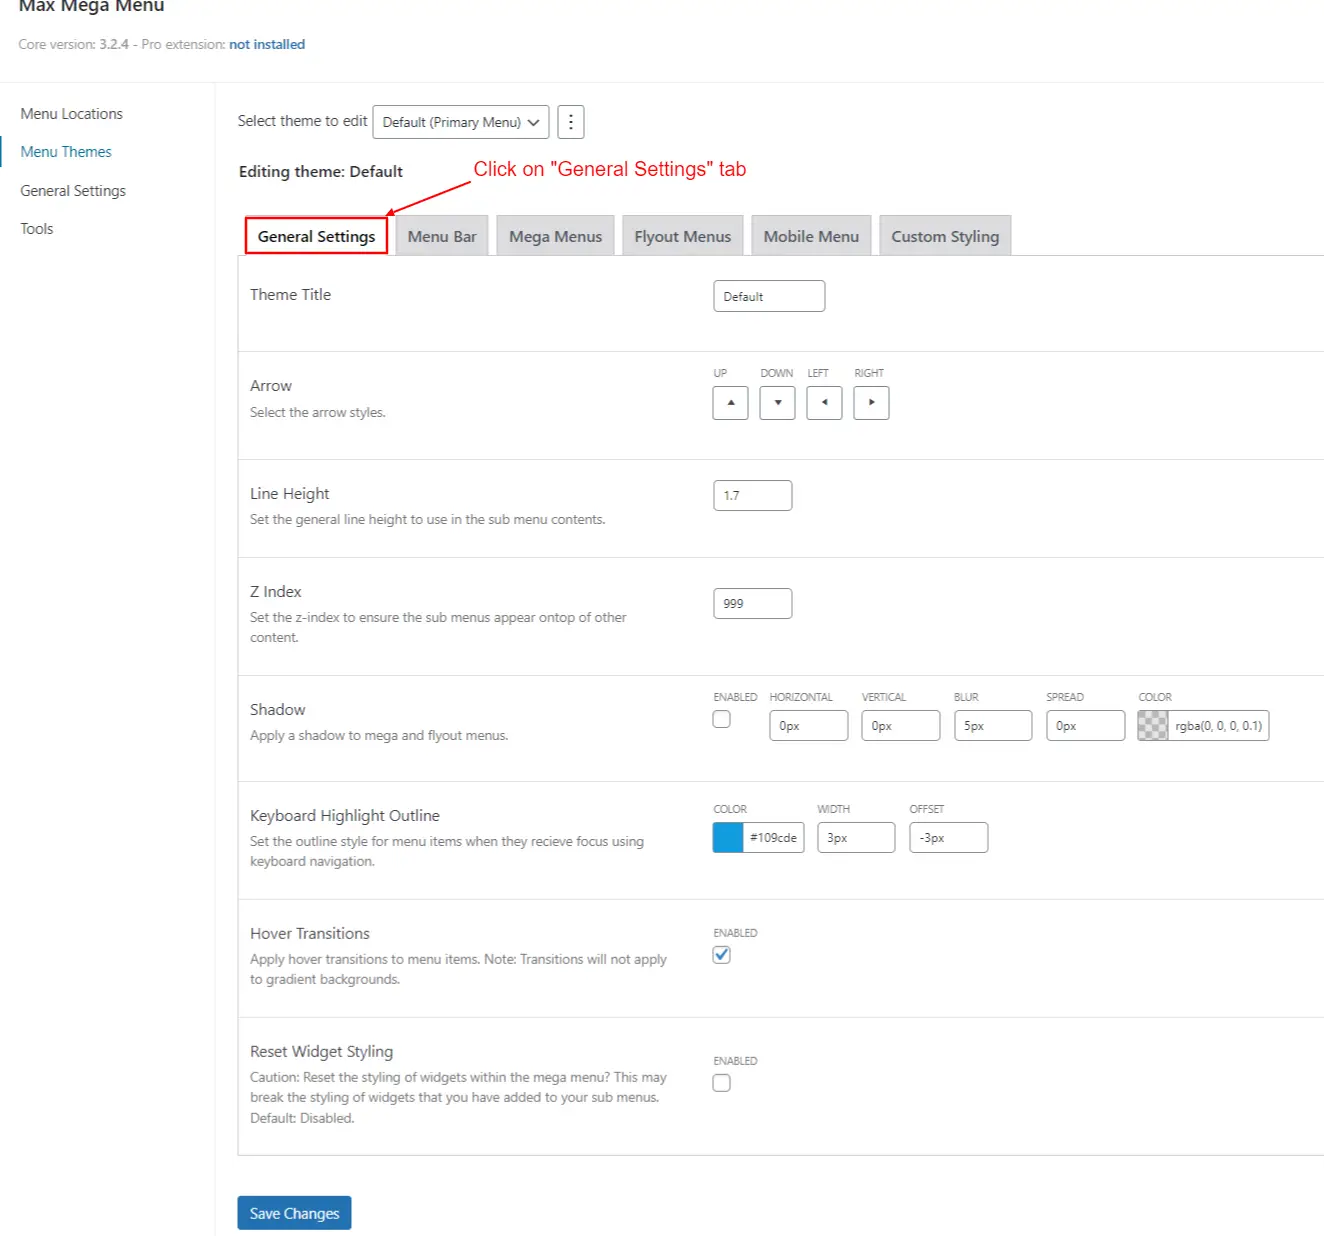
Screenshot 9: General Settings for Menu Themes
2. Menu Bar
Customize your menu bar with variations like menu height, padding, background color, and others. You can also customize top-level menu items like item font, item color, item background, item padding, etc.
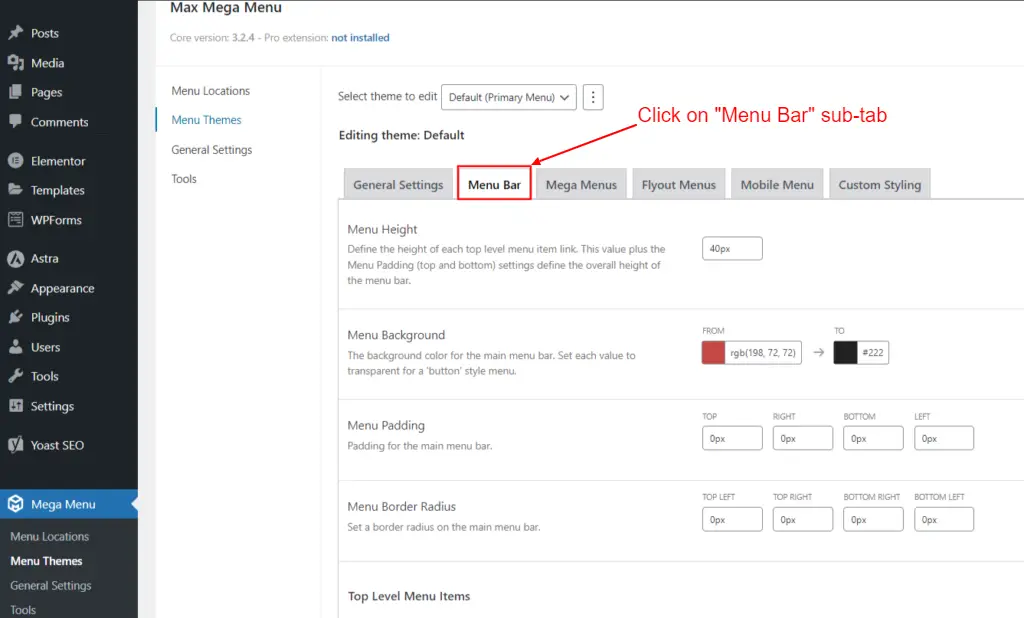
Screenshot 10: Menu Bar
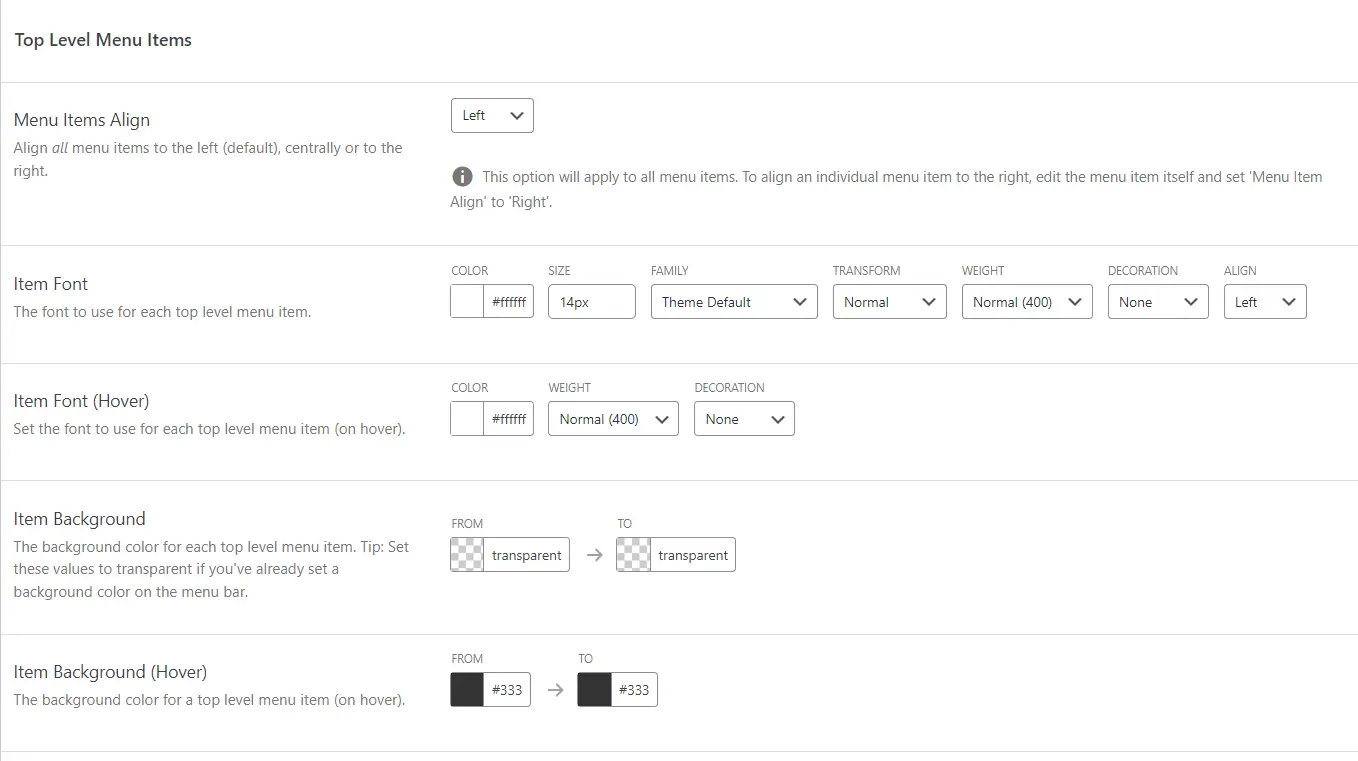
Screenshot 11: Editing theme: Default > Menu Bar > Top Level Menu Items
3. Mega Menus
To customize the submenus, go to Mega Menu. Here, you can customize various fields of the submenu, such as panel background, panel width, padding, border, border radius, and column padding.
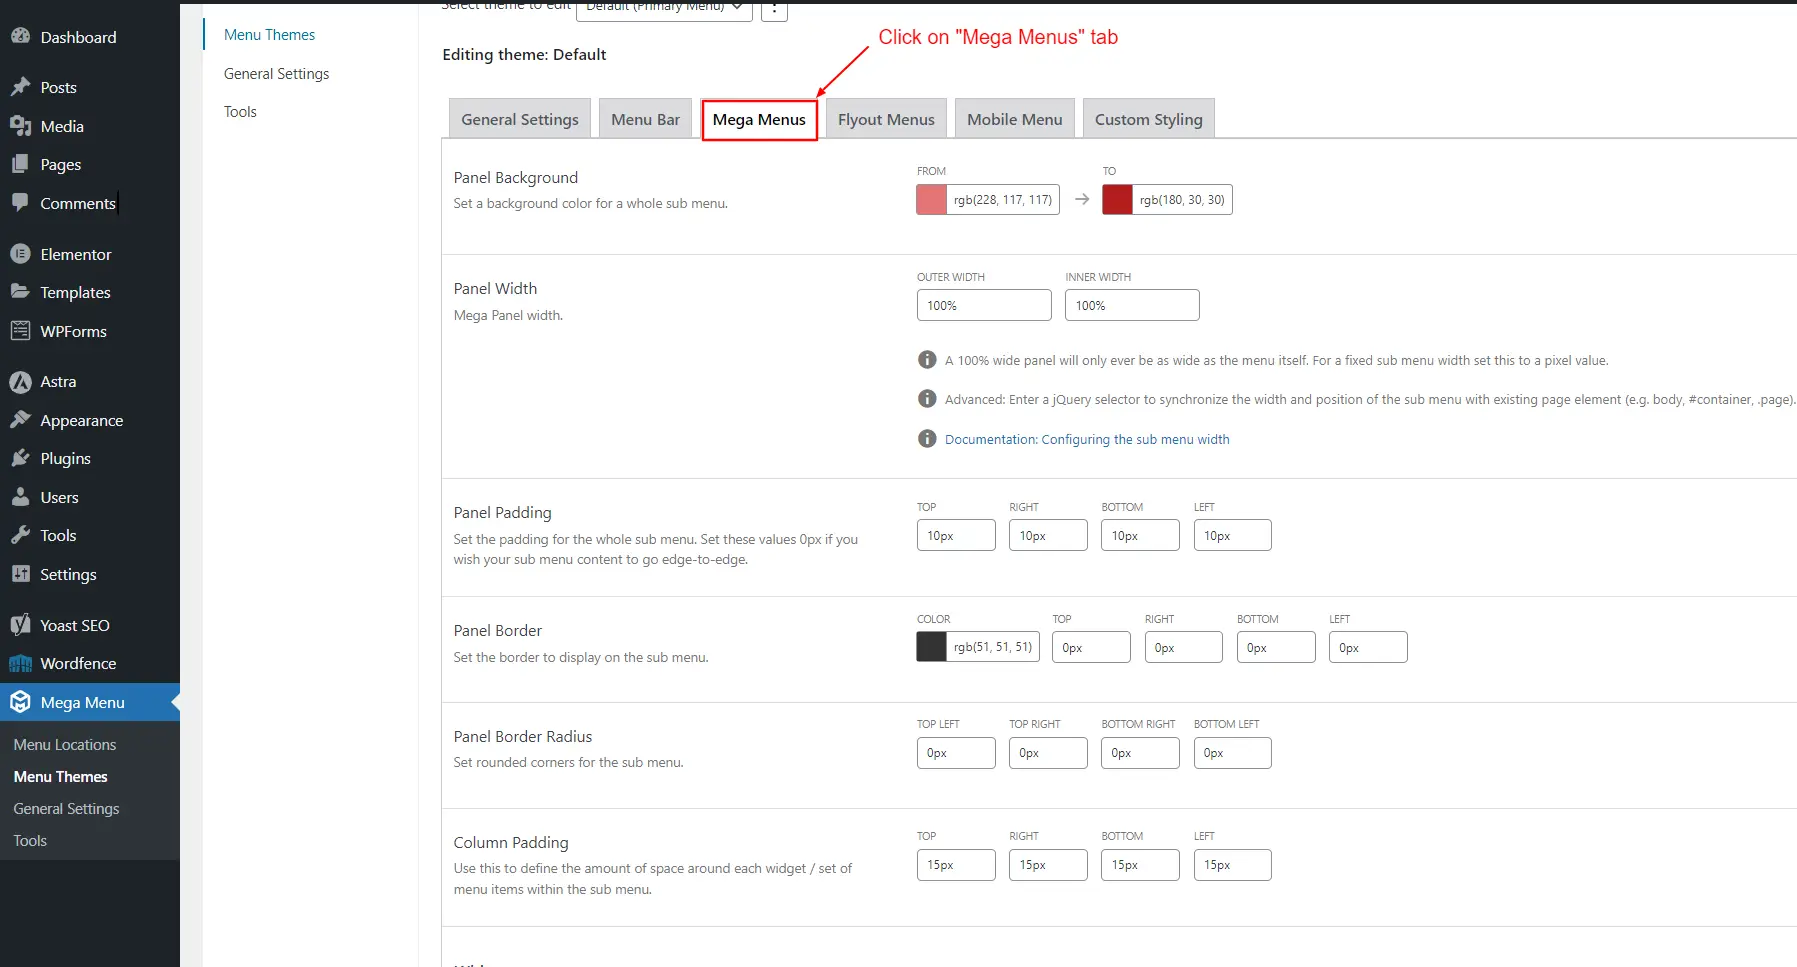
Screenshot 12: Settings for Main Menu
Next, you can customize the title font, title padding, title margin, title border, and content font in the widget section.
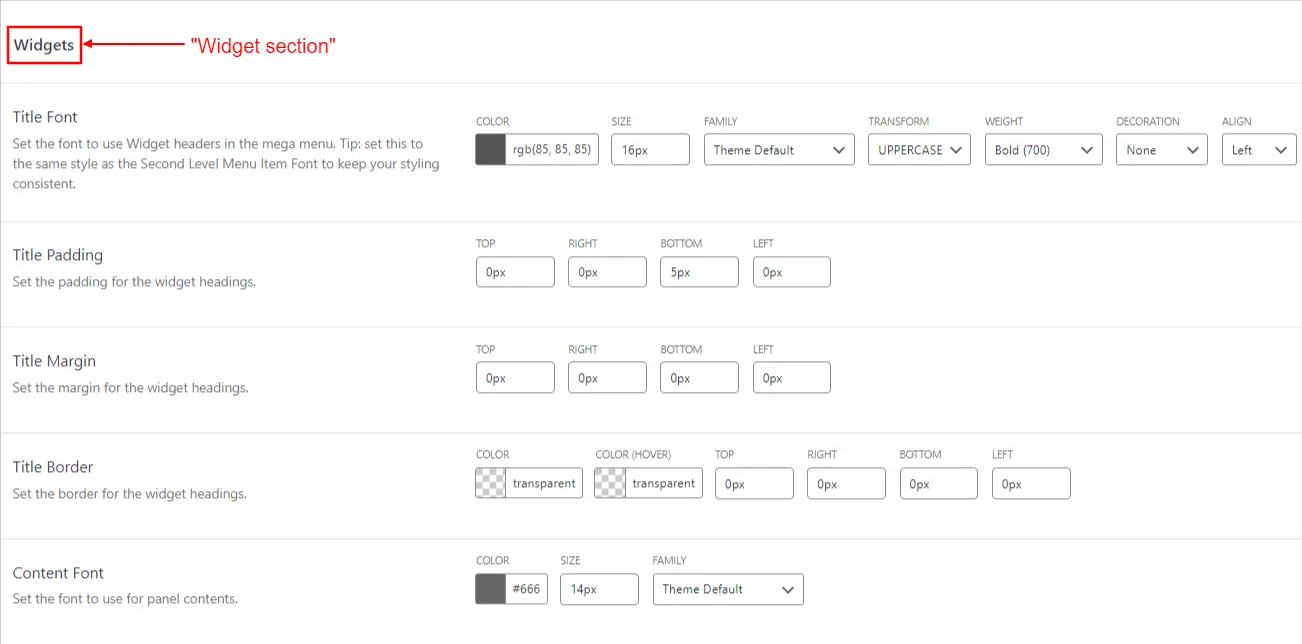
Screenshot 13: Menu Themes > Editing theme: Default > Widgets
Once the top-level menu customization is done, you can customize second-level and third-level menu items.
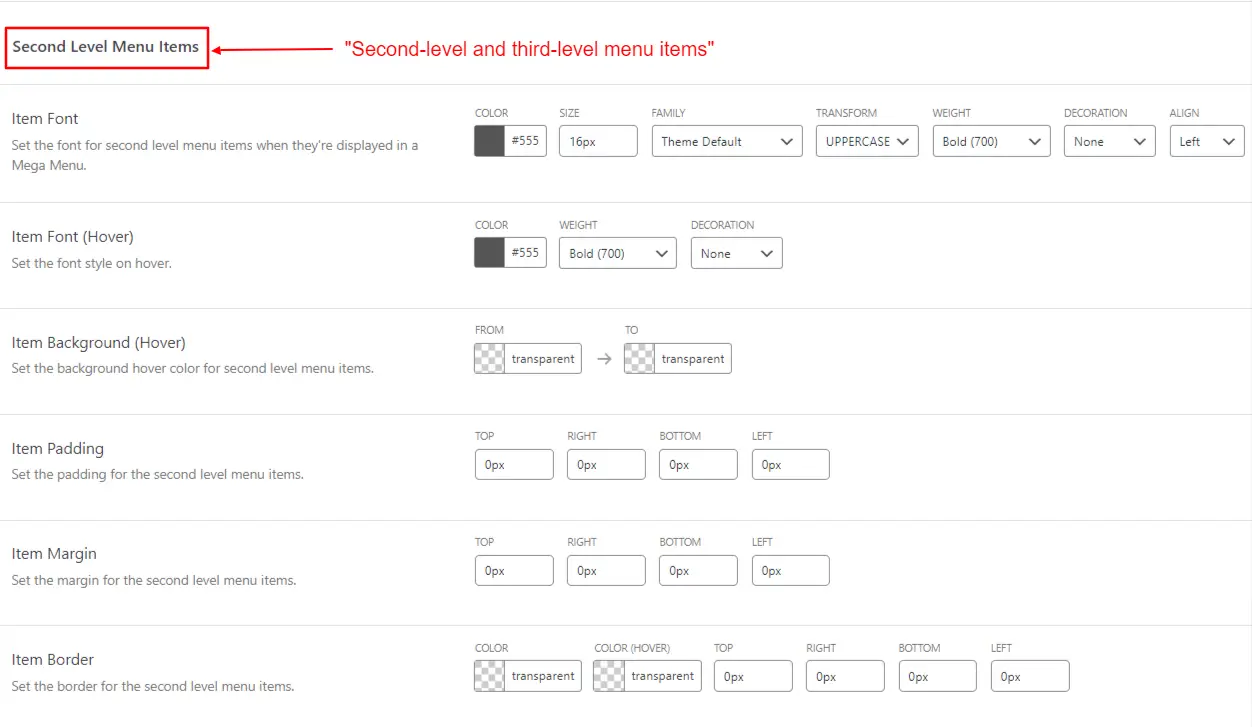
Screenshot 14: Second Level Menu Settings
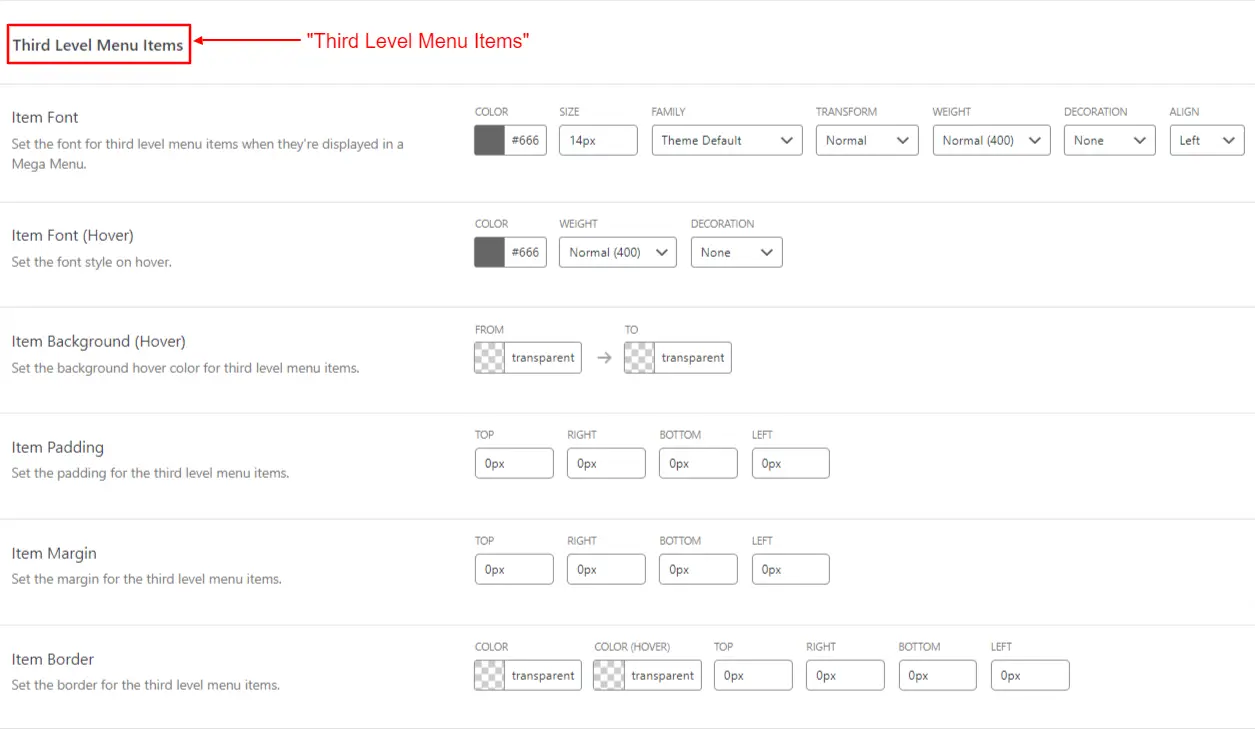
Screenshot 15: Third Level Menu Settings
When all your settings are done, click on Save Changes.
4. Flyout Menus
If your menu has multiple hierarchies and a flyout menu is needed, you can customize it in the ”Flyout menu” tab.
You can customize the submenu background, width, change the background colour and font on hover, and other such settings.

Screenshot 16: Flyout Menu
5. Mobile Menu
Customize how your menu should look on a mobile phone in the “Mobile Menu” tab. The settings for the mobile toggle bar, (toggle bar background, height, border-radius) mobile submenu settings, selecting how many columns you want in the mega menu for mobile, and others can be customized in this section.
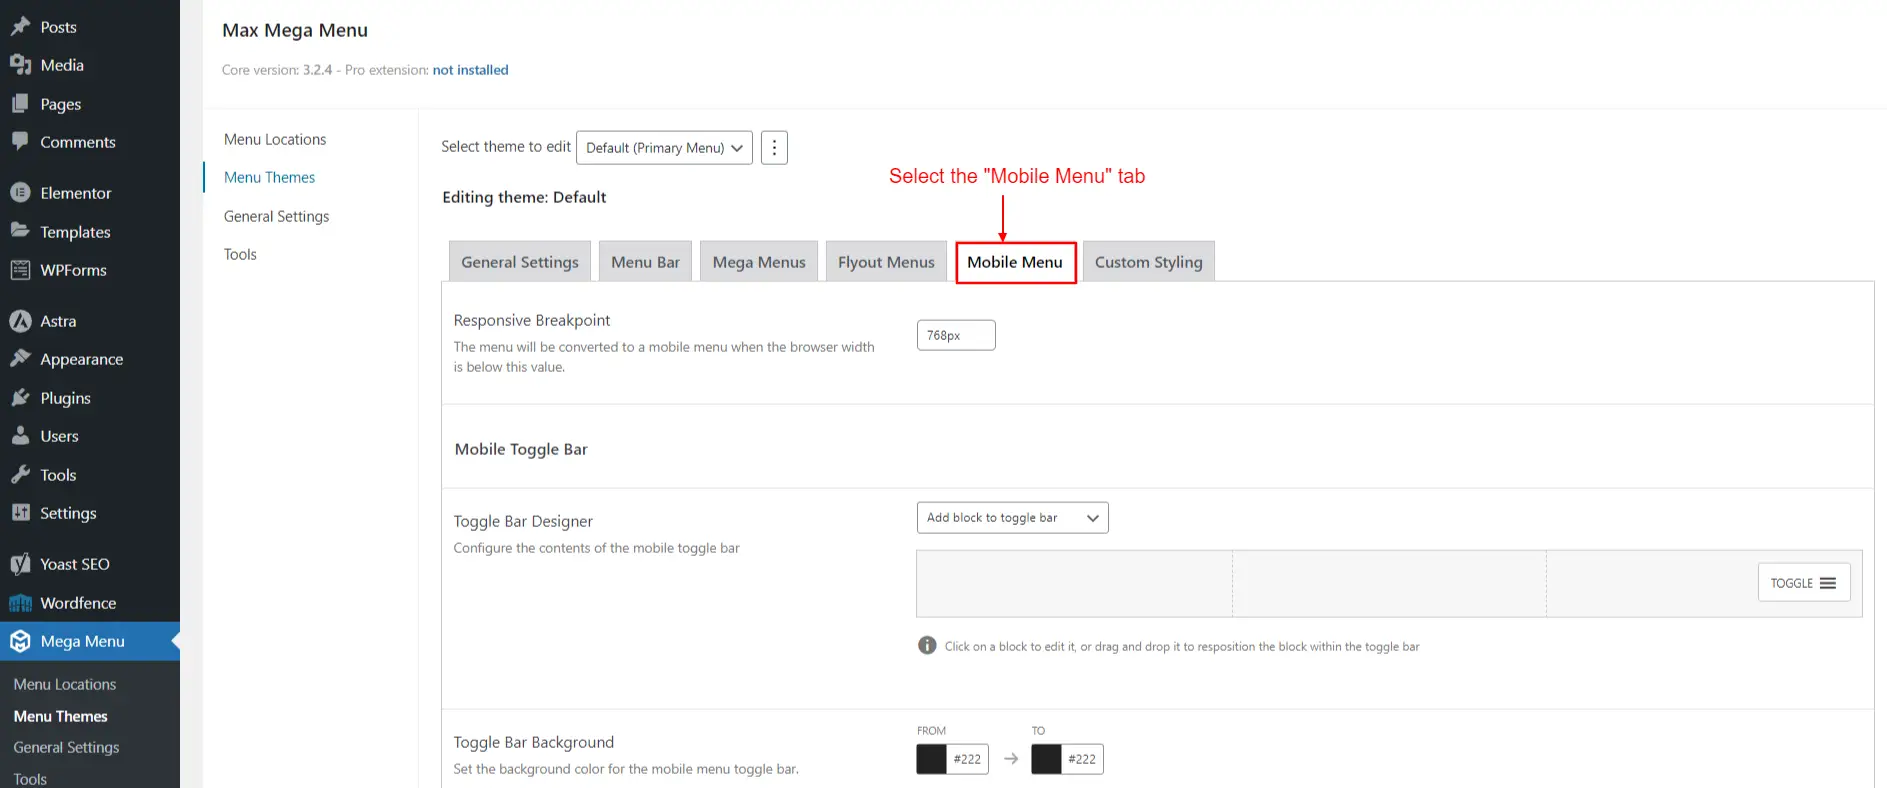
Screenshot 17: Menu Themes > Editing theme: Default > Mobile Menu
6. Custom Styling
This section consists of a CSS editor that allows you to customize your menu. Define any custom CSS that you wish to add to mega menus.
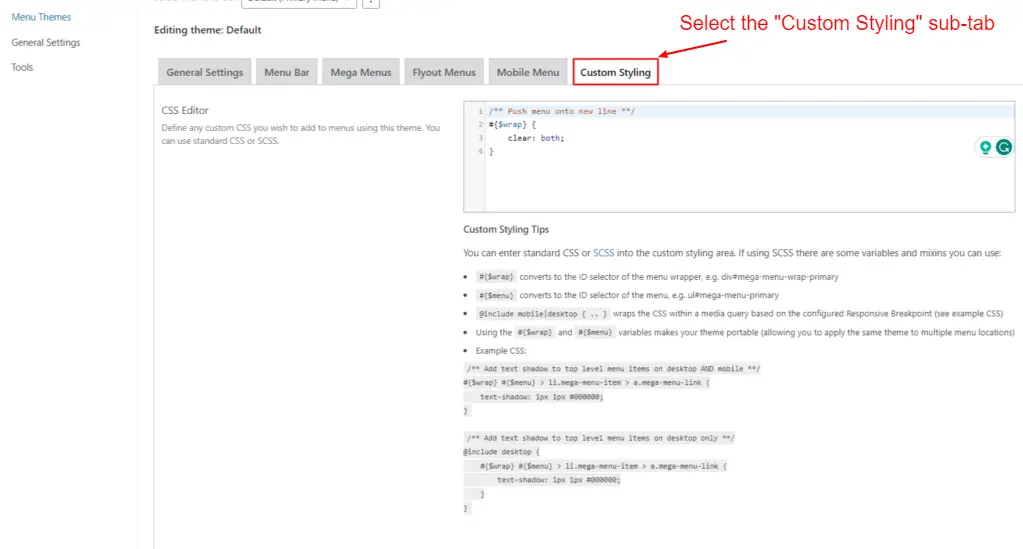
Screenshot 18: Menu Themes > Editing theme: Default > Custom Styling
Click on Save Changes, and voila! Your mega menu is ready.
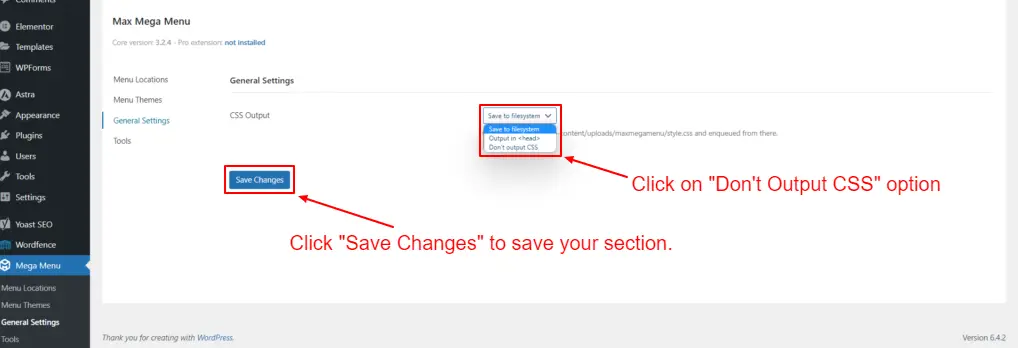
C. General Settings (Max Mega Menu level )
This setting allows you to determine how the plugin outputs the CSS needed for the mega menu’s styling. Here are the options available:
1. Save to filesystem
This option will save the generated CSS to a file on your server’s filesystem. Specifically, it will be saved in the wp-content/uploads/maxmegamenu/style.css file, and WordPress will enqueue this CSS file, meaning it will be included in the pages of your site where required. This is typically the recommended option for performance reasons because it allows the CSS to be cached by browsers and reduces the page load time.
2. Output in
Selecting this option will inject the generated CSS directly into the section of your site’s HTML on every page load. This can be useful if you’re having file permission issues with your server that prevent writing to the filesystem, but it can also increase page load times since the CSS cannot be cached as efficiently.
3. Don’t output CSS
This means that the plugin will not output any CSS at all. You would typically only choose this option if you plan to manually include the necessary CSS in your theme or if you are using a caching plugin that handles CSS delivery differently.
The “Save Changes” button below these options is used to save your selection. After making changes to these settings, it’s generally a good idea to clear your site’s cache (if you’re using a caching plugin) to ensure that the new settings take effect immediately.
Screenshot 19: General Settings for Mega Menu
Conclusion
By following the steps outlined, you’ve seen how simple it is to use the “Max Mega Menu plugin.” It will enhance user engagement and improve the navigational experience of your site.
The plugin’s ability to handle multiple menu items efficiently, incorporate multimedia content, and adapt to various screen sizes makes it an indispensable tool for any WordPress site owner looking to elevate their online presence.
Build
Website
Themes