Introduction
Is your WordPress website running slowly, thus affecting the user experience? Are you losing visitors and potential customers because of slow loading times?
It’s time to take action and optimize your website’s performance with the help of the GTmetrix tool. This tutorial will guide you through setting up and utilizing the GTmetrix WordPress plugin.
What Is GTmetrix Speed Test Tool?
GTmetrix is a tool to easily test the performance of webpages. Just enter the URL that you want to analyze performance, and within a few seconds, it will generate a detailed report providing recommendations for optimization.
One can easily identify performance bottlenecks and take appropriate actions to enhance your website’s loading speed.
You can measure your website’s loading times from different locations around the world. Currently, there are 7 free test locations and 15 premium test locations, for a total of 22 different global test locations. This allows you to understand how your web pages perform for users from different geographic locations around the world.
We can also test page loads on different mobile devices. As of this writing, GTmetrix supports testing on a real Android device or over 30 different simulated device options in its premium plan.
Installing and setting up the GTmetrix Plugin in WordPress
Step 1: Install and activate the “GTmetrix for WordPress” Plugin
The first step is to install and activate the “GTmetrix for WordPress” plugin on your WordPress website.
Begin by clicking on the “Plugins” menu and then clicking the “Add New Plugin” button, as shown in the screenshot below.
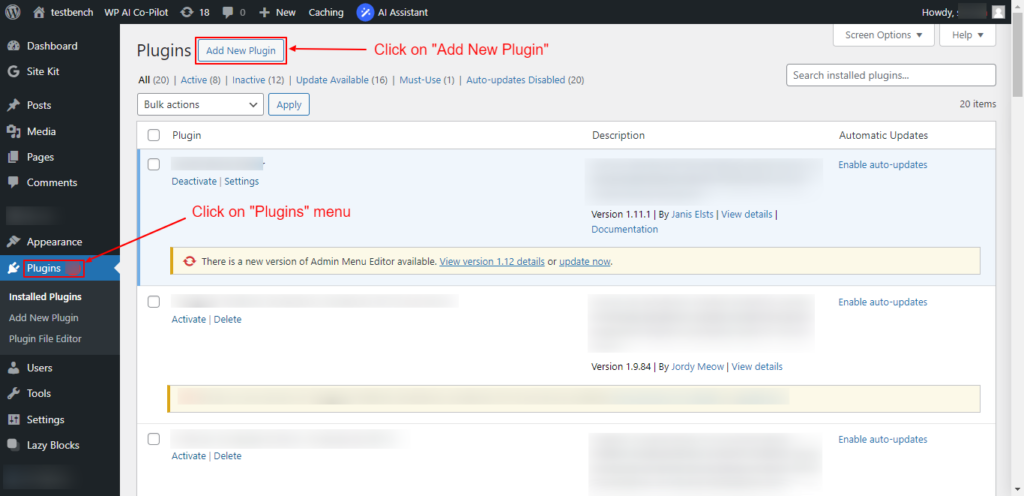
Screenshot 1: Click on the “Plugins” menu and select the “Add New Plugin” option.
Next, search for the “GTmetrix” plugin and install it, or download it from here, upload it, and install it on your website.
If you have already installed the plugin on your website, you can skip this step and go to step 2
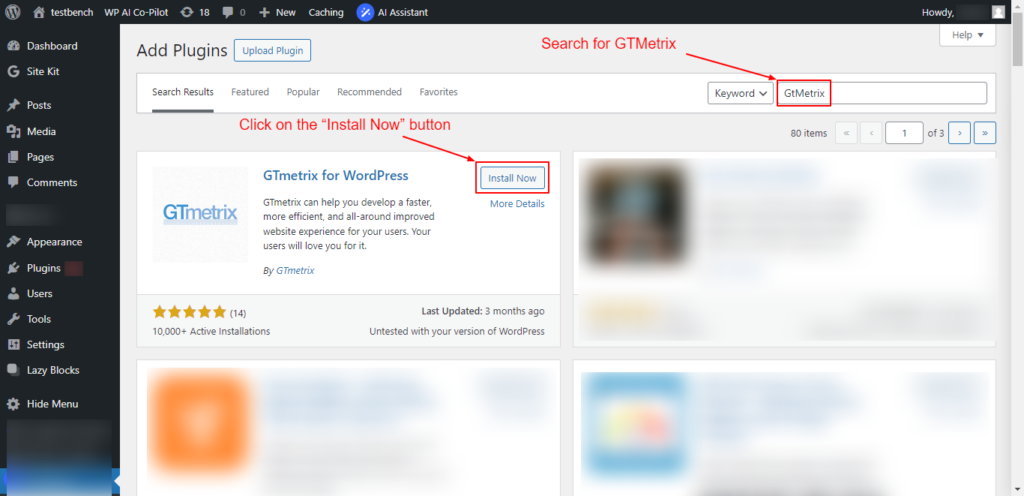
Screenshot 2: Search for “GTMetrix” in the available search box and click on the “Install Now” button.
Once activated, you will see the new menu option “GTmetrix” in your WordPress dashboard. Click on it, which will take you to the “GTmetrix for WordPress Settings” page.
Screenshot 3: Click on the “Register for a GTmetrix account now” link.
To use the GTMetrix plugin, you need to create a GTMetrix account and generate its API key.
For that, simply click the “Register for a GTmetrix account now” link to go to the GTmetrix website, where you can sign up for an account, as shown in the below screenshot 4.
Step 2: Create a GTmetrix Account and log in to it
Once you are on the GTmetrix website, click on the “Get Started for Free” button to create an account. Skip this step if you already have an account and go to step 3.
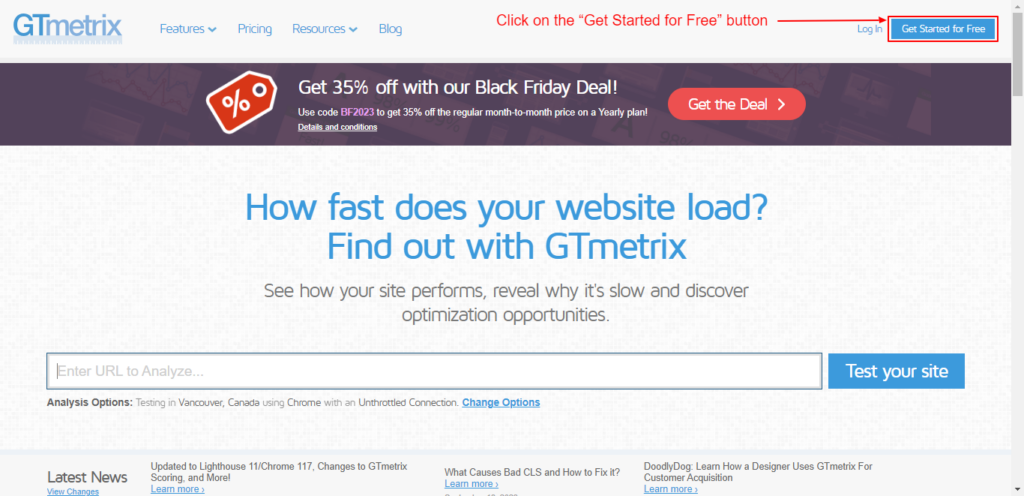
Screenshot 4: Click on the “Get Started for Free” button.
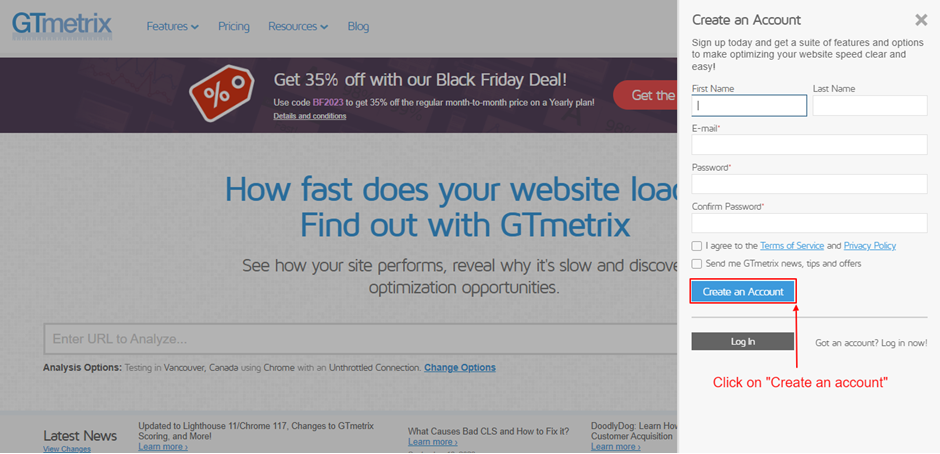
Fill in your information and agree to the terms, then just click on the “Create an Account” button as shown in below screenshot 5.

Screenshot 5: Fill in your information and click on the “Create an Account” button.
Next, you need to validate your email address to complete the account creation process. You will receive an email to verify your GTmetrix account.
Once you have created your account, Enter your email address and password, and click “Log in,” as shown in the below screenshot 6.

Screenshot 6: Log in with your email ID and password and click on “Log in.”
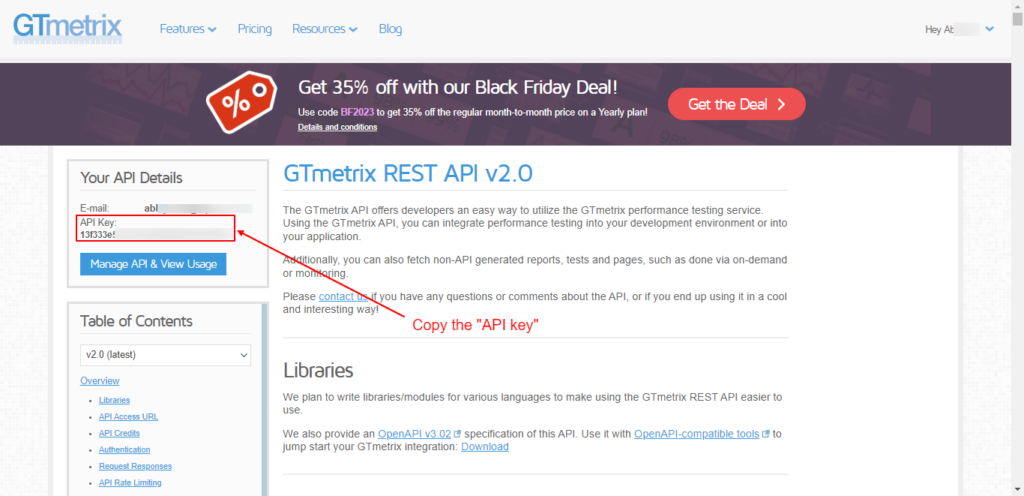
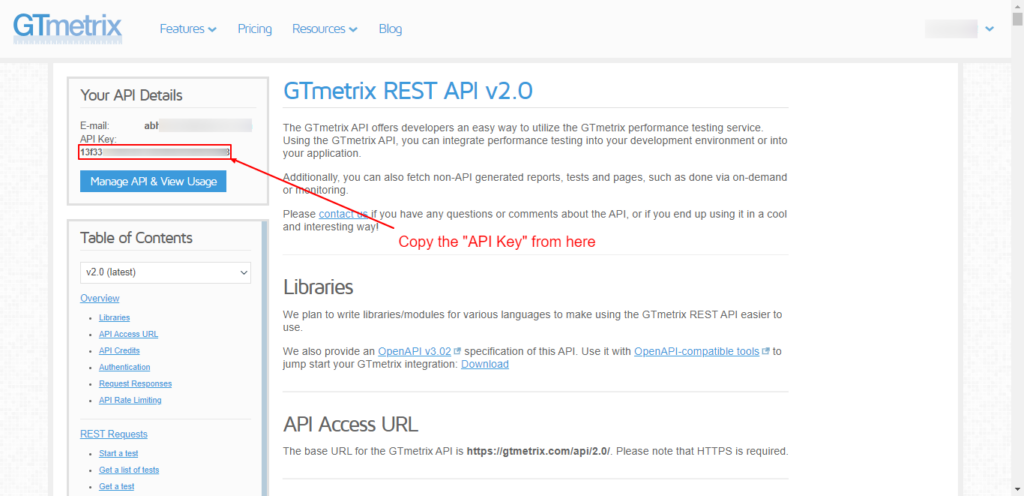
Screenshot 7: Get the “GTmetrix Rest API Key”
Note: If you are directly logging in to Gtmetrix.com instead of clicking the link from its plugin settings, you have to scroll to the bottom of the homepage and then click on “GTmetrix Rest API,” as shown in screenshot 8.
This would take you to the https://gtmetrix.com/api/docs/2.0/ webpage. As shown in the above screenshot 7.
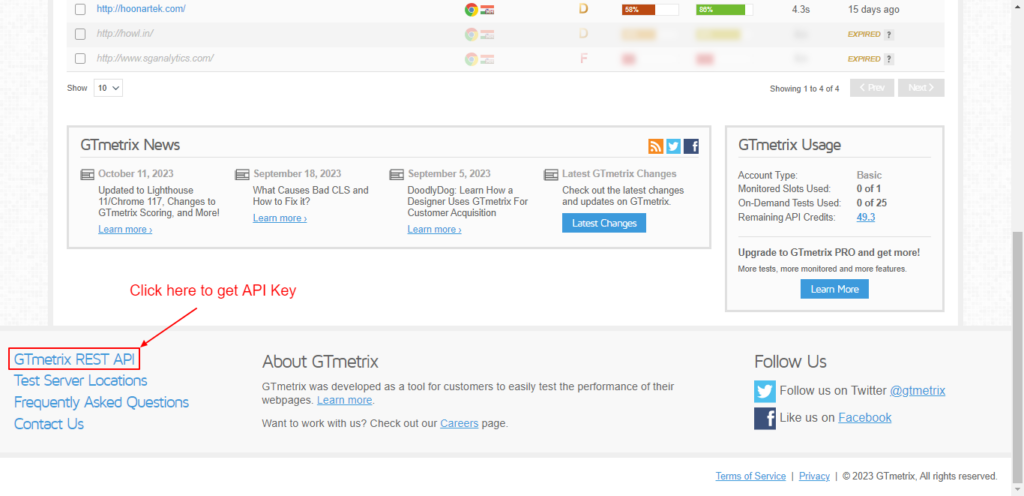
Screenshot 8: Click on “GTmetrix REST API” to get the API Key
Step 3: Generate a Gtmetrix API Key
Next, simply click on the ‘Generate API key’ button. Copy the API key, which is on the left-hand side of your screen.
Screenshot 9: Click on “Generate API Key” and then “Copy the API Key.”
Now, switch back to the ‘GTmetrix’ settings page in your WordPress dashboard. Go ahead and enter your GTmetrix account email address and the API key you copied earlier (as shown in screenshot no. 7).
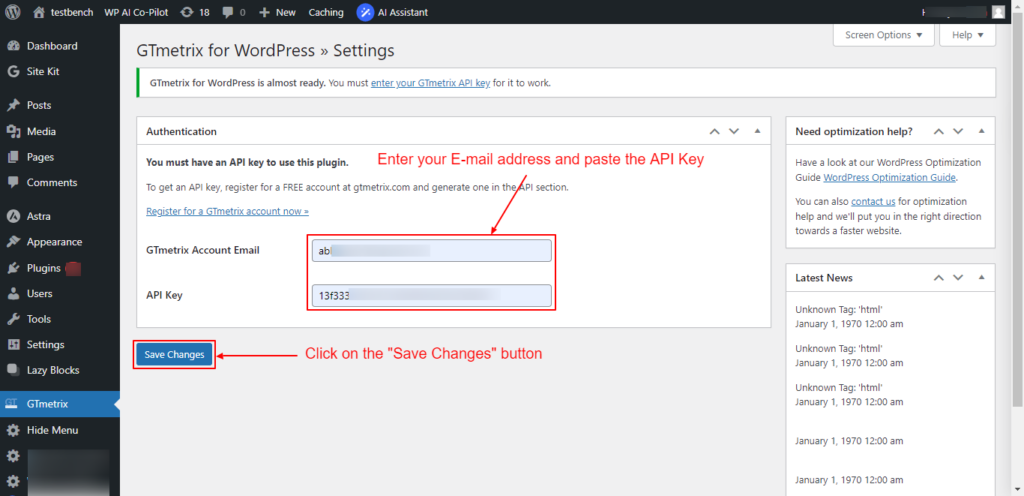
Screenshot 10: Enter your E-mail address and paste the GTmetrix API key
Don’t forget to click on the ‘Save Changes’ button to save your settings.
Step 5: Set Default options
Head over to the GTmetrix > Settings page, scroll down to the “Options” meta box, set the “Default location” drop-down to the Test Server location (region) that is closest to your hosting, and then again save the changes.
For this tutorial, we have selected Mumbai, India, as the default Test Server Region.
That’s it! You have successfully integrated GTmetrix with your WordPress site.
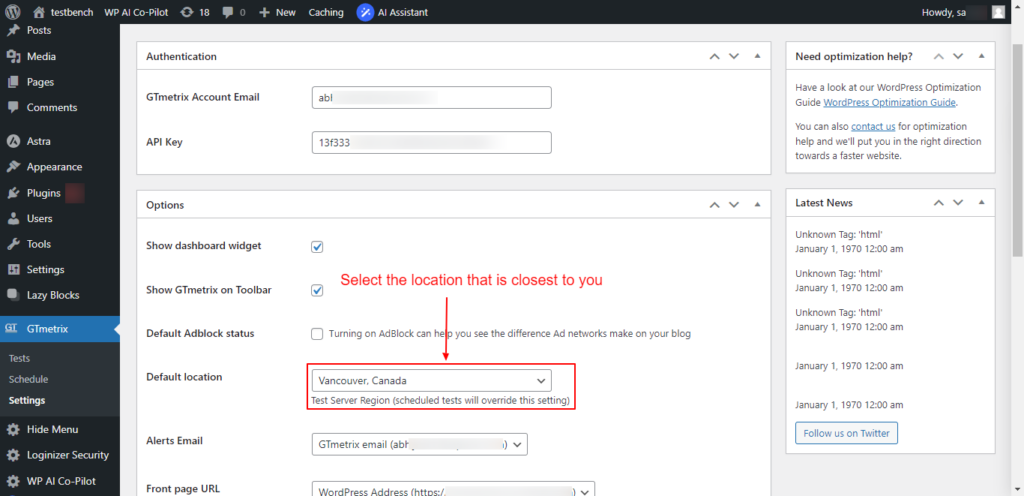
Screenshot 11: Select the Test Server location that is closest to your hosting
Step 6: Test the Web Pages
On the left-hand admin panel, click on the Tests sub-menu. Enter the page URL that you want to test the page load speed for.
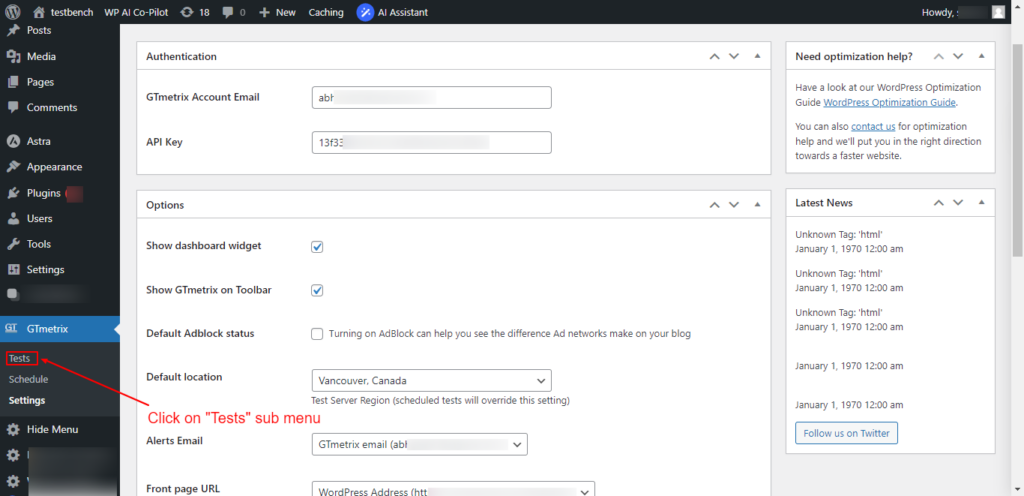
Screenshot 12: Click on “Tests” to perform tests on any page of your website.
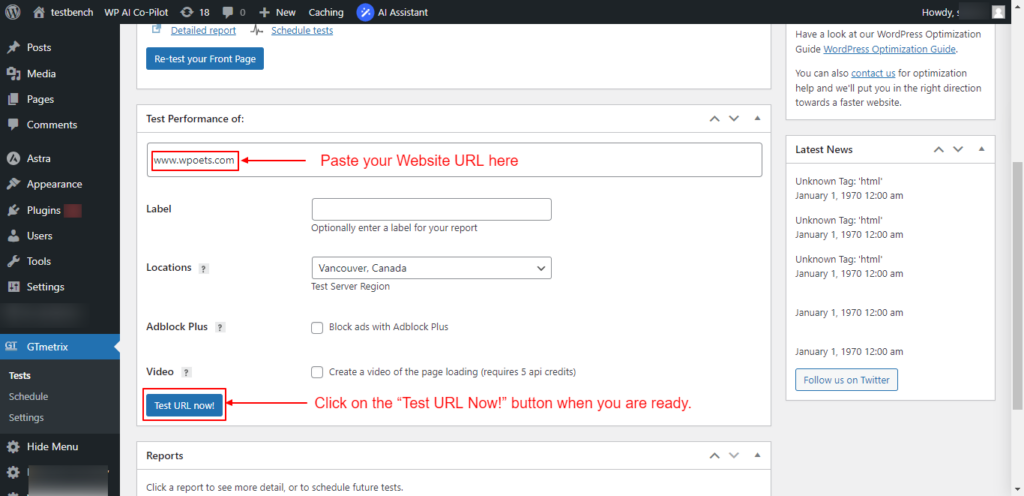
Screenshot 13: Paste your “Website” URL and Click on “Test URL Now!”
GTmetrix will take a few seconds to scan your whole page. Once the scan is finished, you will see your site’s detailed reports, along with the top issues that you can fix to improve the user experience.
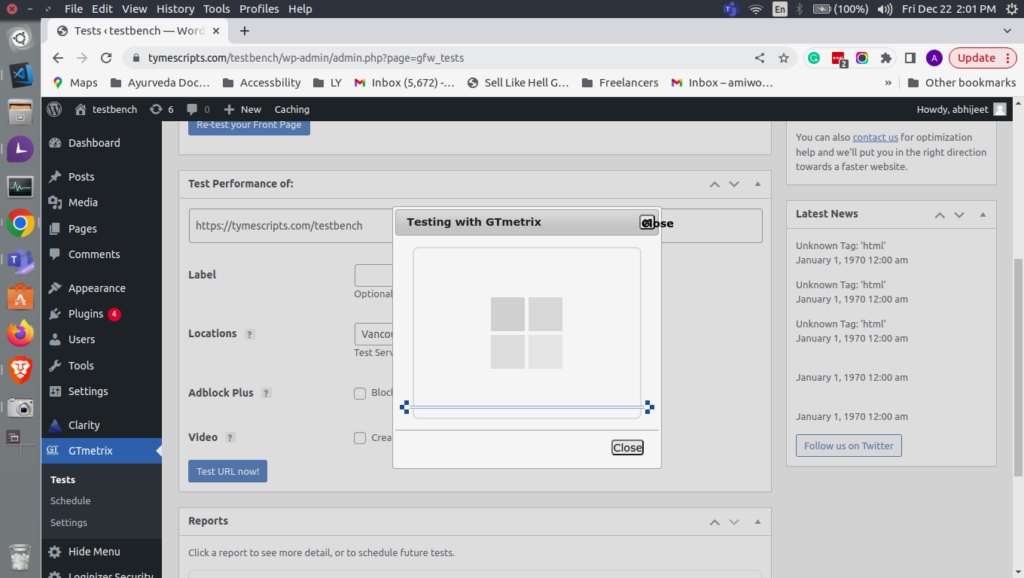
Screenshot 14: “GTmetrix” scan in progress.
This report generated gives you a detailed breakdown of your PageSpeed score, YSlow score, and a list of recommendations on what you can change to improve your page load time. Anything below a Performance score of “A” means there is room for improvement.
All the reports that have been completed are available under the “Reports” section (meta box) as shown in the below screenshot.
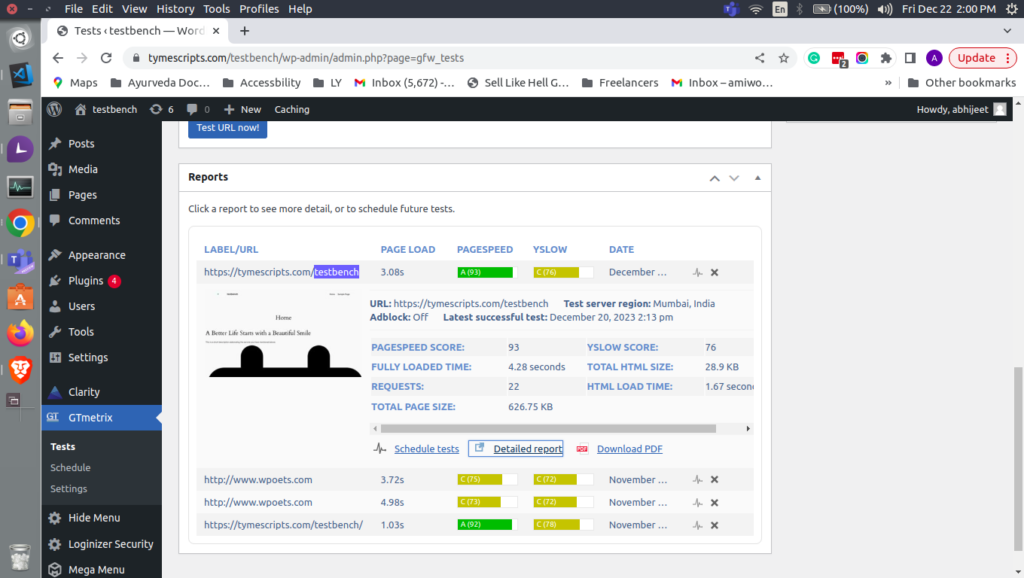
Screenshot 15: List of all reports. Click on Label/URL to expand/collapse
Individual reports can be expanded to view the summary of page speed scores, Yslow scores, load times, and other details, as shown in the above screenshot. Below the individual summary of the report, there are links to pages for scheduling future page load tests, viewing detailed reports, and even a link to download a PDF report.
For a detailed report, click on its link; it will take you to the GTmetrix web page, where you can view it in-depth. A sample report can be seen in below screenshot 15.
The detailed report is divided into different tabs. First, you will see your PageSpeed score, with different ranking items listed with their score.
Green items are good and don’t need your attention. Red items are slowing down your website and require further investigation.
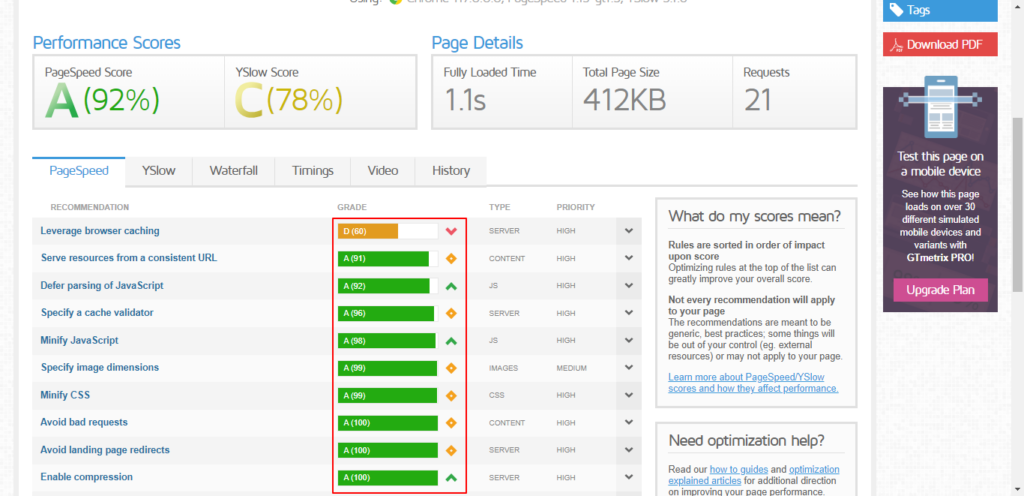
Screenshot 16: PageSpeed score with different ranking items listed with their individual scores.
The best part is that when you click on the suggestions, it tells you exactly what needs to be fixed.
Step 7: Schedule Tests (Optional)
You can also schedule the page load tests to run hourly, daily, weekly, or monthly. By default, scheduled tests always use the Vancouver, Canada, test server region.
The test will automatically run at the frequency you choose. The admin will be notified when the test completes and one of the following conditions is met:
- Page Speed score is less than A, B, C, D, E, or F
- YSlow score is less than A, B, C, D, E, or F
- Page load time is greater than 1, 2, 3, 4, or 5 seconds
- Page size is greater than 100 KB, 200 KB, 300 KB, 400 KB, 500 KB, or 1MB
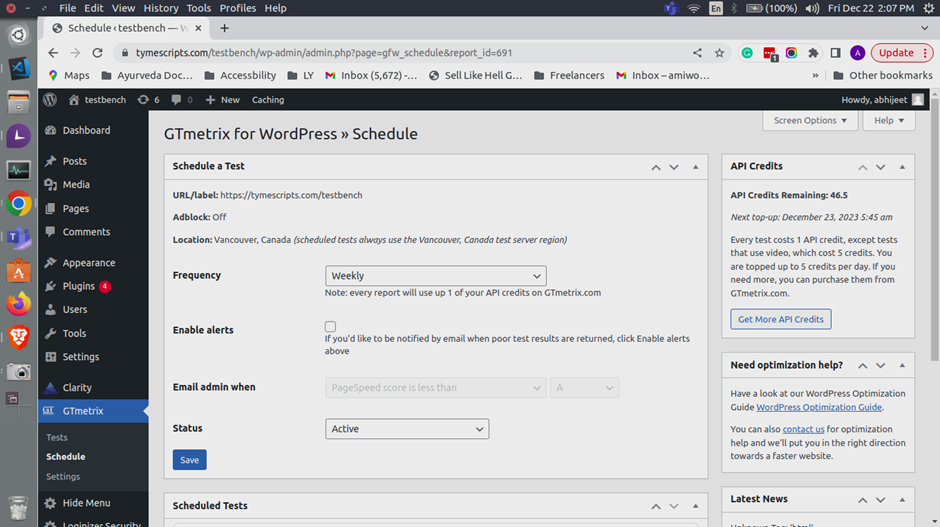
Screenshot 17: Choose a frequency to run the test automatically
Conclusion
In this tutorial, we saw how to install and use the GTmetrix plugin step by step. We also learned how to run and schedule page load tests to keep a check on your website’s performance score.
The reports generated help you easily identify performance bottlenecks, such as large image sizes, excessive HTTP requests, slow server response times, and much more. With this crucial information, you can make the necessary changes to your website to optimize it, thus improving its loading speed.
That’s it for this tutorial. If you want your website to load blazing fast, connect with our Page Speed experts.
Build
Website
Themes